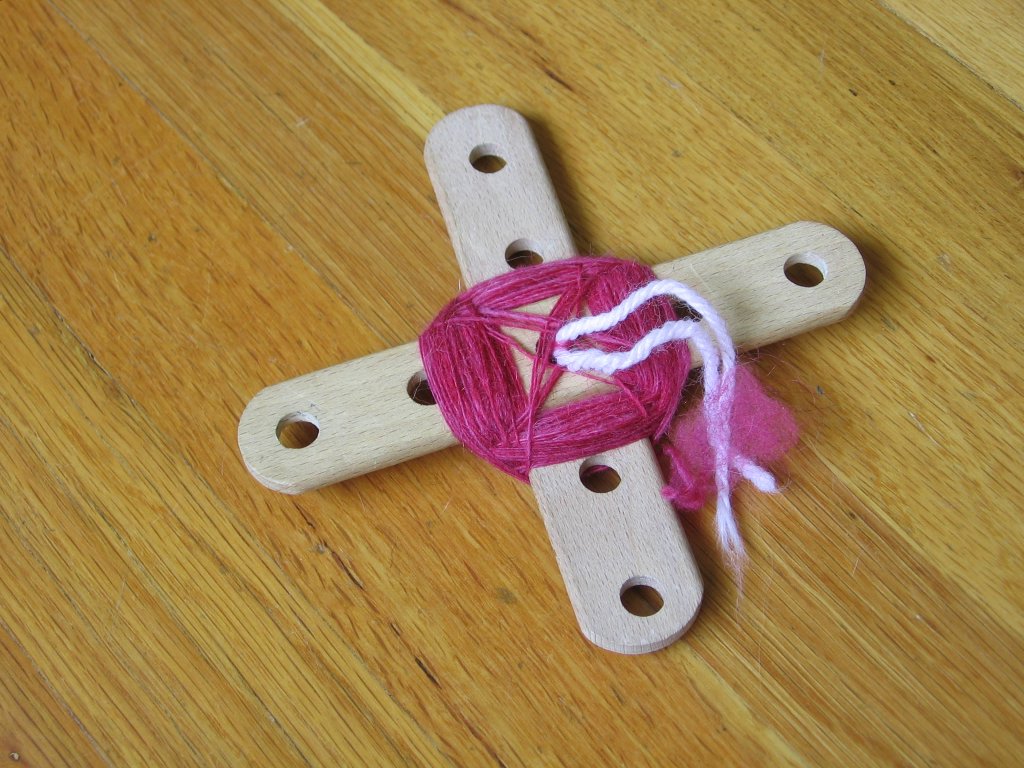
Brio Mec Turkish Spindles

You can file this under, “Now, I’ve seen it all…” Last Saturday, I attended a wonderful Fiberlicious party at my friend, Peggy’s, house. At the party was this really nice lady, Julie, spinning away on her spinning wheel. Well, Julie mentioned that she doesn’t spin only on a wheel, that she uses drop spindles too, and that she’s having fun these days with her Turkish Spindle. I thought to myself, “Turkish Spindle? Will wonders never cease! Remember to google….”

 
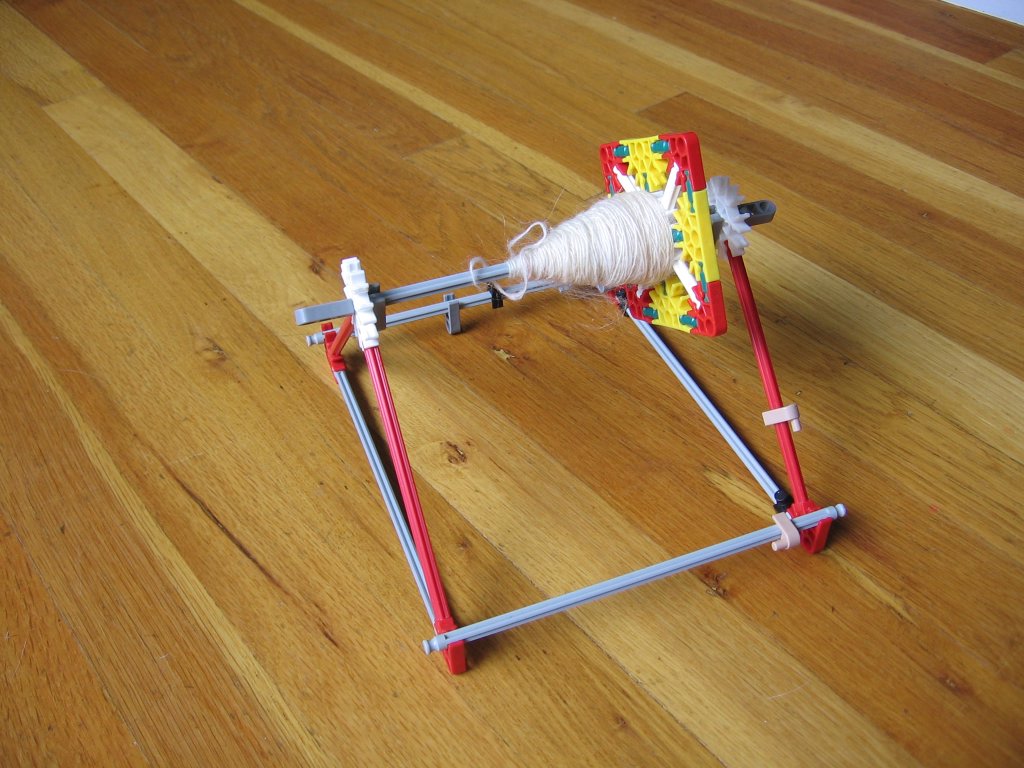
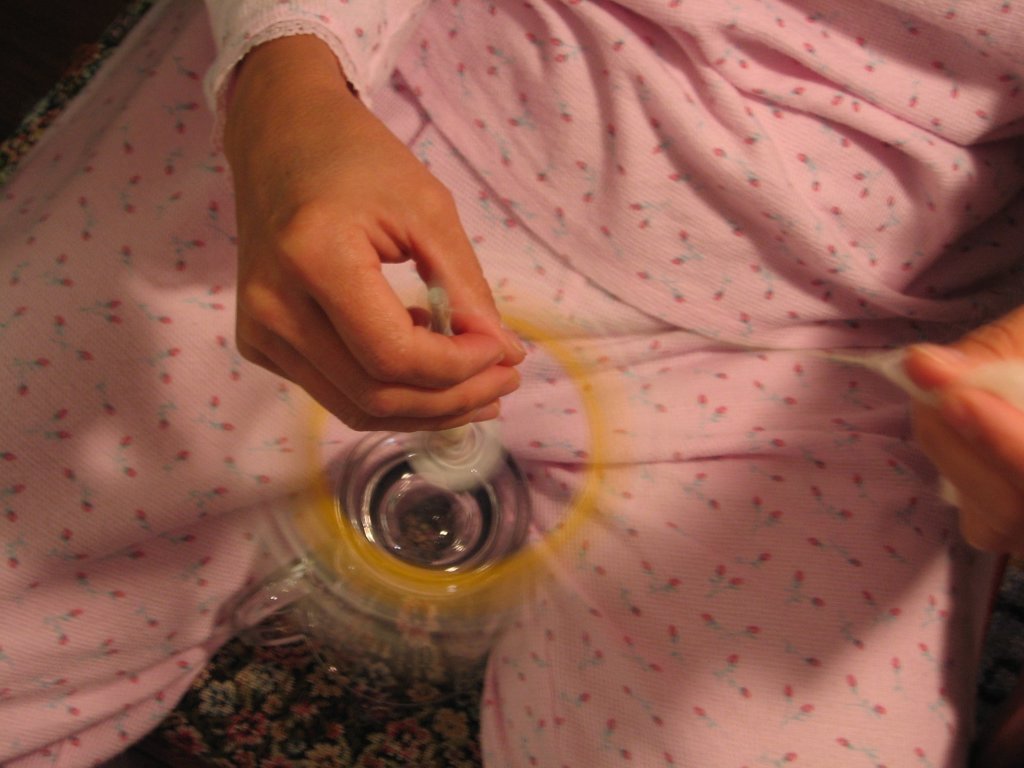
I did remember to look it up on Google, and then, when I learned what a Turkish Spindle is, I thought to myself, “How wonderfully clever! I bet that Brio would work perfectly!” This has been my project of the day. Actually, this has been my project of the afternoon, because it all went very quickly.


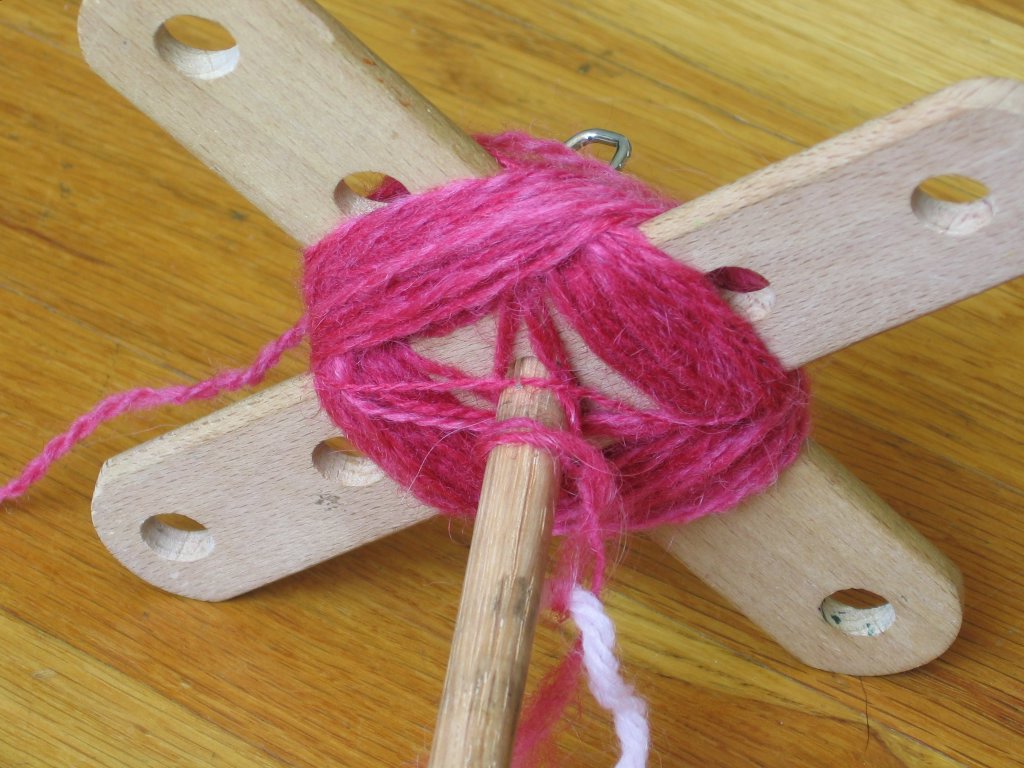
It seems that all of the Turkish Spindles I saw online were bottom drops. This one is a top whorl, drop, and it works fine. My goal was to spin a center pull ball, not to be historically accurate. If I wanted to be historically accurate, would I be using Brio Mec?


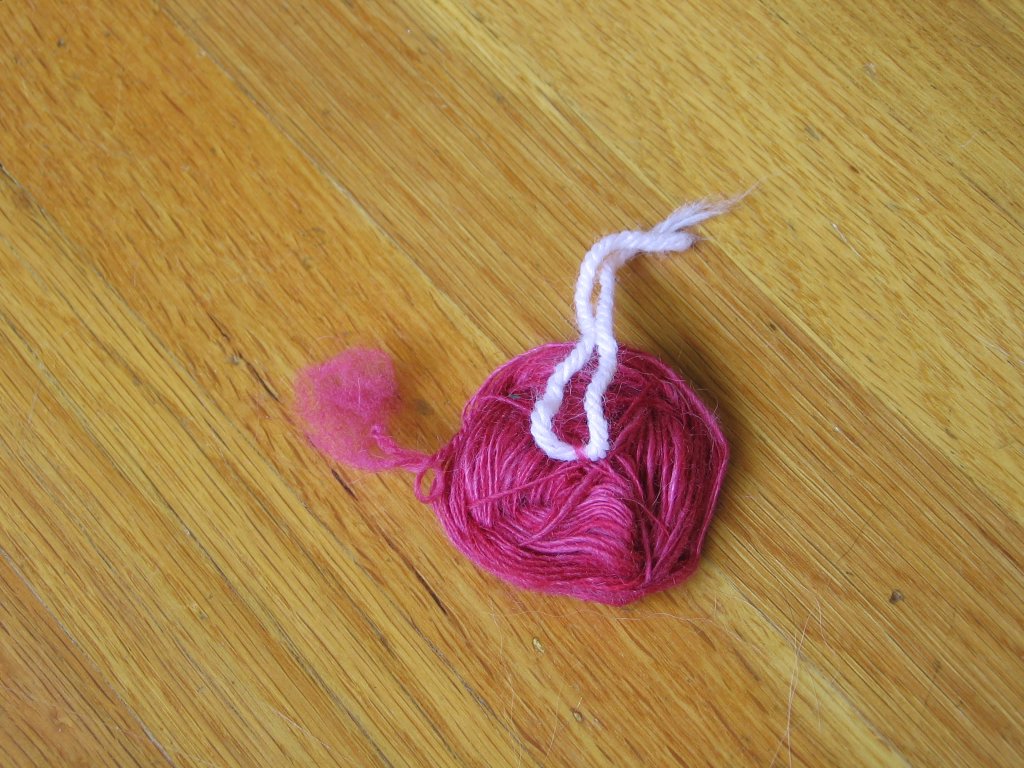
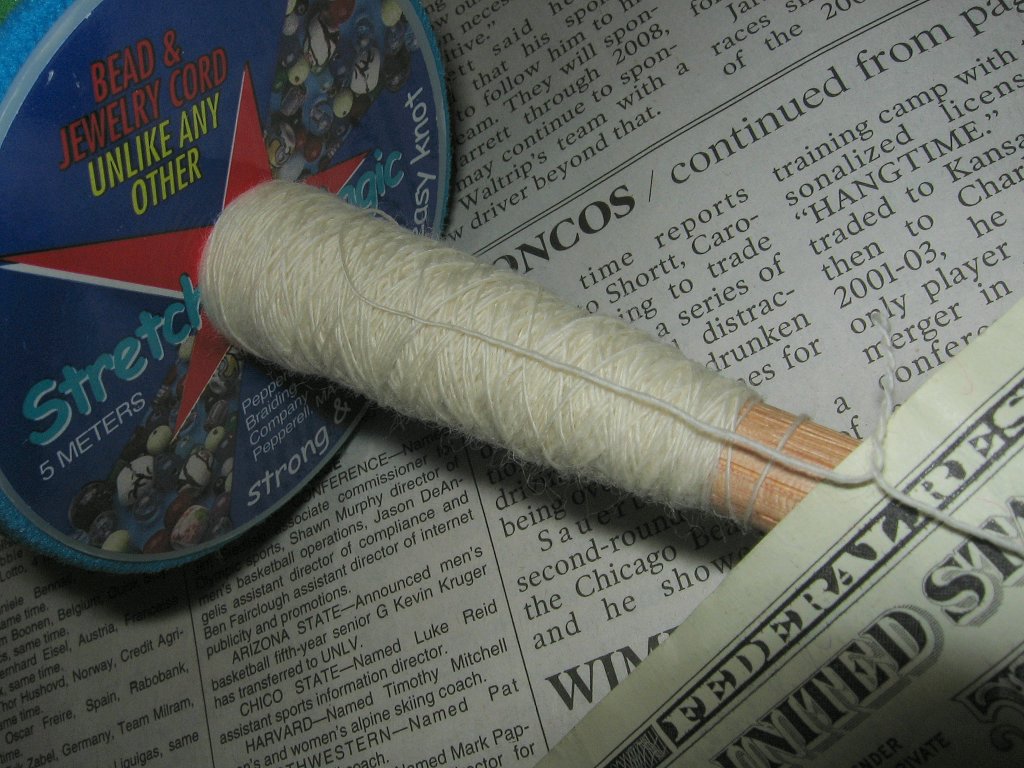
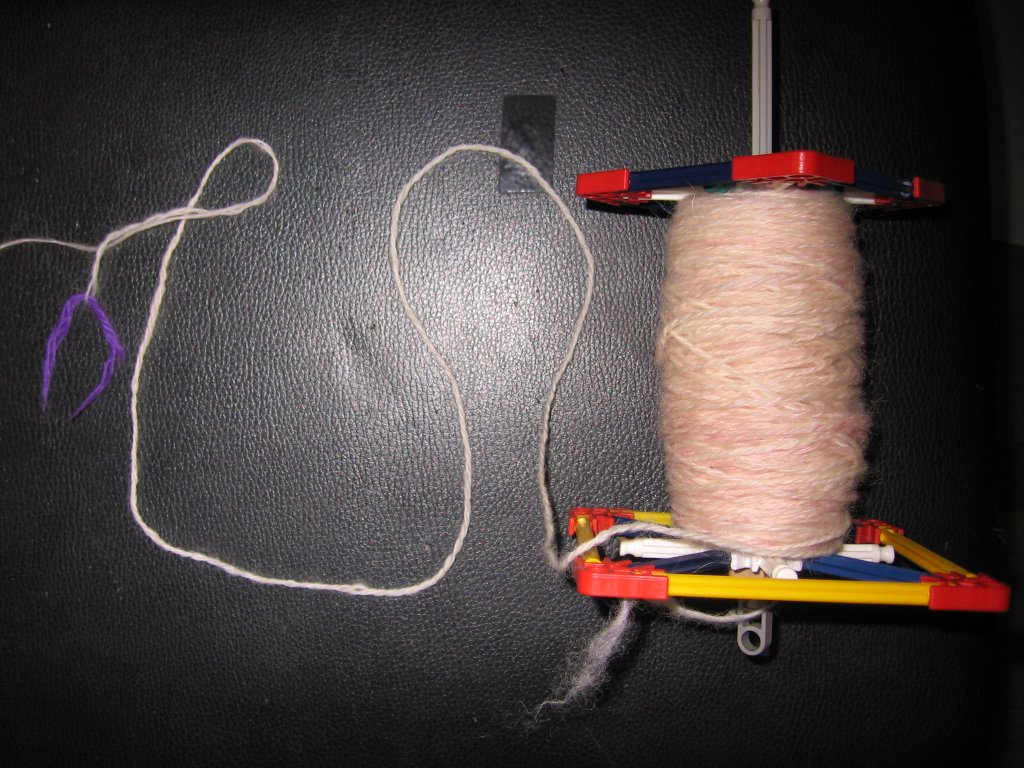
I only spun a little bit of fluff, just to test it out, and lo and behold, it actually does make a center pull ball! How cool is THAT???


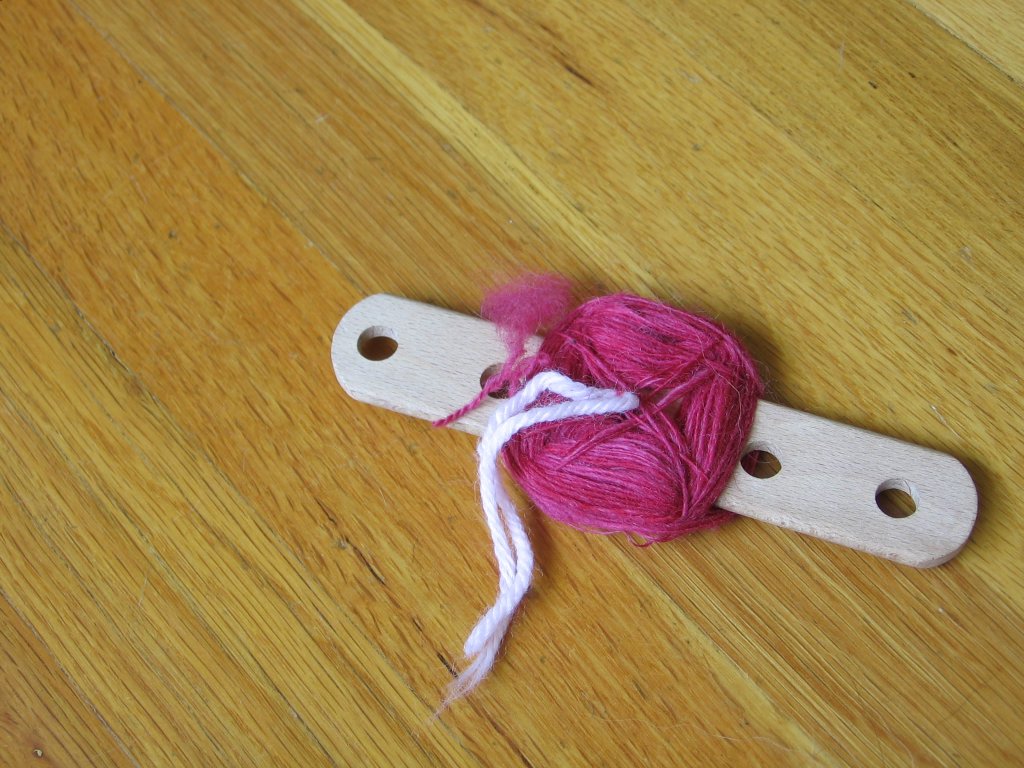
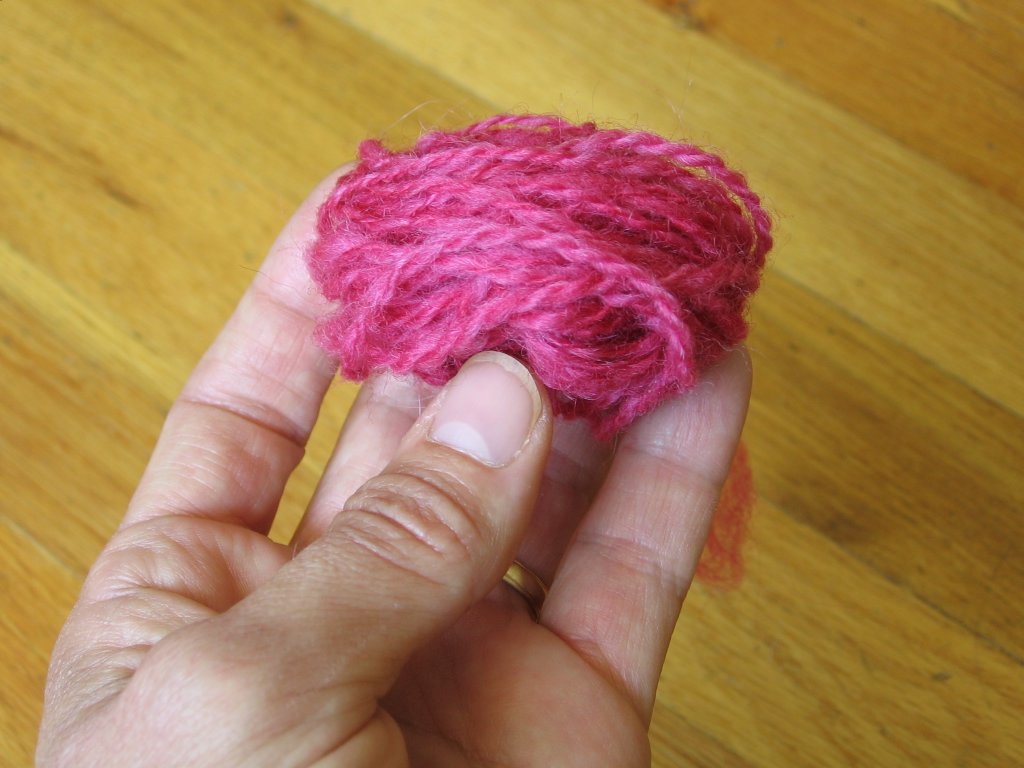
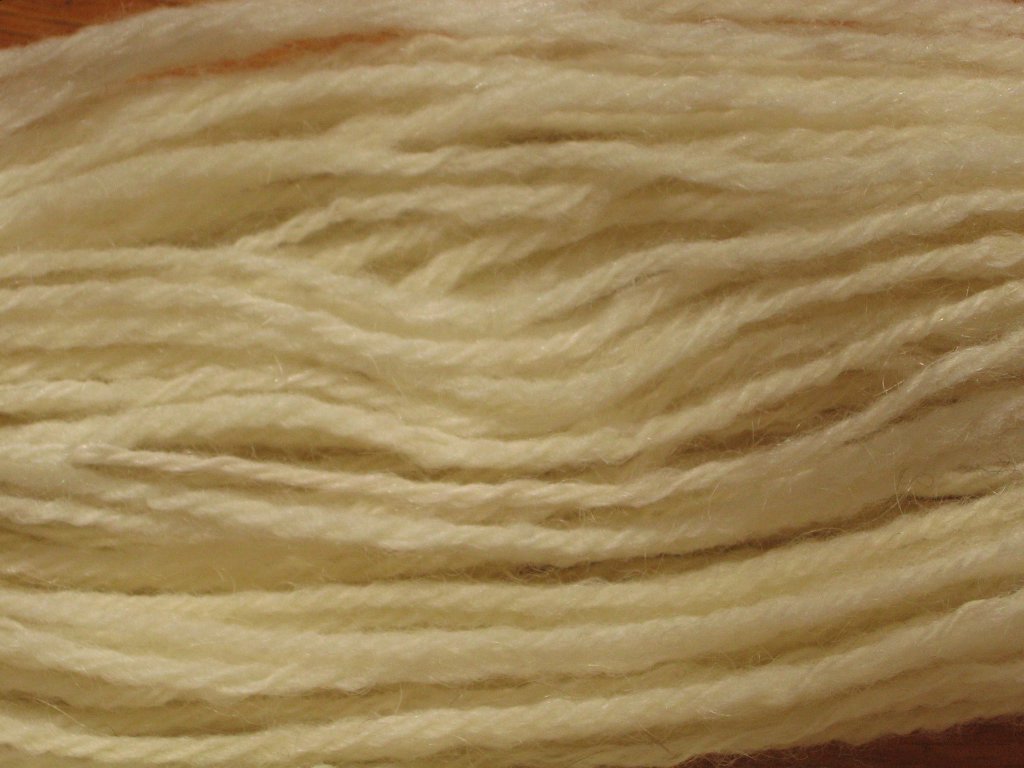
First, I spun a bit of singles, took the spindle apart, then I used the center pull ball make a 2 ply with, plying from the inside and the outside of the ball. The plying step resulted in a neat, tidy, little center pull ball of ready-to-knit-YARN! It was really easy, too! Yippee!

My only problem is that now, I want to zip it out onto my niddy noddy and wash it. This sort of defeats the purpose, doesn’t it?

I wonder if this would work for a really big bit of fluff, so that I can actually spin up a skein? Hmmm…. Back to the drawing board. Or, rather, back to the toy box!

 
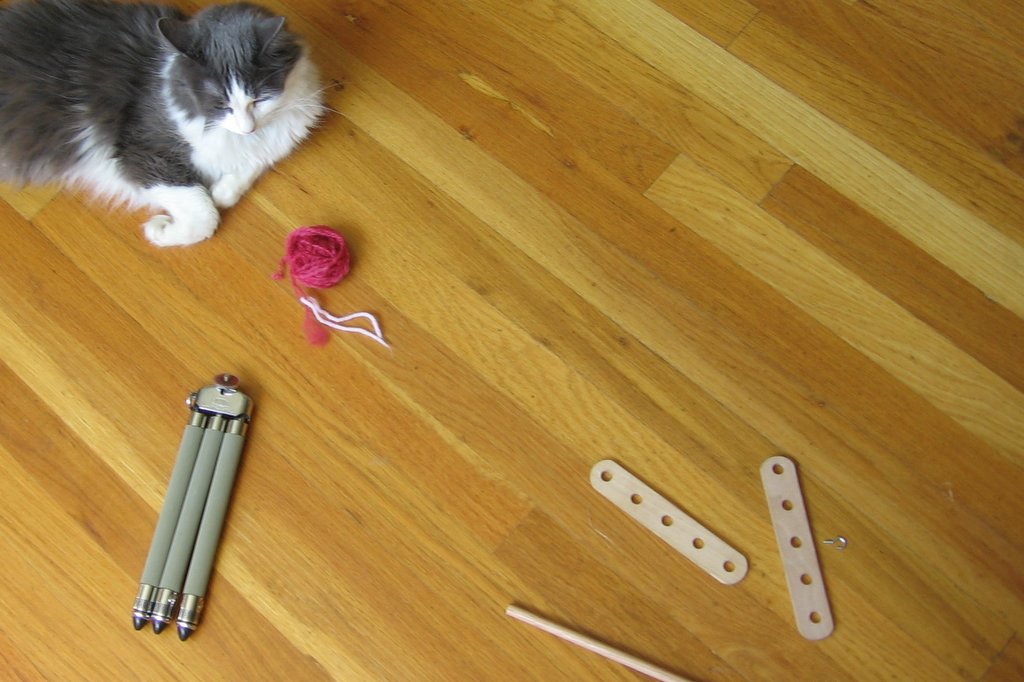
…I turn my back for the tiny bit of time it takes to make a tostada, and LOOK – kitty intereference!

 
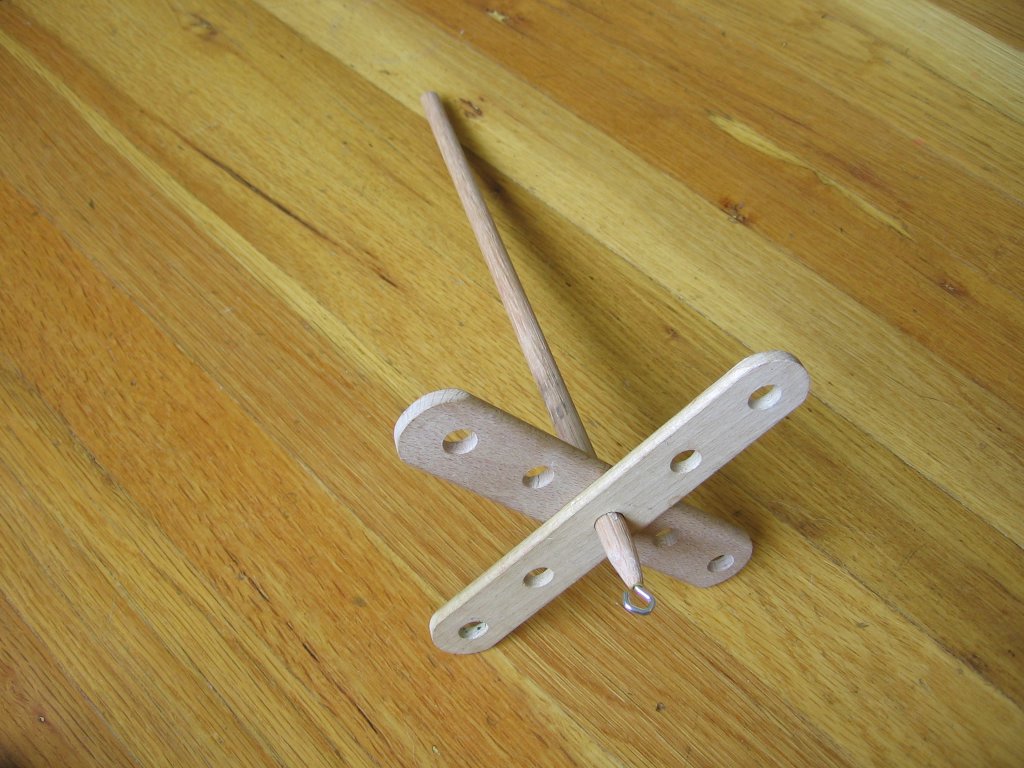
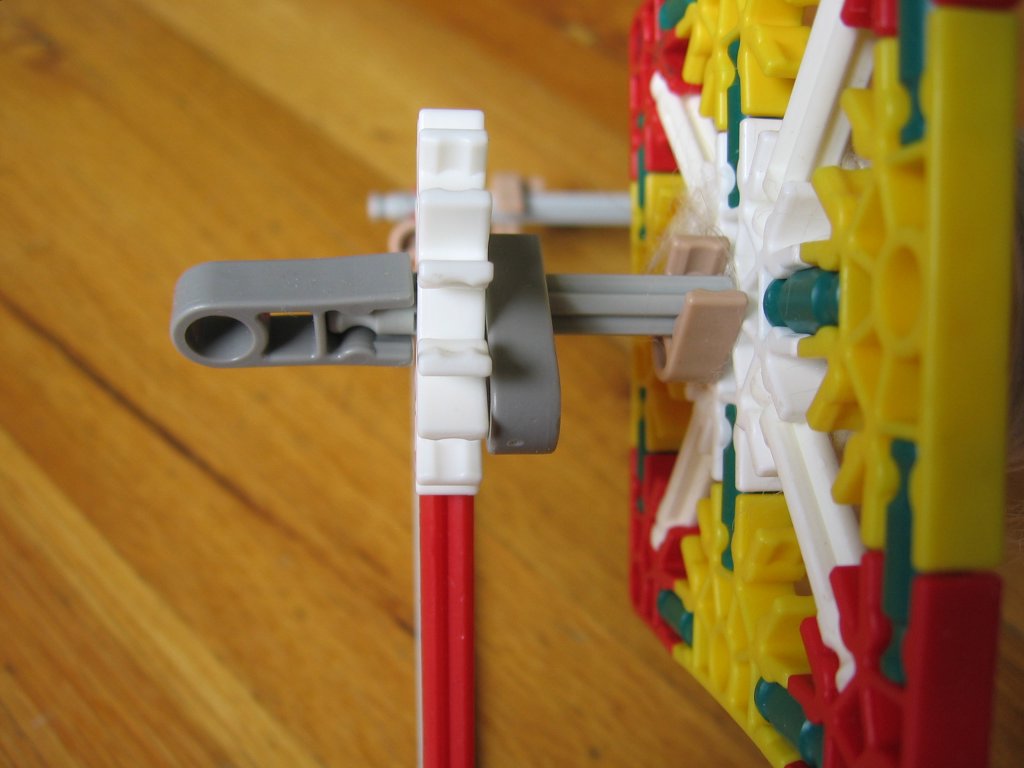
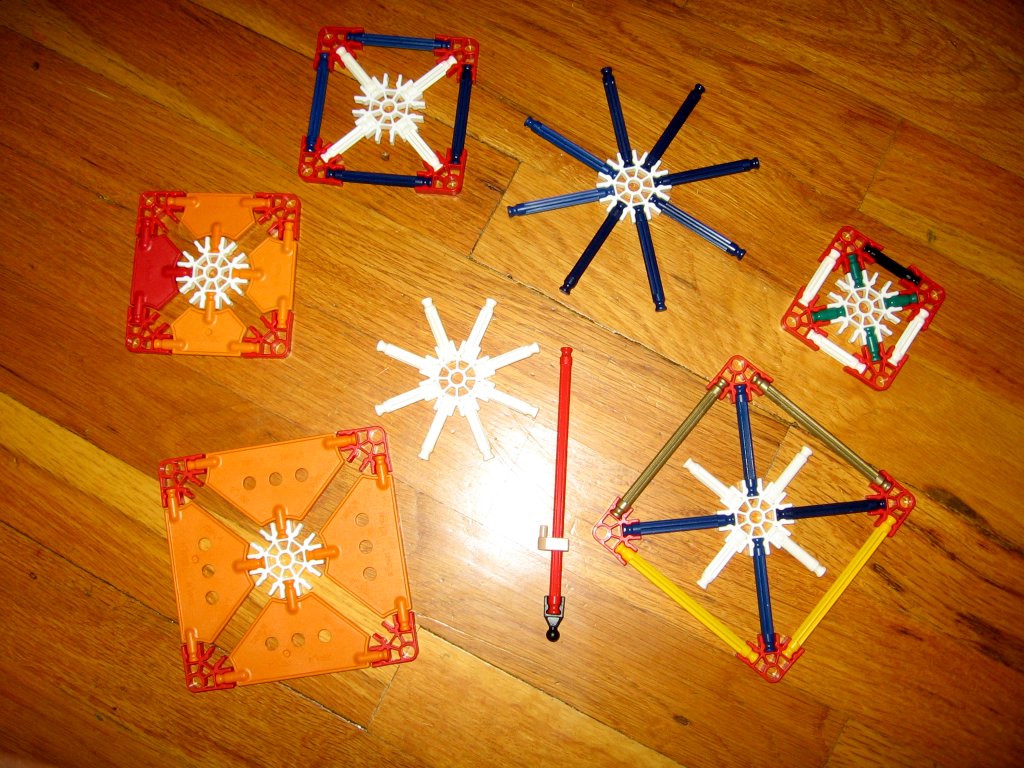
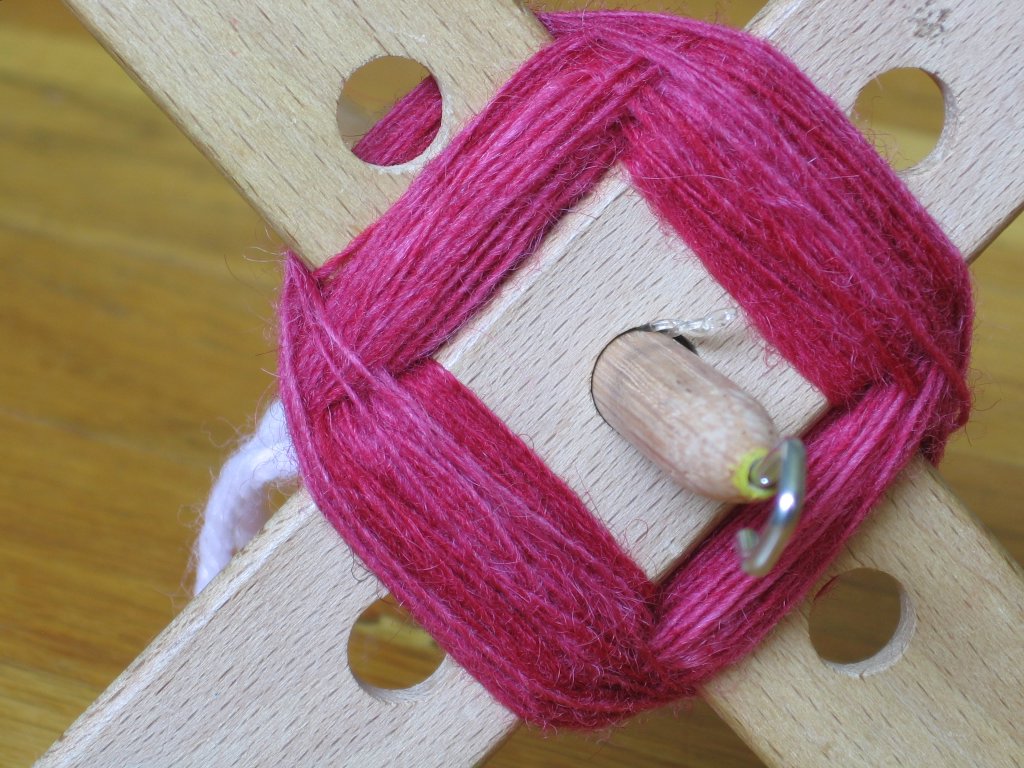
Here you can see the spindle, in all it’s naked glory. The arms are wedged into place with a bit of beading elastic, but in the meanwhile, I tried it with a small rubber band, and it works perfectly well.

New blog - tutorials

I get so many requests for detailed instructions about how to make circular needles, that I decided to write a long, detailed, photo-filled blog entry about just this topic.

Please visit me at Rosemary Knits Tutorials and let me know what you think!

It's been a Whole Year! Imagine That!

Today was the day of the Annual Fiberlicious Party, the event where I got infected with the Spinning Bug - last year. I can't believe that it has been a whole year already!

I can state with confidence that last year, at this exact same hour, I was sitting in my living room, in my pink pjs, spinning my little K'Nex spindles and thinking that life was grand. You know what? It is! (And... I have on my pink pjs tonight, too!)


At today's event, I learned how to spin on a spinning wheel! At last year's party, I tried spinning on a wheel, but all I got was a big fat mess. Today, I actually made yarn! I was so excited! My time with my little drop spindles has taught me enough about spinning that the wheel was much easier to manage. It was still an awful lot like rubbing my belly and patting my head, but there's hope.


Look at what I started at today's party - I started a spindle of really fine singles. It was much easier than I ever dreamed it would be. I have absolutely no earthly idea what I'm going to do with this - maybe I'll just ply it up and admire it? Maybe spin up a spindle-full, ply it up and admire that? I don't know, but I am well pleased.


Of course, a spindle full would be about a mile long....


I wonder... would it hold together enough to knit with it single ply? Hmmm.... Posted by Picasa

More Cheap, Unattractive, Plastic Fiber Tools

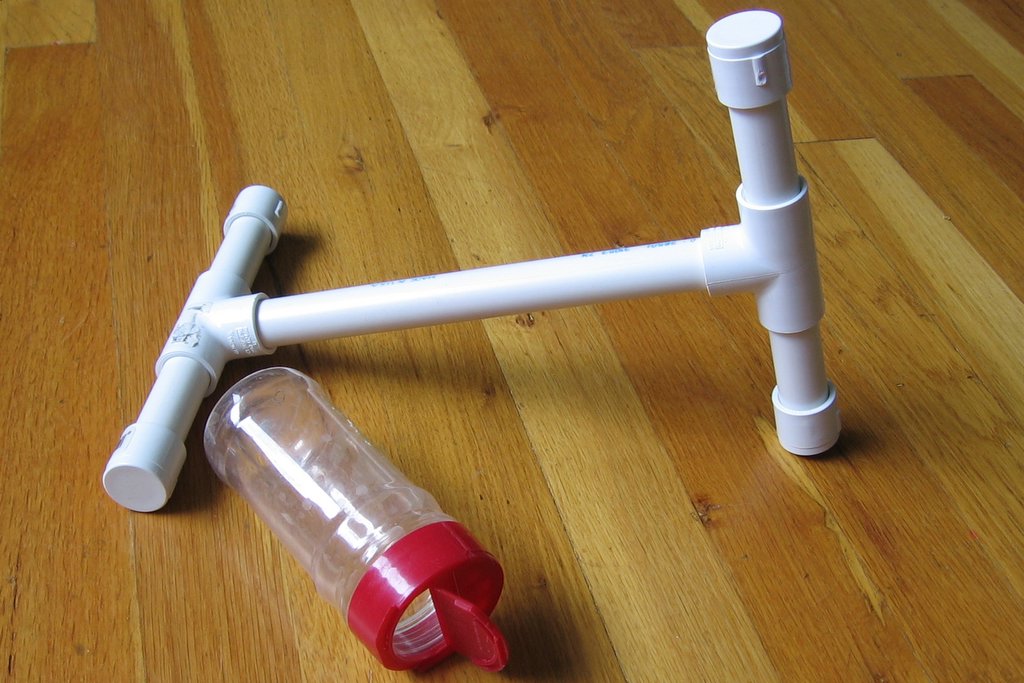
While we are on the subject, I thought that you'd like to see my Niddy Noddy and my Nostepinde. The Niddy Noddy represents about $3.50 in PVC parts, and the Nostepinde was totally free, after the chile powder was used up, that is. It is the perfect Noste. I stick the end of the yarn in the little door, and wind away. I make perfect yarn balls (see below) so you snobs can cluck your tongues all you want! I discovered that my Noste also makes the perfect support for my K'Nex spindles, so I don't have to haul that coffee cup all over town, lol.

The PVC pipe is practically free, it's the little joints and end caps which are costly - well, relatively speaking, that is. So, I had the hardware store man cut (Yes! He cut them for me! What a nice man!) these lengths, which wind a yard skein, and he also cut a longer center piece, as well as 4 longer arms, so that I can wind a two yard skein. Nothing is glued together, and I just swap out the parts. Sometimes, I use the center part as a Noste too, and I clip the yarn end into place with an end cap. Everything comes apart, so it takes up no room in my spinning bag. It works beautifully.

Cheers!
.
,
 Posted by Picasa

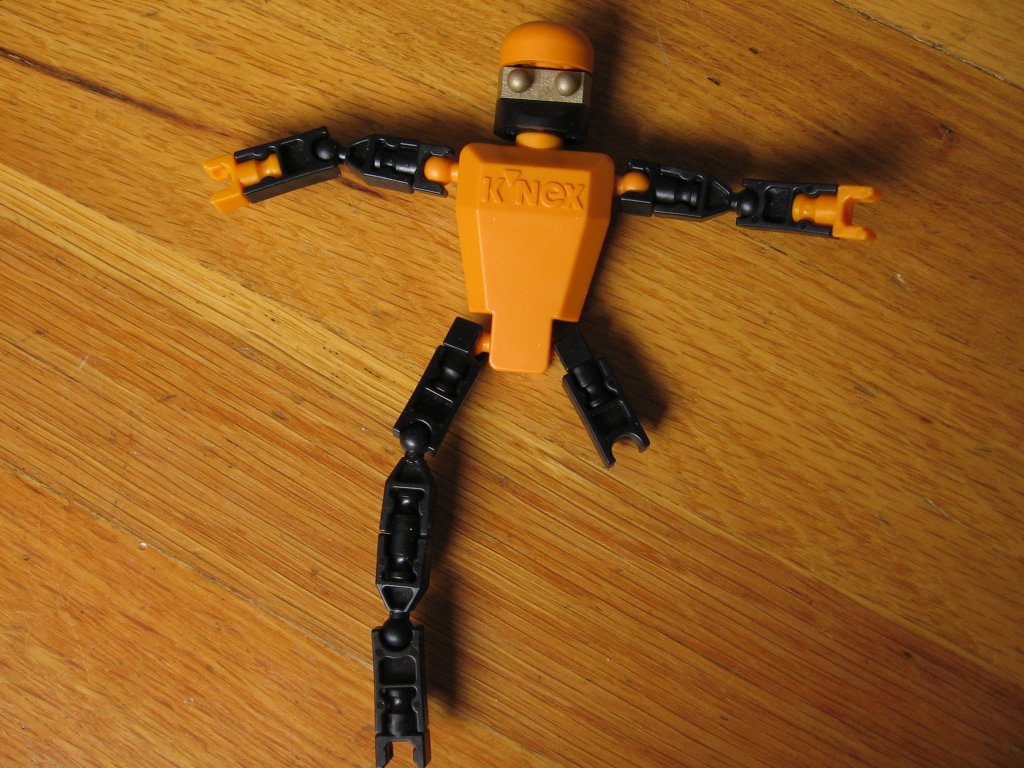
Thank you, Mr. K'Nex Man.

Thank you, Mr. K'Nex. I'll put your leg back together, once I'm all done spinning. Posted by Picasa

More K'Nex!

Here, you can see how I get started on these spindles. I hand spin about 8 inches' worth, then I clip it into the whorl, and away I go!


In the picture above, you can see how all of the pieces are arranged - -
.


And this is how they all go together for spinning. Easy, yes?
.


Remove the clip from the bottom to hold the spinning-in-progress.


Once you spin a bunch of wool, well, you have to ply it, right? K'Nex to the rescue! Here you can see my Lazy Kate -


I put my foot onto the grey bar which is across the front, in this photo.
I can adjust the tension - press harder to slow it down, release it to let the spindle revolve more quickly. It works amazingly well!

This is showing a close-up of the hub -


And here, you can see an action shot.
I love spinning action shots...
.
.

K'Nex Spindles!

I learned to spin, just about a year ago, on spindles made from the building toy, K'nex! They are quite easy to make, and if you have children, then you don't even need to leave the house in order to gather your supplies! (Click on the photo for a close-up.)

Here you see me, about 10 minutes into my new addiction - a still shot -


and an action shot -


I'm using this spindle as a supported spindle - on an upturned coffee cup.

It works!
.
.


.
.

...yarn....


Here is a picture of my very first ball of yarn!


I'm so proud! This ball is surrounded by some spindle options available - of course, there are many more possibilities. (See the yellow, green, red and white spindle on the left side of the photo - with the fiber on it? This is my favorite design.)

Here are a few more ideas, along with the spindle shaft.


Here you see my first ball of yarn, on its plying spindle. Isn't it sweet? LOL.


(Please, disregard the electrical tape which is hiding a hole in the piano bench *blush*)

The support spindle is very nice and all, but sometimes one gets the urge to take the show on the road, so I figured a way to make my little spindle turn into a drop spindle - -


...spinning at the Reservoir, at sunset, on a peaceful October evening.


Now, does it get any better than this? Nope.

This little spindle is so small, and it comes apart ( to a degree) without disturbing the already-spun fiber, so it is just perfect for taking on a walk. Stuff it all into your pocket, and off you go!

For the past few months, when I get around to spinning, I use the spindle shown further down this blog. I got to where I preferred to spin while standing up, and I *really* like the longer shaft on the beading-elastic-spool spindle, and on my CD spindles, and I much prefer to use a top whorl spindle while drop spindling. I can make the K'Nex spindle into a top whorl, but the shaft is really too short to work with the thigh roll technique. So, I use it as a bottom whorl drop spindle and twist it to make it spin, and this makes my hand fatigue really quickly. I think that I'll stick to support spindling with my K'Nex, and drop spindling with my other spindles. I love the rhythmic whirring that this spindle makes, as it twirls on its little coffee cup. Almost like it's purring, lol.

What's really the coolest thing of ALL is that this little K'Nex spindle can go from a support spindle, to a top whorl drop, to a bottom whorl drop by simply moving the little black clip from the top to the bottom and then... just doing it. A convertable spindle! Really! It works just fine! Cool or what???
.
.

Magic Stripe Socks


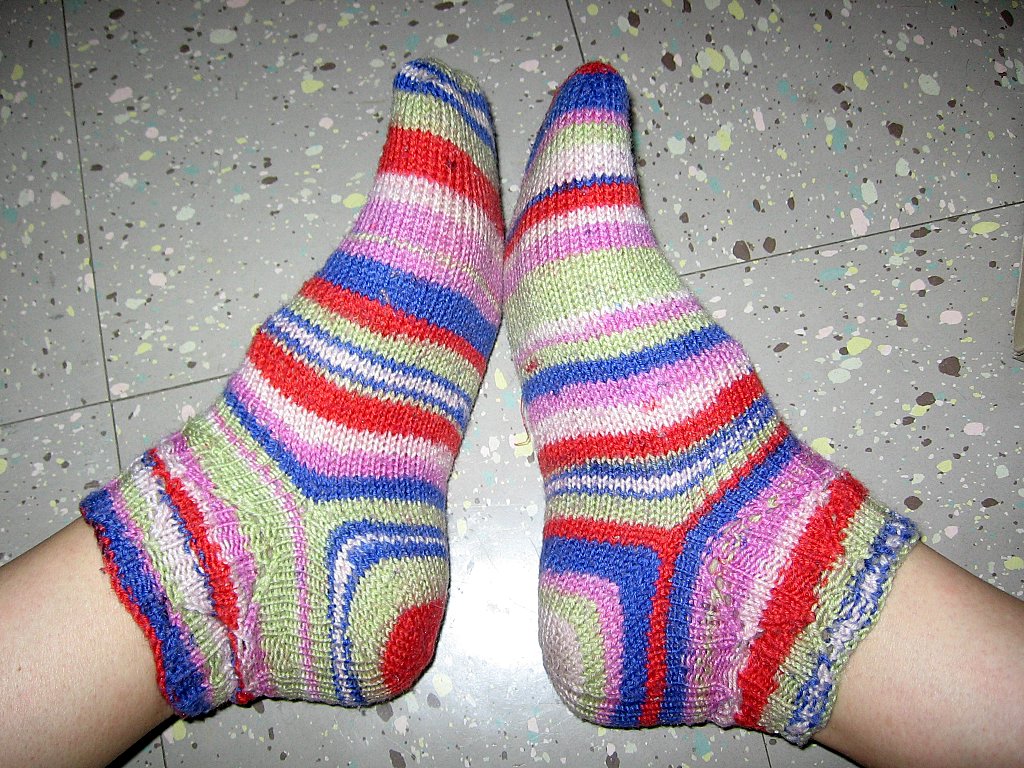
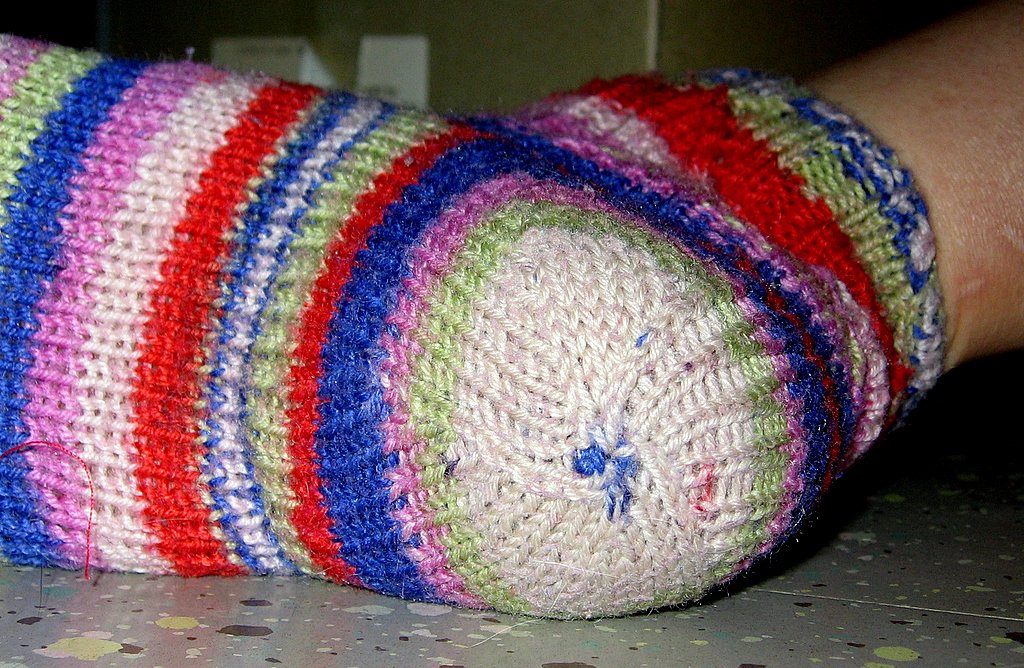
Grace cleaned her room, and take a look at what re-surfaced! I knit these socks two summers ago, and they've gone missing for just about that long.... Grrr....

Anyway, these were great fun to knit! I love the yarn - Lion Brand Magic Stripes, I think. I really like how the socks are sort of alike, in that they are clearly a pair, but they really don't match at all. I've decided that this is the only way that I'm going to knit socks anymore. What's the point of knitting them to be exactly the same? You can go to any store in the land and buy two socks which are exactly the same! For my effort, they are going to be FUN! LOL.

I knit these from the toe up (Is there any other way? LOL.), with a peasant heel. I had experimented with different heels in the past - see my variegated merino superwash socks below - and I really like this heel. It's knitted in the exact way one would knit a hat, only really really small. One's heel is rather head shaped, isn't it? It fits the foot much better than any other heel that I've knitted.

I love how the heel ended up with a tiny spot of blue, right in the middle. Serendipity!

The sock looks rather deformed on my foot, because it's way too small. The only trouble is that it is way too small for Grace's foot, too. Grrr... It wasn't too small, back when I knitted it. Grrr...

Here is a link to the yarn - Lion Brand Magic Stripe in Jelly Bean Stripe. Too cute!

Grace's cute new purse!


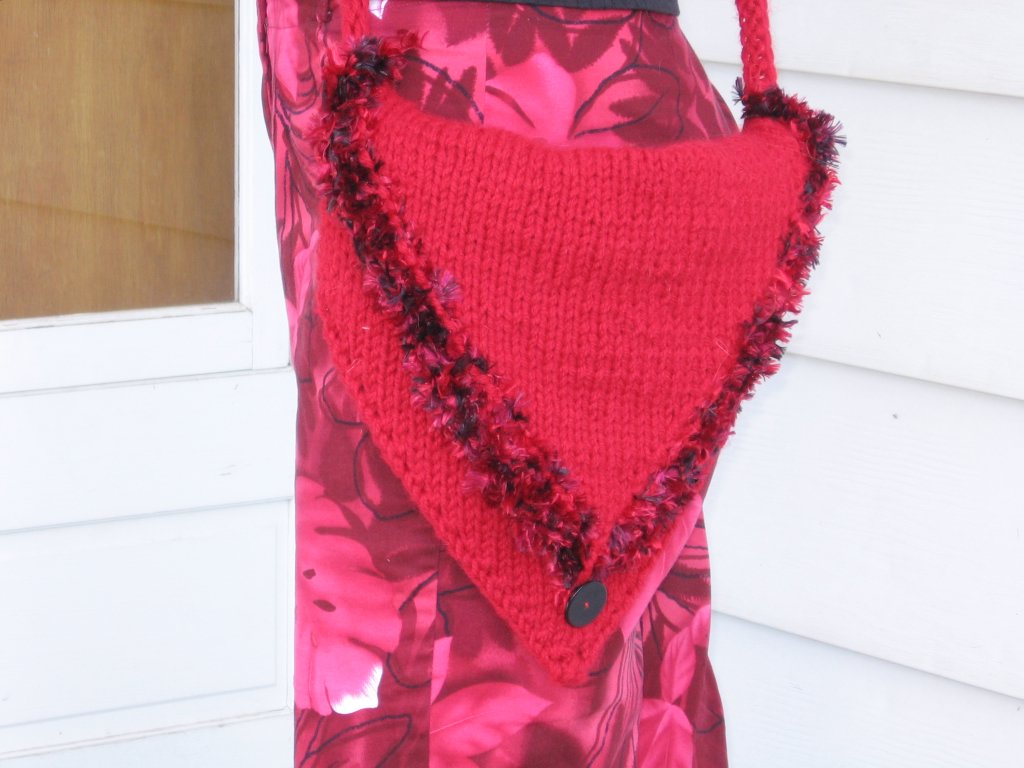
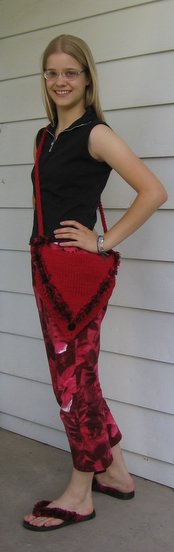
Well, she's at it again! Grace designed and knitted this cute little purse out of Plymoth "Encore," a wool/acrylic blend. Isn't it darling? She held two strands of yarn together, to give the purse thickness. Notice her shoes? Notice the trim on the purse? (She also made a pony-tail holder, but it's not in the picture.) Now, isn't this a rather pulled-together outfit??? I forget the name of the yarn trim, but it's from Walmart and maybe it's an eyelash by Bernat? It has a "bird" name... Anyway, it all came together to make a really cute outfit! Best of all - except for the tweety-bird yarn from Walmart and the flipflops, also from Walmart, *everything* else in the photo comes from various thrift stores! I bought a HUGE sack of yarn from the Salvation Army, and in the bag were 12 balls of Encore, in 4 really nice colors, along with all sorts of other wonderful balls of wool - my spider shrug is knitted with wool from this sack-o-yarn, too. What a haul! The pants and the shirt are also from thrift stores.

My little girlie is a devoted thrift store shopper. Want to know the reason why? Look in her purse, and you'll see what she saves her hard earned money for. BOOKS! I can die happy. Posted by Picasa

Finished


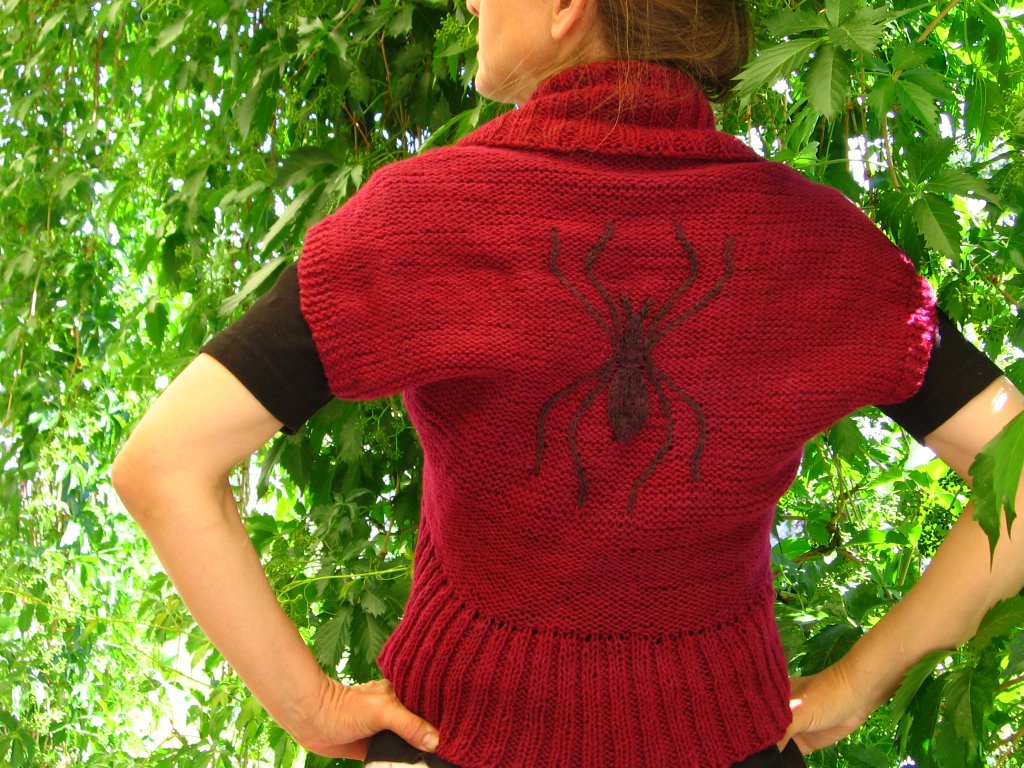
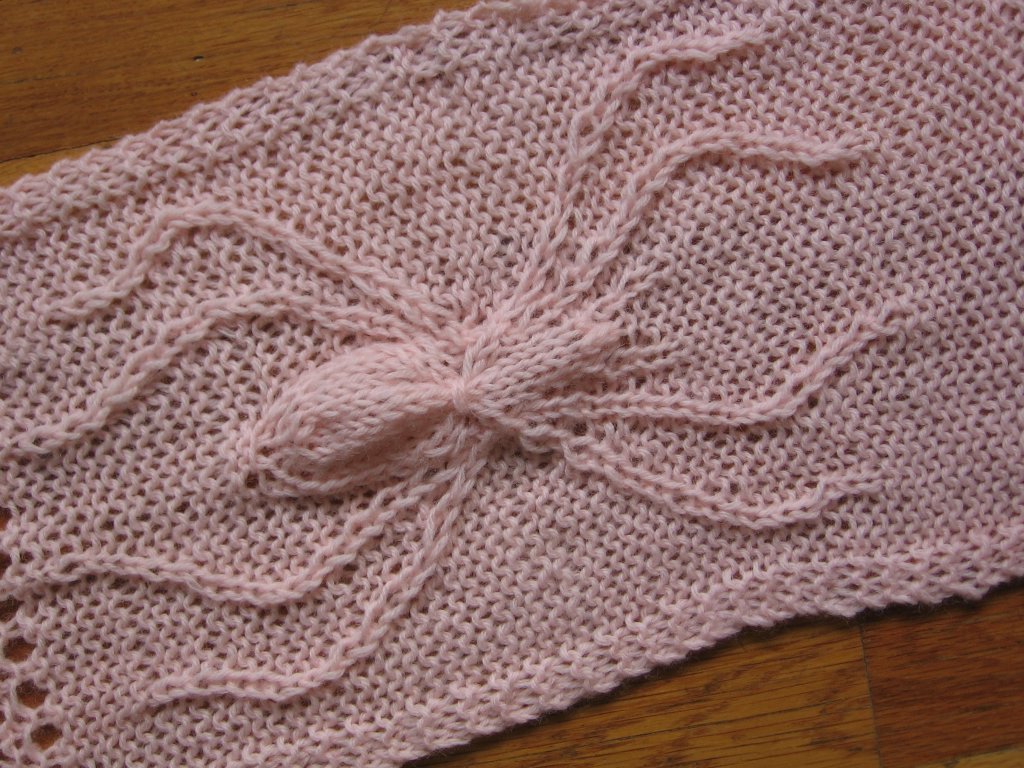
My spider shrug is finally completed, YAY! Just in time for today’s prediction of highs in the 100’s! Well, when the weather does cool down, I’ll be ready for action, lol.


 Posted by Picasa

Felted Backpack


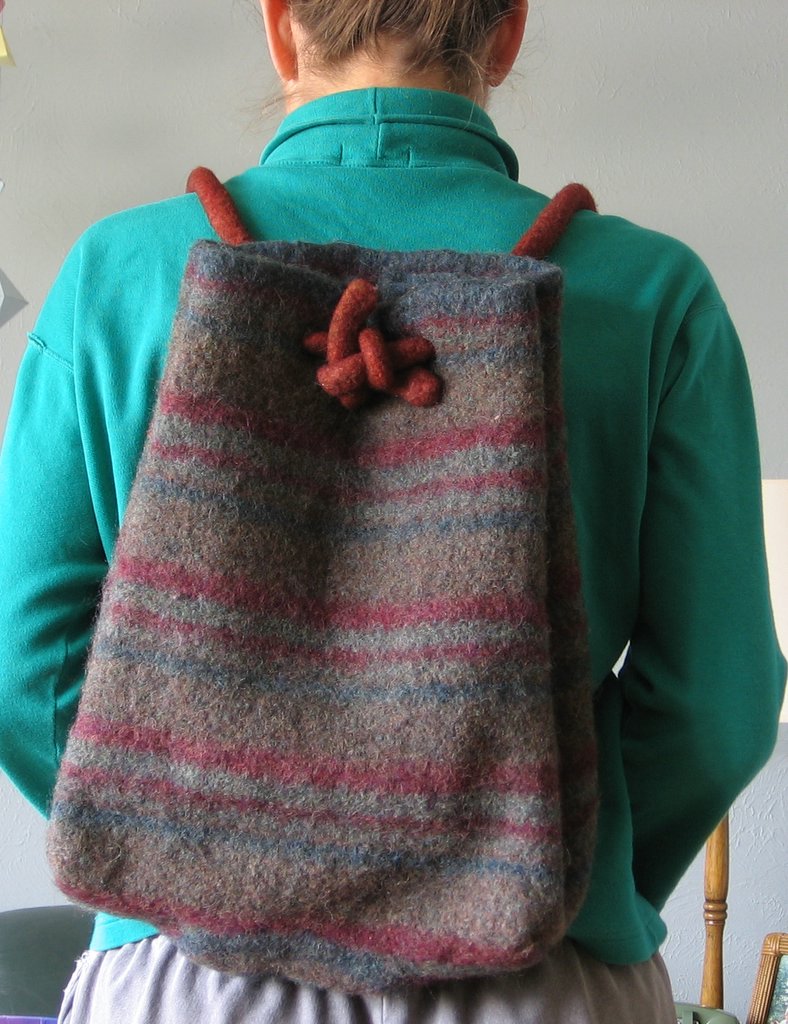
I made this backpack from a felted man’s sweater. I purchased the sweater at the thrift store, foolishly thinking that my husband would like it…. I was so wrong! No way! He wouldn’t even try it on. Sigh. So… I took off the sleeves, which was surprisingly easy – just pull the right string and Zip! off it comes! The sweater-body was just a cylinder, so with the sleeve holes sewed up, I now had a giant flat rectangle. I then used the unraveled-seam’s yarn to kitchener the sleeves together, so that the stitches wouldn’t un-knit themselves, and then I threw the whole business into the washing machine and felted the daylights out of it.

It was such a loosely knitted sweater, that it felted tightly and shrunk an amazing amount! Then, I squeezed it over a plastic-bag-covered Amazon.com box and set it aside to dry. While it was still wet, I sewed up the neck hole, and patted and shaped it into what I thought a proper backpack ought to look like.

When the project was in the washer, I was mentally planning how I was going to use the sleeves as outer pockets on the backpack – maybe a large front pocket with a cool button, and maybe a water-bottle pocket on the side…. Well… the sleeves, which went into the washer measuring something like 4 feet long by 2 feet wide came out of the washer really teeny teeny teeny tiny! So, instead of my grand plans for outside pockets, I used the sleeves as inside pockets. It works quite well, actually. I knitted the drawstring/backpack straps out of Lion’s Fisherman Wool and dyed them with Koolaid. All in all, it’s a pretty neat backpack. Too bad I never use it….


In the photos, you can see….

Look way at the bottom – you can see the neckhole and the tag – it was an Austin Reed Sweater. One of my friends assures me that the original owner paid much more than the dollar that I paid for this lovely wool sweater. What do I know? More to the point, what do I care?


Anyway, in the photo above, I’ve put tissues into the inner pockets so that you can see that there are actually three of them! One large one, one medium one and a tiny one (cell phone?) piggy-backing on the medium sized pocket.


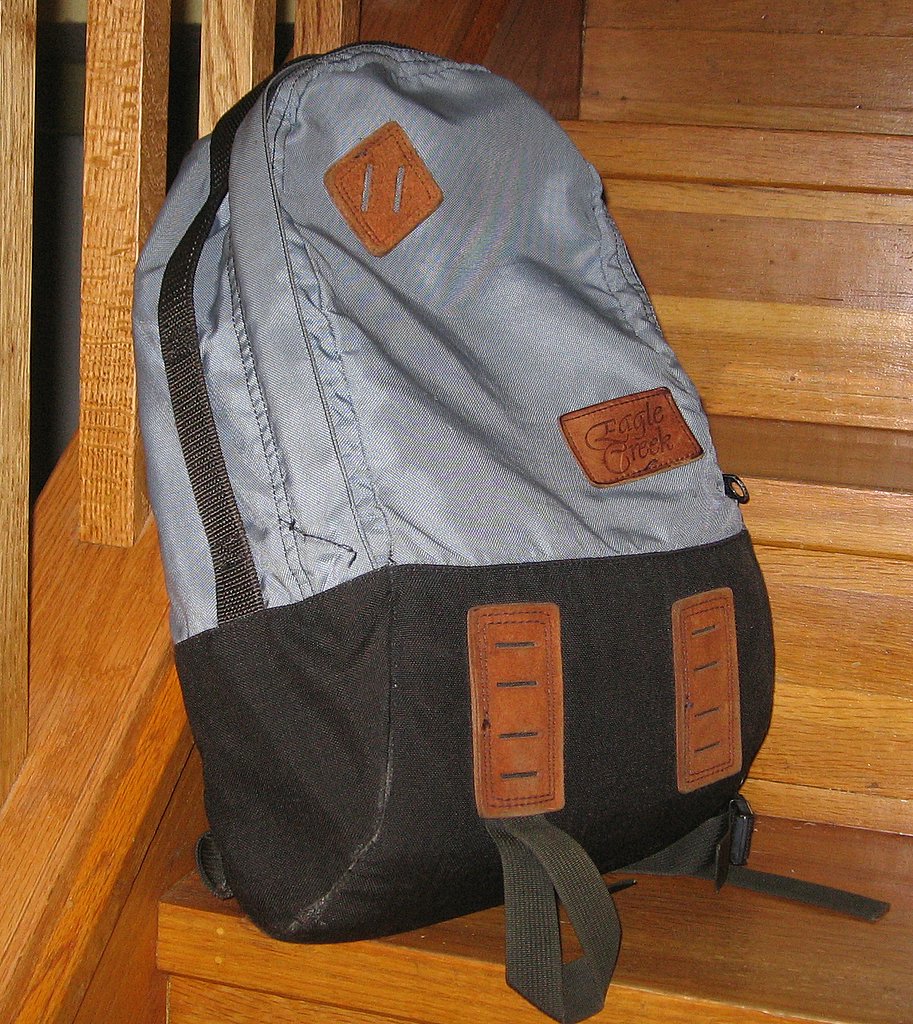
I’d use this bag, except that I can’t wean myself away from my ancient blue backpack that I’ve slapped on my back nearly every day since I was 20 years old. Let’s see… yes, that was 26 years ago… I’m not sure that I’m going to be able to break the blue-backpack habit any time soon. Isn’t she a beauty? How on earth does the Eagle Creek company stay in business if a customer needs to buy only one of their backpacks, ever, during that customer’s entire life? I’m telling ya, it’s the best backpack ever manufactured!!!


I’ll try to use my new backpack, but I’m not making any promises. It was a fun and easy project, and quite amazing to watch this HUGE sweater shrink down to nothingness. What’s even more amazing is that the fabric is perfectly smooth. It wasn’t smooth, back when it was a sweater. There were these knit-purl diamond rows, there were blackberry-stitch rows, there were eccentric-gauge rows (you know, where one row is knitted with huge needles, so that the loops are huge in some rows, but “normal sized” in the rest of the rows?) and other textural things, but once fulled, it’s perfectly smooth. Imaginese!

Mission Accomplished!


I finished it in the nick of time! You know, most knitting patterns read something like this – “Continue knitting the k2p2 rib for 3 inches.” I don’t know if I’ve ever read one that instructed the knitter to knit like mad until 3 o’clock, but this is what I had to do! You see, it suddenly occurred to me that this wedding was to take place in Louisiana in April and not Colorado in April so the wool-shrug plan was just not going to work. Have you ever been to Louisiana in late April? Suffice it to say that it’s Hot and Steamy…. So – on to plan B! Knit a whole new shrug! I ditched the wool spider idea, and jumped onto the lace idea on the very day that I was packing for the trip, which is the very best time to decide on a big project, isn’t it?

I raced to my LYS and stocked up on some black Luster Sheen, which was the exact perfect shade of a black, with an almost reddish tint. I went to the store specifically to pick up some Sinfonia, but alas, the black Sinfonia was blue black and that simply wouldn’t do, lol.

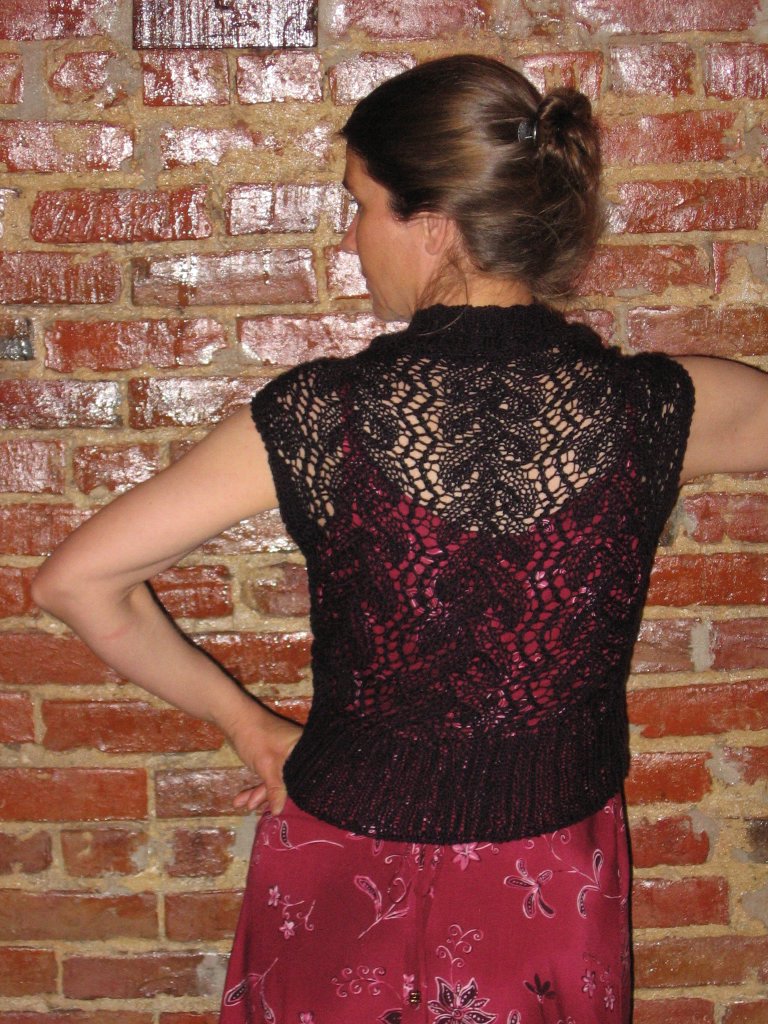
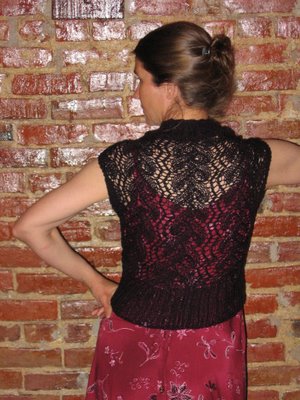
When I should have been packing my bags, I was instead surfing the internet in search of the perfect lace pattern, and I found it here, Print O' the Wave Stole , and here in pdf - I love this lace pattern, and as you can see, three repeats of the main portion of the lace was a perfect fit! I knitted all the way from Colorado to Louisiana, then knitted in every spare moment on the day of the wedding. Based on my experience with the interrupted Spider Shrug, I knew that the cast-off step would take about 30 minutes, and this is why I gave myself the 3pm cut-off.

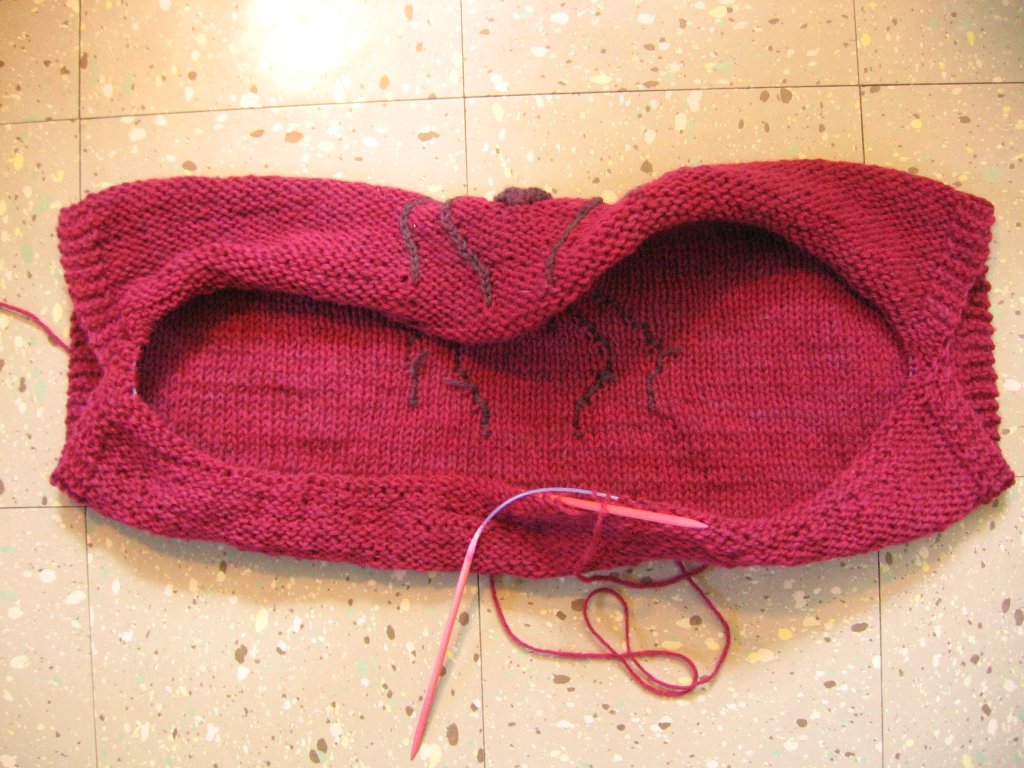
I followed this shrug pattern, Circular Shrug - here in pdf - but I changed it a bit. For the spider shrug, I provisionally casted*-on, knitted the back with the lovely spider, then folded it over, picked up the cast-on side, and knitted in stockinette, in the round for about ½ inch, then began the k2p2 rib.
(Here you see the shrug just before the ribbing was started.)
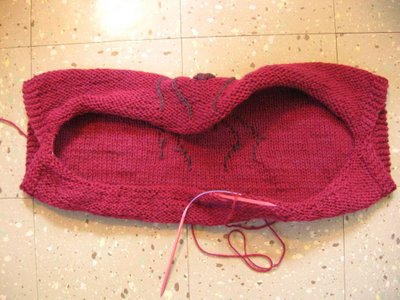


Well, this idea worked perfectly well, but it was way too small! In the planning stages, I decided that the original shrug would be too long, since it was intended to be worn with a summery dress, so I’d simply knit the back shorter. Only… this doesn’t work. Each of the 20 inches called for in the pattern are necessary, so don’t scrimp – knit every single inch! Lesson learned.

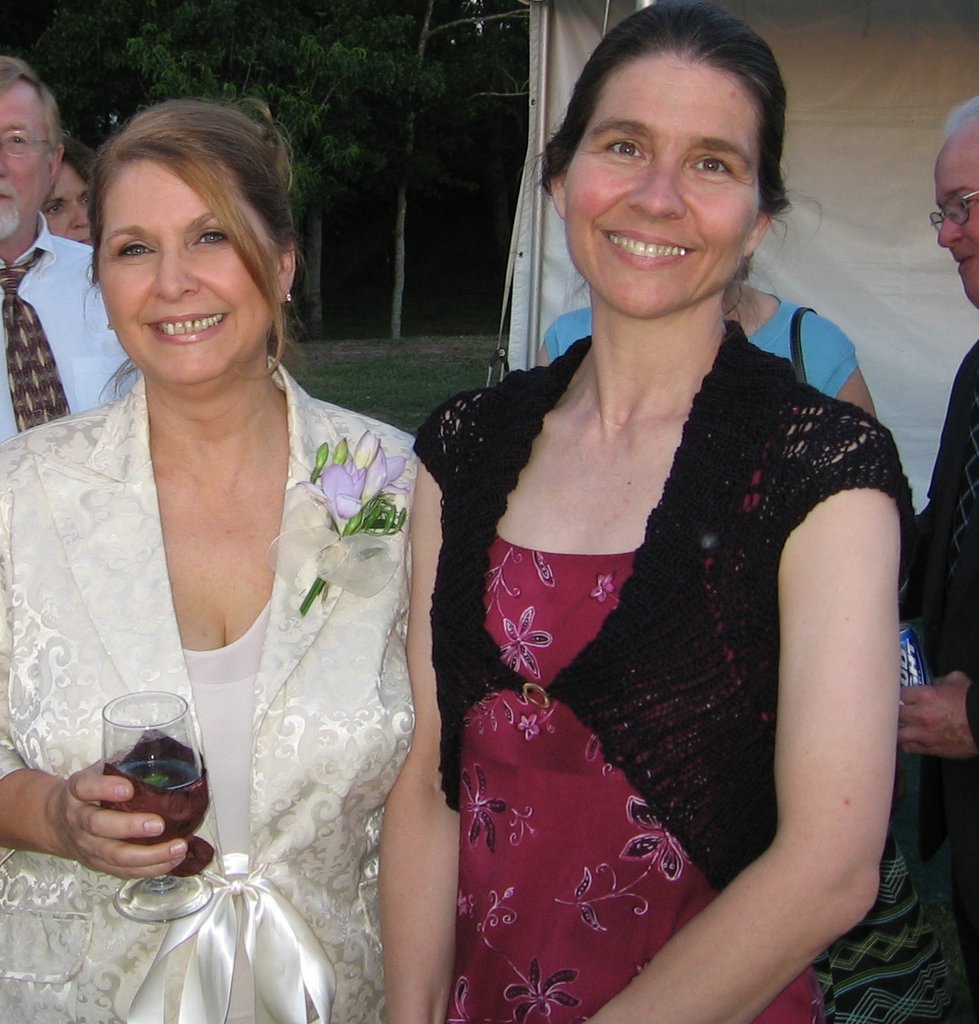
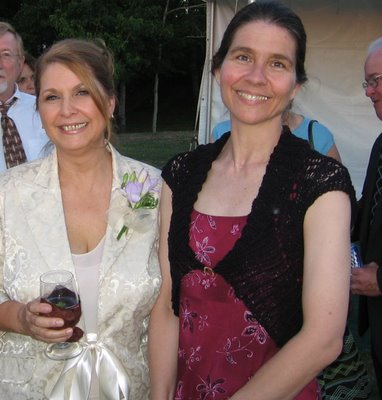
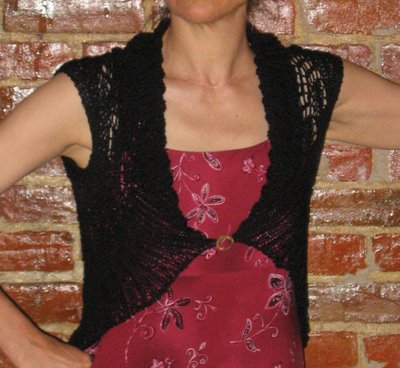
This is how I knitted my black lace shrug - I provisionally casted-on, knitted the lace pattern for 20 inches, then folded it in half, picked up the provisional cast-on edge, and knitted twice around in stockinette. Then, I began the K2p2 border by knitting a stitch, backwards-loop-increase one, purl a stitch, backwards-loop-increase one, and so on around. Then, continued, until 3pm (ha!), in k2p2 ribbing, then cast-off in a real big hurry, because I still had to iron my dress, and apparently I also had to burn my left fore-arm, as you can see in the photo. The wedding was an hour away from my family home, so my sister, the mother of the bride (see photo), rented a bus to drive all of her friends and family to the wedding. I’m so glad for this hour, because it was on the bus that I sewed up the arm-holes, and worked in the various ends of yarn. As this was Luster Sheen, and ickycrylic, I was afraid that the ends would work their way back out, so I sewed them down with black sewing thread. My mom loaned me the little circle pin (thanks mom!) and provided the thread and needle (thanks mom!) and I was ready just in time! Whew! However…. The knitting until 3pm part didn’t provide enough time, so I’ll search for the end of the yarn (how much you want to bet that I’ll have to cut???) and rip out the cast-off, and then knit a couple of more inches onto the edging. I think it will look better with a larger collar.

Now that I know how this shrug pattern works, and that the 20 inch measurement is truly the magic number, and that the 3 inch arm-hole seam is another magic number, I’ll fix the spider shrug by ripping out the k2p2 edging, continue knitting in stockinette in-the-round for 3 more inches, then knit the k2p2 edge for 5 inches, then I’ll be done, yay!!! I hope to be able to wear my spider shrug this summer – who knows, maybe even with the dress that it was originally intended for! We have cool evenings all summer long, so maybe I will.

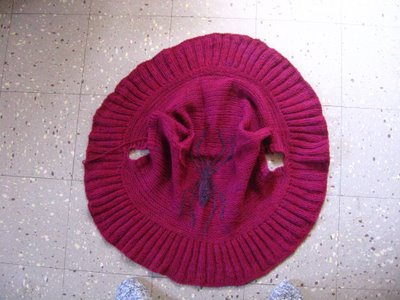
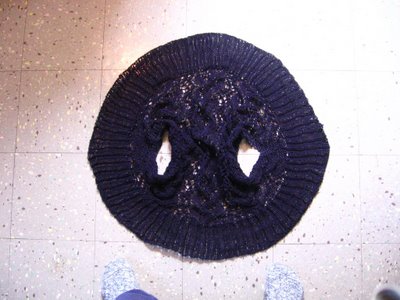
Here you see the shrugs, and you can see how much shorter the spider one is from the underarm to the center front.


*Knitting Grammarians – does one say “casted-on” or “cast-on?” I don’t really know, but “casted-on” sounds kinda silly, and “cast-on” doesn’t have that past-tense flavor that I’m looking for here. Hmmmm…..
Shrugging along....
 

My little spider is coming along nicely. She should just about cover my back. I'm pleased!
I couldn't be happier with the colors of the yarn. I started with baby pink yarn, which I dyed burgundy, and I dyed a small bit with black Wilton's, but the color came out more of a raisiny color - sort of red black. It's the exact colors of my dress, and I'm thrilled!

Who am I trying to fool, though. This is for a GARDEN wedding in LOUISIANA in APRIL and I'll probably wish to be completely stark naked, not to be wearing a shrug, even though it is going to be darling...

I am knitting the Crafster Circular Shrug - and here are the directions - http://momcast.blogspot.com/2006/01/craftster-circular-shrug.html

Isn't this a really cute pattern? (This is a really good blog, too!)

I'm Cooking Up A Shrug!


Naw, that's not actually my shrug in the pot! My shrug is on the needles, and you'll be the first to see it, once it's completed. In the pot is the pink yarn being dyed with burgundy Wilton's icing dye.


Just a little idea of what's going to be on the back of the shrug, and a look at the color that the yarn was before the dyepot.

Folks around here are either amused or horrified at the spider. When I tell them that I'm going to wear the shrug to a wedding then pretty much everyone is horrified. I tell you, I feel like an idiot, but I honestly don't get it. Someone said that if I wanted a bug, then knit in a ladybug. Please - tell me why this makes a difference? I could see if I were to knit in an image of Satan or something, but honest to pete - a spider? And why does the idea of spiders and weddings get everyone all worked up? There's a message here but I don't know what it is. At times like these I feel like Temple Grandin when she says that she feels like an anthropologist on Mars. I am *immensly* amused by the whole thing, however.