
OK, now we’re ready! This poncho is knitted from the neck to the bottom. I used Caron’s Simply Soft in their “Brights” line of colors, and I held two yarns together as I knitted. I think that I used #10 needles, but they might have been larger. Since I make my own needles, I am not really sure of the size. So – Swatch! If you click on the photos, you can see a larger version, and the ruler markings will be apparent.

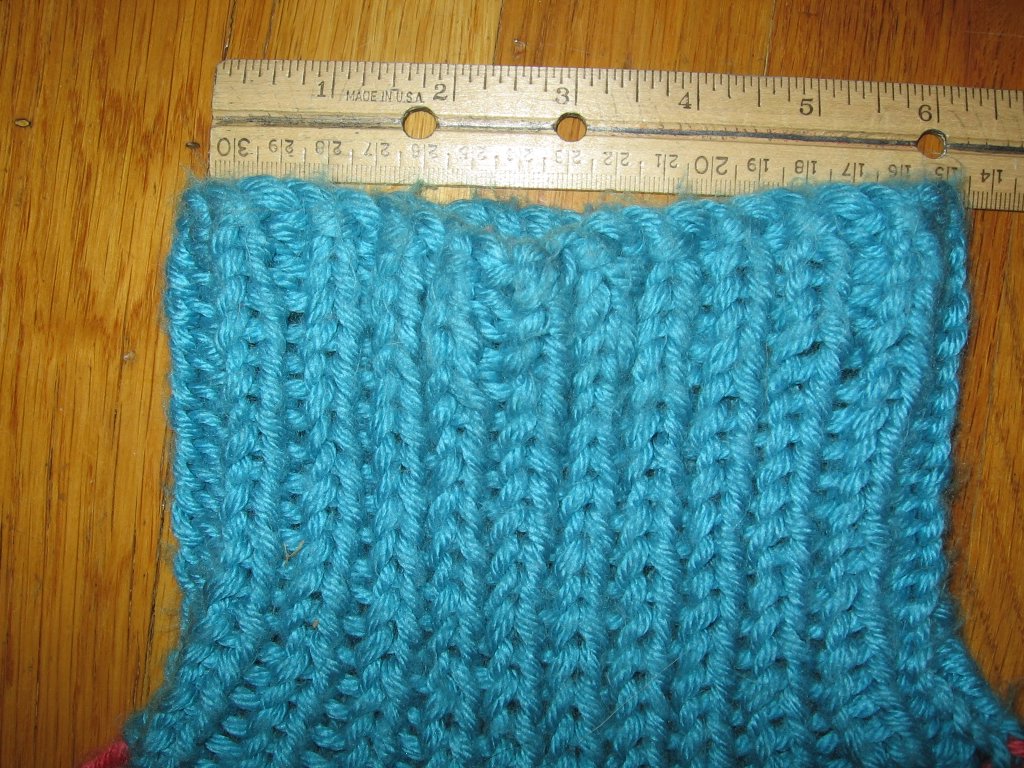
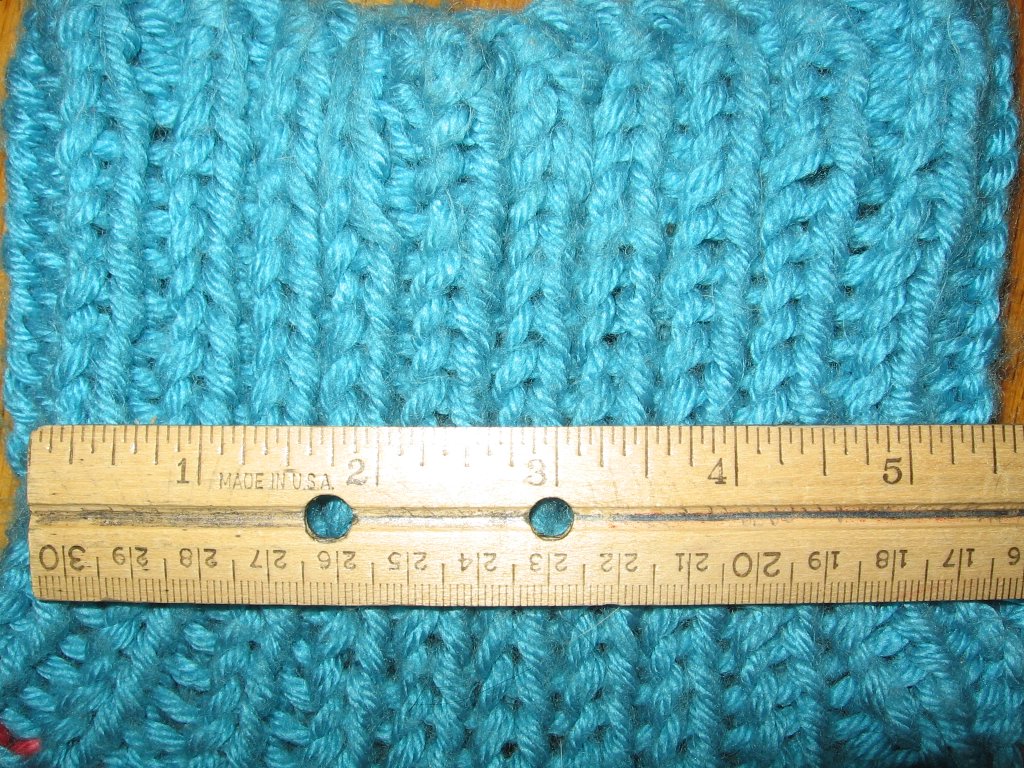
With the yarn held double, I got 13 stitches, and about 21 rows, over 5 inches in stockinette, and about 19 stitches over 5 inches in k1p1 rib.
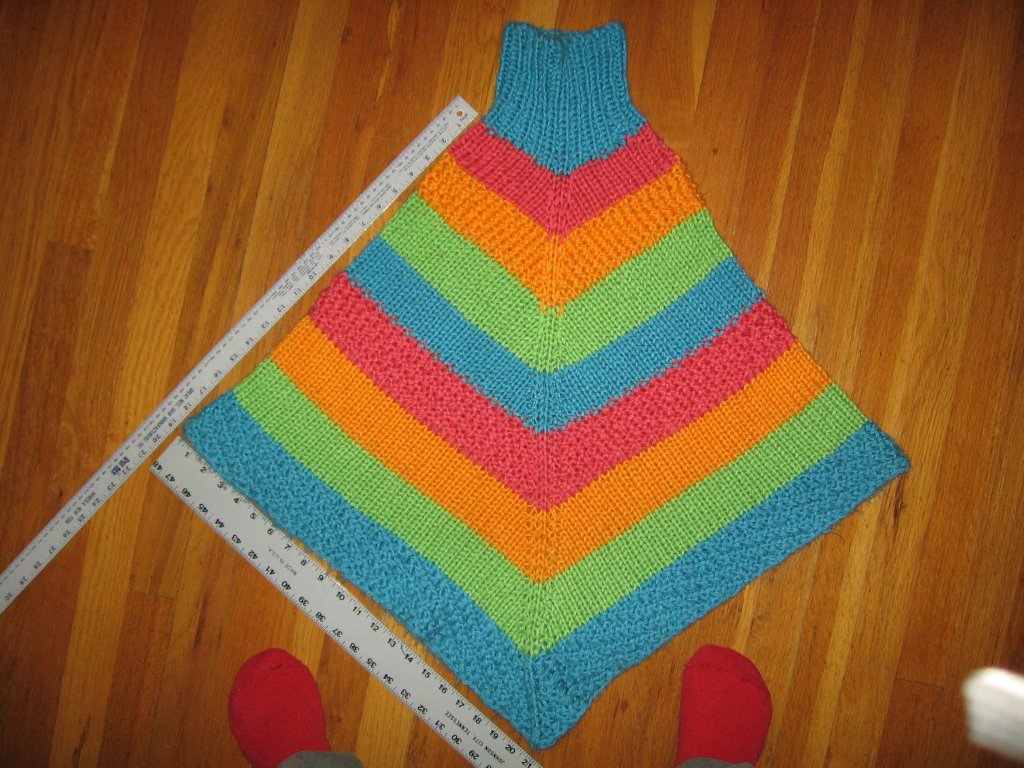
This poncho fits my 10 year old daughter. She’s a tall one at 5’2” but is a skinny gal at 80 pounds. I tell you this so that you can have some idea of the size.
Cast on 42 stitches. When I made this poncho, I used the Cable Cast On, which is a lovely cast on, but in the meantime, I discovered the best cast on ever. It can be found on page 132 of the Principles of Knitting – the Double-Needle Cast on. Since it’s copyrighted, I can’t duplicate the instructions here, but it involves a long-tail cast on, two needles and a twist. It’s the BEST EVER so trot on down to your local library, find the book, and learn it for yourself. I’ll never use another cast on for as long as I live. Even though it is quite complex, it is the only cast on that I teach to my newbie-knitter friends. It works with every stitch pattern there is. It stretches sooooooo nicely. Learn it.
OK, I digress. Cast on 42 stitches, and k1p1 until the neck is as long as you like it. If you do only a couple of inches, you won’t get this turtle neck effect, but it will lie flat. Emma’s poncho has a 5 inch neck.
Switch to straight stockinette, and knit one round. (On Emma’s Poncho, I changed color here, and changed colors every 10 rows.) From now until the very end of the poncho, you will increase at opposite sides of the poncho (front and back), and you will increase 4 stitches, every other round. Here’s the easy way – put a stitch marker on either side of stitch #1, and on stitch #22 - - but this is a special stitch marker – it is a “red light green light” stitch marker, that my darling daughter Grace invented. Make a loop of red yarn, plenty large enough for your large needle to pass through. Tie a loop of green yarn in this loop, so that the two yarn loops are united as in a chain. Now, put the green loop in front of stitch #1, knit stitch #1, put the other marker, then knit around to stitch #22, and put the markers in front and and in back of the stitch. Knit around, and when you get to the marker at #1, increase one stitch, pass the marker, but pick up the RED loop, knit the stitch, increase, pass the marker and so on. Now, next time you come around to stitch #1, you will see that the red loop is on the left needle. This means “stop!” or don’t increase. Pass the markers, picking up the green loop. Knit around. When you come around to the green marker again, it means “go!” or increase on this round. This will make sense if you just do it, lol. When you get to the red marker, pass it to the green and keep knitting. When you get to the green marker, increase, pass the marker to the red side, knit the marked stitch, pass the marker, increase and go to the other side. Get it? You must keep the marker on either side of the marked stitch – don’t let the increases happen between the marker and the marked stitch. Trust me, this will all make sense when you do it. Friends of mine who have knitted since forever are now fans of Grace’s Red Light Green Light. Anyway, back to your knitting…. Increase every other round, on either side of the center back and the center front stitch until the poncho is long enough, then bind off. You are increasing 4 stitches, every other round. You must put the increase stitches into the bind off row too, otherwise, it will pucker at the bottom. That’s it! Voila! Done!
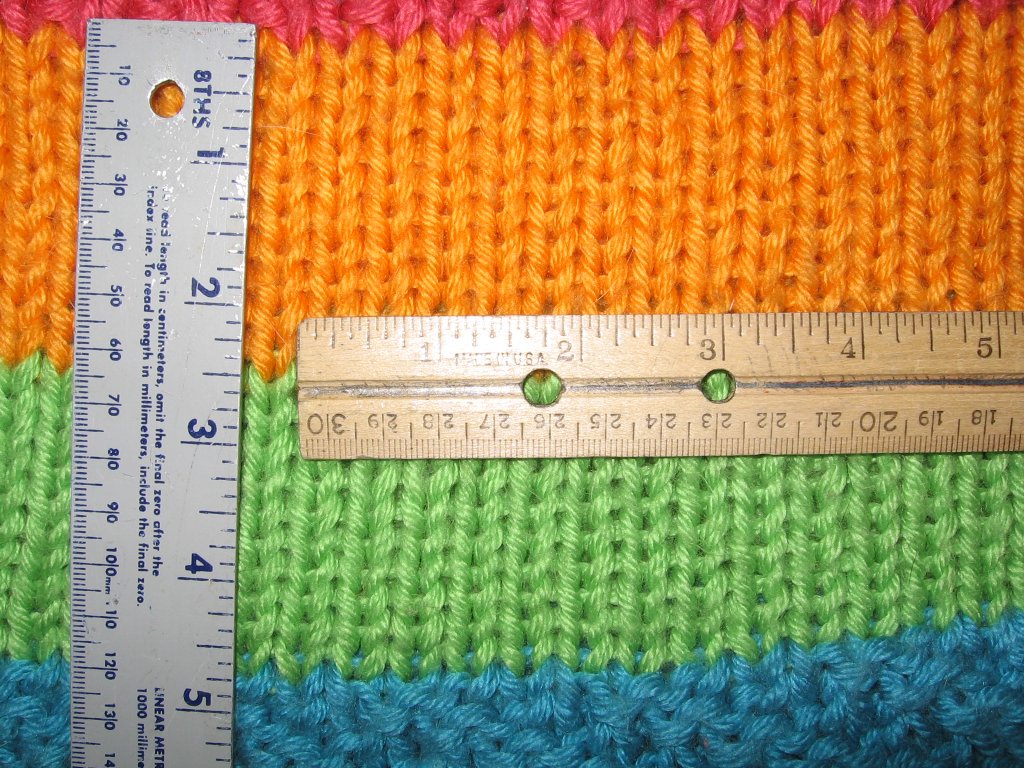
I’ve included photographic evidence of yet another of life’s little knitting lessons…. When changing colors, and when knitting in patterns, one must knit the first row in all stockinette, otherwise you get THIS - -
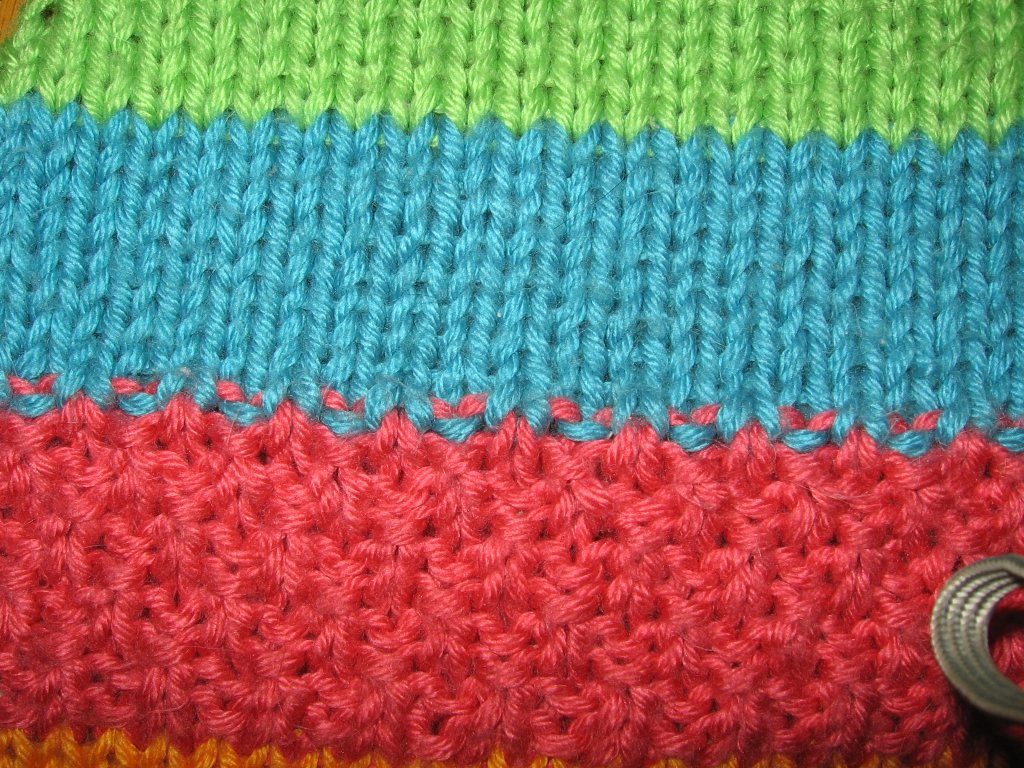
Instead of this - -

These pictures are upside-down to the direction of knitting, but this is how it lies on the wearer. In the top pic, you see that I knitted a blue stripe in stockinette, then switched to red seed stitch. See that oh-so-not-lovely dot and dash thing going on here? It annoys me every time I see the child wear the poncho, lol. See the bottom picture? How well behaved that color transition is? I knitted the first row of the blue in stockinette, even though I fully planned on knitting in another variant of seed stitch. Lesson learned…..


2 comments:
I love your blog Rosemary! LOVE IT! So real....so informative! And your daughter is beautiful in the poncho!
Wow! Thanks! Aren't you sweet! I checked out your blogs too. As you said, I have lots and lots of posts planned, just no time to write. Right now, I'm obsessing over the back of a Circular Shrug - I want it to feature a net-like lace and leaves and I can't figure out how to chart it and I'm going nuts! Thanks for stopping by!
Post a Comment