
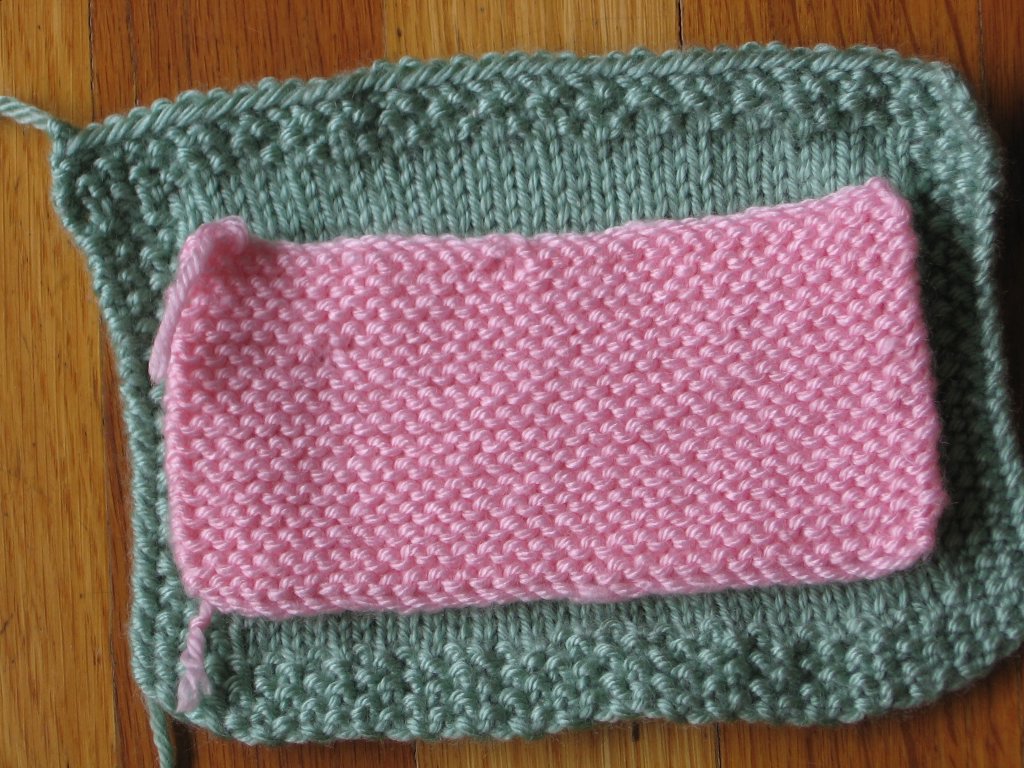
All of these swatches are 30 stitches across and 30 rows deep. I wanted to do the same number of stitches across as the number of rows so that I’d knit a square. Well… the very first lesson learned was that knit stitches are rectangles and not squares, as witnessed by the first swatch, the pink curly number, which is clearly a rectangle. Lesson number two was that plain stockinette curls one way at the sides, and the other way at the top and the bottom. I knitted another swatch, this time with a seed stitch border all around, so that it would lie flat. The stockinette portion is still 30 stitches across by 30 rows deep with the border added, so that the swatch is now something like 38 stitches across by 40 rows deep. I couldn’t get over how different the two swatches were – the pink one is so unruly, and the green one is so well behaved. The only difference is the border – lesson number three – stitch patterns affect the behavior of their neighbors!

Next, I knitted a swatch of garter stitch – 30 stitches across by 30 rows deep. What a difference! As you can see in the picture with the garter swatch on top of the stockinette swatch, the garter stitch one is much shorter and a tad bit wider than the stockinette one. Also, it is quite evident, even from this small swatch, that stitch patterns “feel” different – this garter stitch swatch is very floppy and drapey – much more so than the stockinette swatches.
Next – seed stitch – wider still than the garter swatch, and taller too, but still not as tall as the stockinette swatch. Not as floppy as the garter stitch, either.

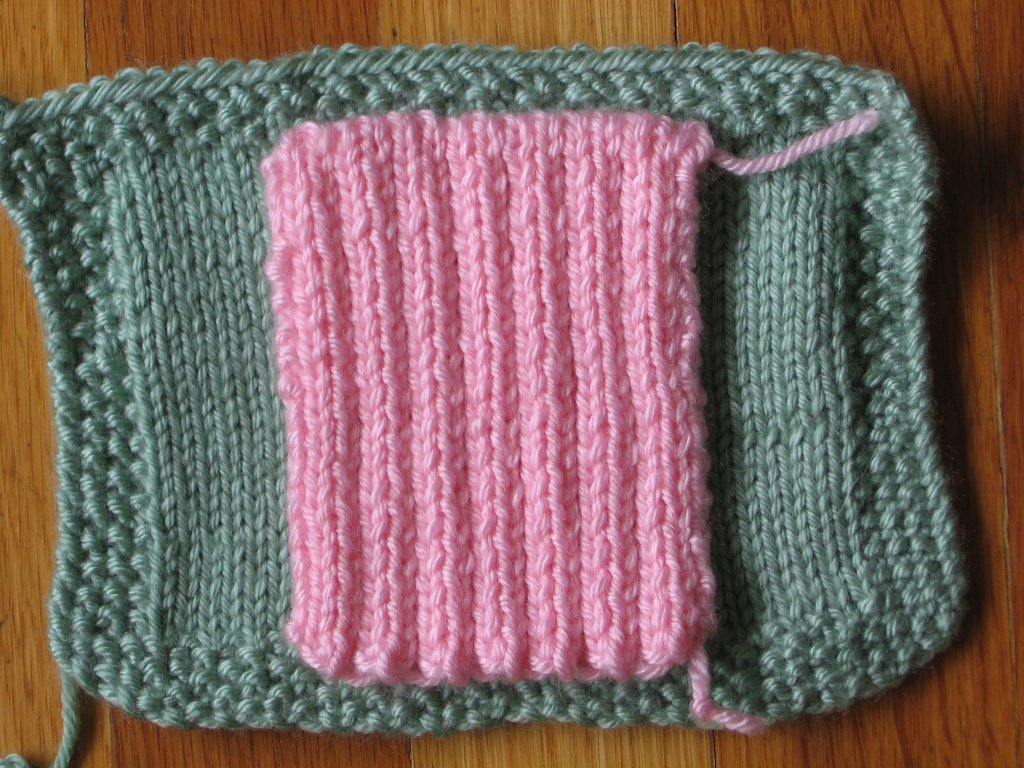
Next, I studied how the different rib stitches work. As you can see, all of the rib stitches are taller than the stockinette swatch, and *much* narrower. Of course, I knew from an entire life of wearing sweaters with ribbed cuffs, that rib stitch would be narrower than the corresponding stockinette, but I was completely surprised that the rib knit was also taller! The swatches start with a k1p1 rib, and continue to a k4p4 rib.


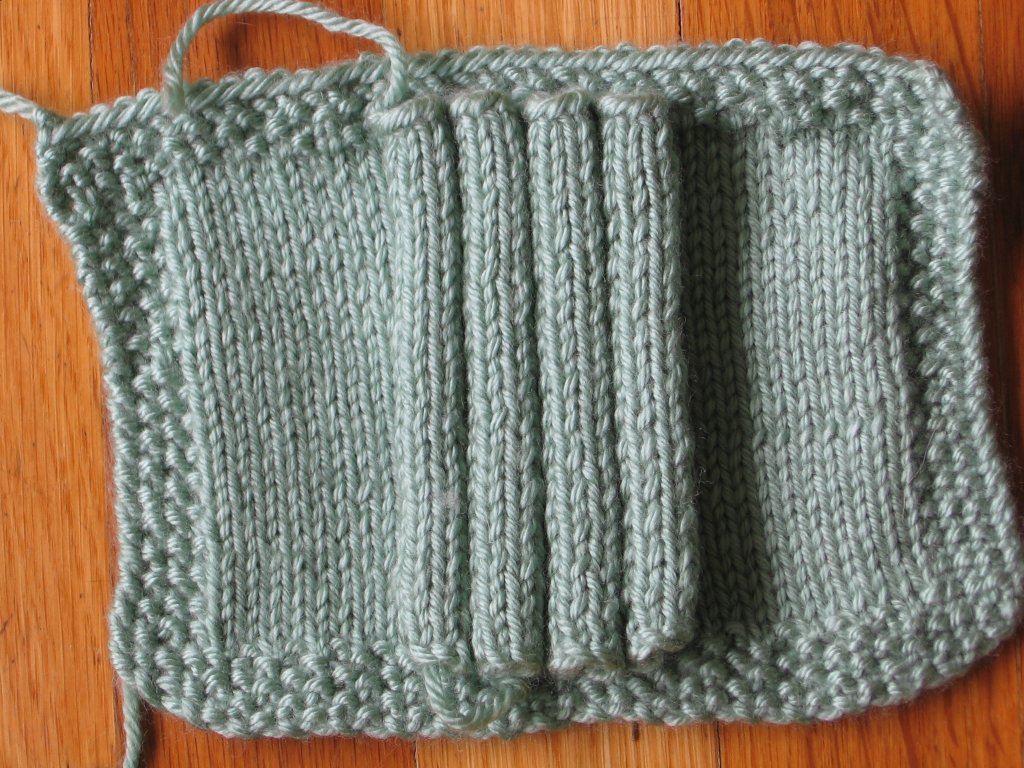
My final swatches involved specialty stitches – one swatch of Shaker knitting, from Katharina Buss’s Big Book of Knitting, and the other swatch with a simple cable. The Shaker knitting swatch is quite interesting – I knitted it on the same needles as the other swatches, but look at how much larger the stitches are! One would think that I used a larger needle, yes? But, I didn’t. It is how the stitch pattern is made – it involves knitting into the row below, and the row above it sort of comes undone. If you count the rows, it appears that there are only 15 rows deep, but there are actually 30 – this is simply how the stitch pattern works. The result is a very three-dimensional stitch pattern, which is very loosey goosey and sort of floppy. I don’t particularly like it in Simply Soft, but I bet that it would be awesome in wool, and with better attention paid to needle size.
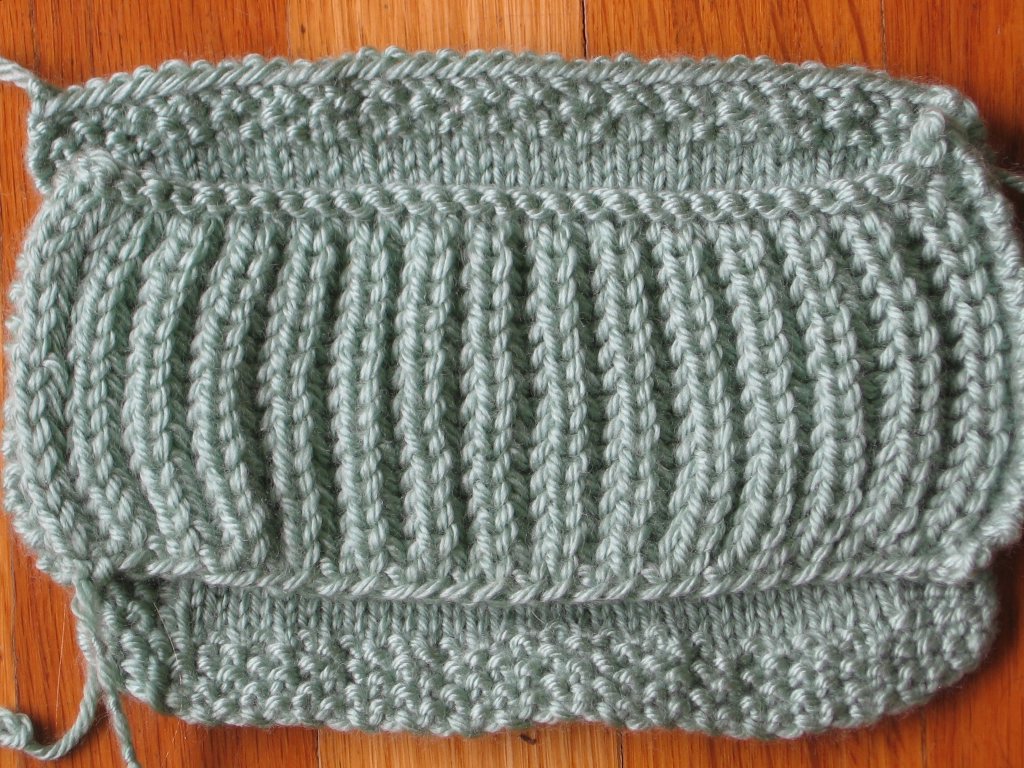
My last swatch is a cable – the seed stitch borders are in addition to the 30 cross-wise stitches. Just *look* at how much lateral space is taken up with a cable! That one cable takes in as much, laterally, as a k1p1 rib, all the way across! I was amazed. Imagine how many stitches one would have to cast on in order to have a man’s sweater with cables all the way across!

If you are just starting out, I urge you to do a little swatching – you will *really* understand the architecture of knitting, and you will understand the reasons why some things work and won’t work. Also, in my little swatch lesson, I practiced different binding on and binding off methods, and I urge you to do the same.


2 comments:
What a neat post, Rosemary! That is an excellent way to start off knitting. It reminds me of the swatching I've done for a class ... measure, give gauge, talk about how the gauge relates to the stitch ... and you did it on your own!
Wow. That's scholarship. Me, I just like to get started on the next project.
Seriously AWESOME post. I have considered doing this and was too lazy. I hope this post remains up, and available to all, forever!
Post a Comment