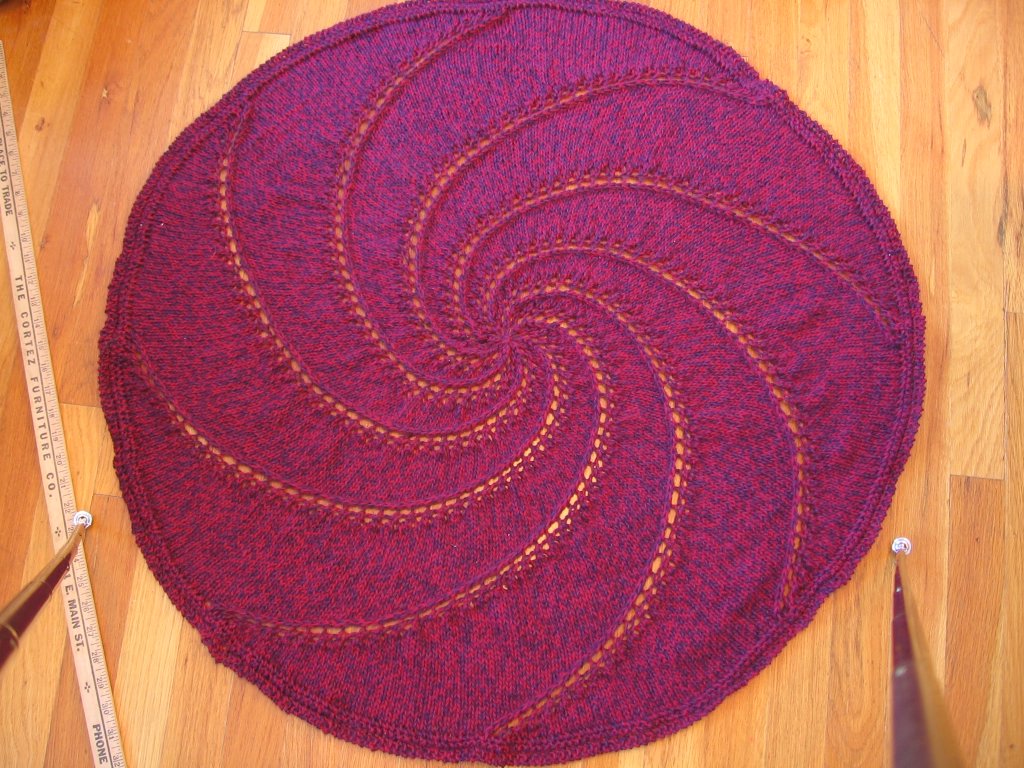
Before –
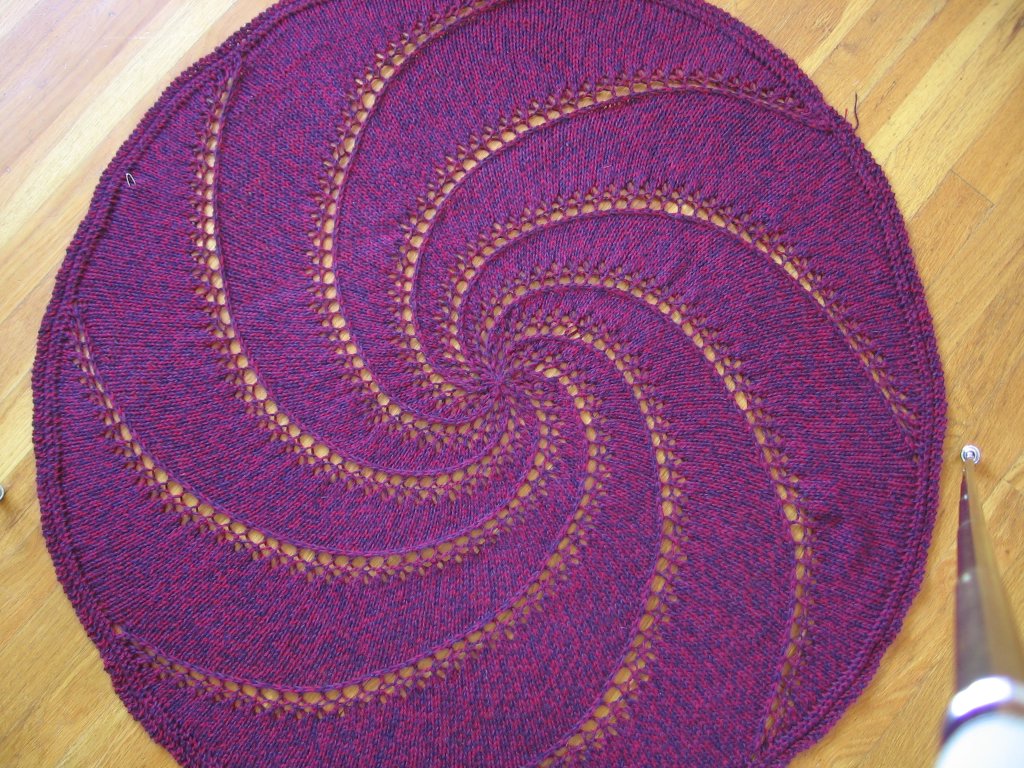
After –
…no… blocking didn’t change the color of the yarn. The conditions and lighting were different on the different days in which I took the photos. The color stayed the same. This “after” photo seems to have a more realistic color, but all pix of this spiral blankie are a bit off, color-wise.
OK, so I took a better look at these photos, and aside from the color, you can't tell a bit of difference, can you? LOL. OK, here are the differences - the blocked one lies much flatter, the stitches look more even, and the edge lies flat and isn't threatening to fold over. It is also MUCH larger - it grew more than 5 inches in diameter. The drape is much improved, too.
All in all - blocking works wonders and your work will look SO much better blocked. So, if you are a new knitter, trust me - block it! Also, if you are a new knitter, know this - you should block your swatches. Keep in mind that this small blanket grew 5+ inches in diameter - imagine how your project will look if you are taking your gauge measurements from an unwashed/unblocked swatch? Oh, it makes me shudder to contemplate such horrors!
Edging –
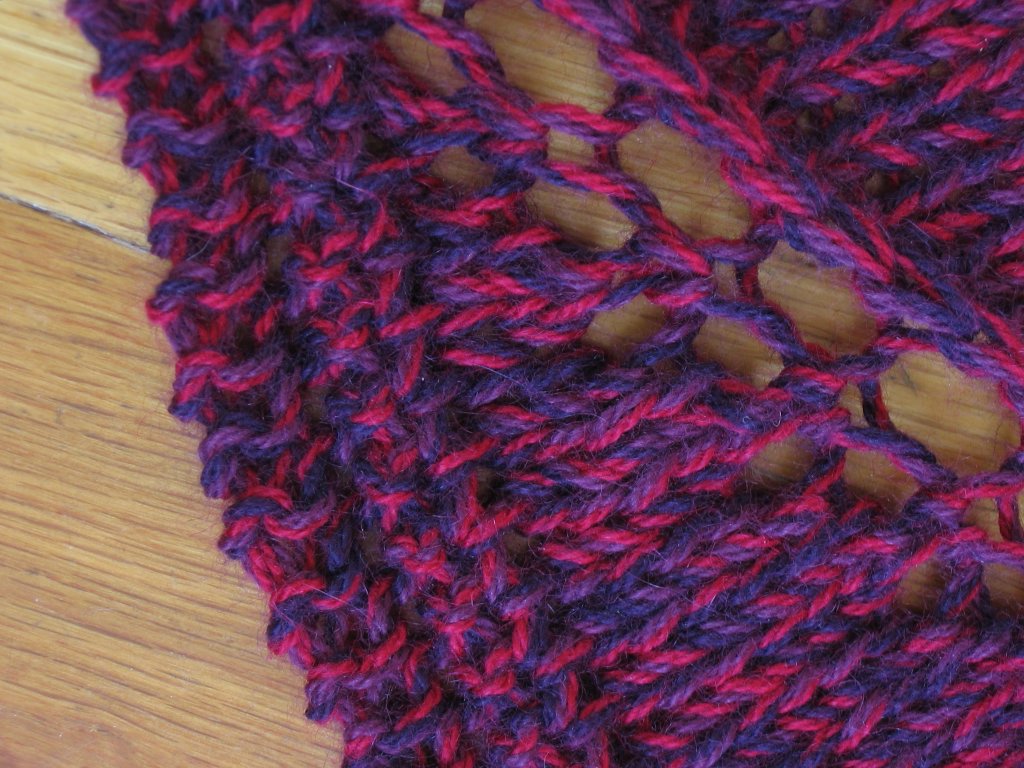
Chart for edging –
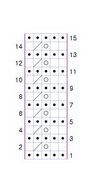 (Yes, I’m still all charged up about this chart maker! It’s wonderful!)
This is a very simple garter stitch lace edging. So simple, yet so effective.
I finished this blankie with about 3 feet of yarn left over. This is how I performed such miracles – first of all, I didn’t ball up the yarn, but I left it in a skein. I don’t know why I did this, as I generally ball yarn, but these skeins are rather small, and why not. I have a floor lamp next to my Knitting Throne, and I just looped the yarn over one of the lamps and knitted away.
When I felt that it was time to put on the edging, I stopped and counted the number of loops left in the skein. I took this number, and divided it by 8 to calculate the number of loops per segment. Then, I divided the number of stitches per segment by this number to calculate the number of stitches per loop. Get it?
After all of my figuring, and allowing myself some room, I allowed myself 6 stitches per loop. So, I unlooped 2 loops, and practiced different bind-off edgings over 12 stitches, and experimented until I came up with an edging which took up this much yarn.. My calculations proved pretty accurate, but I was kinda worried, there towards the end. Gulp. But, it all worked out and I’m very happy.
It’s pretty easy to make up these edgings as you go along, and you can make the edging as wide or as narrow as you like. This blankie would look very nice with a plain garter stitch edging, but I decided to throw in a yarn over for fun.
Ahhhh – I just love this pattern! So simple and so… ahhhh….. 
This is the perfect beginner project. It’s really easy, and just look at how wonderful it comes out! My teenaged son proclaims it, “Mesmerizing…” LOL.
In March, I’ll teach a class on how to knit this blanket. Sign up now! Contact me at thomases2000@yahoo.com for more information. In this class, we’ll discuss the math of the start-from-the-center-and-knit-outwards-flat-item, and we’ll learn different increases and decreases. We’ll also learn how to make a lace cast off, and we’ll take a look at different ways of casting on for the center. This is a very easy project, but there are so many different things to learn!
There’s still room in my Baby Surprise Class! Contact me for details.


1 comment:
I don't know if my last commented posted, but I said your blanket is BEAUTIFUL!!!!
And that I could tell it had been block because the holes looked more open.
Wish I could take your classes!
Post a Comment