The whole fun of Log Cabin is to use many different colors, which means many loose ends to weave in later. Well, I decided that this was just foolish – OK, really, I’m just lazy - so I start out each color, and I also end up each color, already woven in, so to speak. Are you familiar with the Russian Join, or Russian Splice? Google it. It’s the best way to end one piece of yarn and begin the next, without leaving any tails or knots to worry with later. It’s also fairly easy to change color predictably, as I’ll show you in a minute.
First, notice that in the Garter Stitch construction, you need to *start* your new color on the *right side.* If you start on the wrong side, then you’ll get those odd, but sometimes desirable, little middle-of-the-road stripes. So, this means that you need to *end* your colors at the end of the *wrong side* row. Keep this in mind, as you knit.
Now, all of the directions call for binding off each log, only to turn around and pick up along this edge. This seems silly. Just keep those stitches live, and come back and knit them later. Easy, plus you don’t get a bound-off edge in the middle of your knitting. What’s the point of suffering through miles and miles of garter stitch, the slinkiest and drapiest of stitches, only to make stiff ridges all over the place?
Now, back to the Russian Splice. I won’t attempt to teach it to you here, as there are a million wonderful tutorials already online. My fave is at www.boiknit.blogspot.com. I started each new color with one half of the Russian Splice. Here you see me preparing to pick up along one edge.

I picked-up the stitches with a small-gauge metal needle, simply because it was handy. It is much easier to use a skinny needle for picking up along the garter stitch edge.

Here, I’m beginning with my “official needle,” one of my beloved wooden circulars. Notice that the first row is a right side row.

All the way across…

I’m five stitches short of finishing the row. Notice that I’m on the wrong side of my work. Also notice the lack of yarn ends. *smile* I’ve wrapped the yarn five times around the needle, and marked the end of the fifth wrap with a teeny-tiny hair clip. Maybe you have something handy? Paper clip? The corner of a binder clip? Thread this point of the yarn onto a tapestry needle? You’ll think of something.

Leaving the tiny hair clip in place, I’ve cut the yarn, and am weaving it back and forth, with tiny stitches, back through the yarn, to accomplish the Half Russian Join.

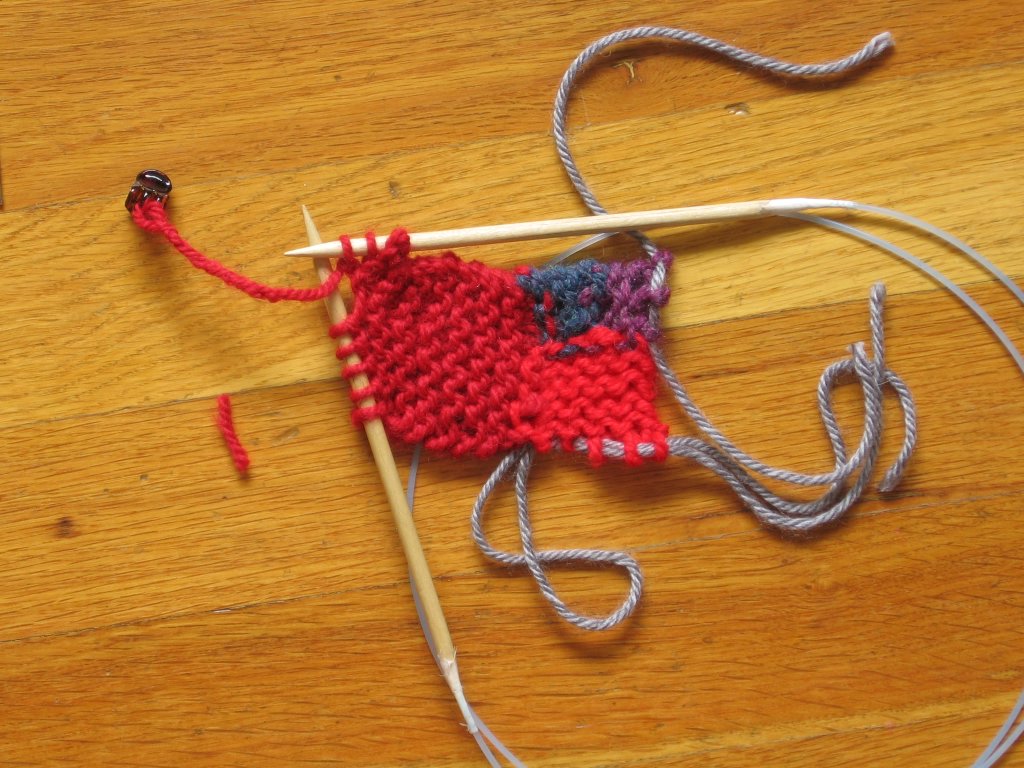
Pull the yarn end through, and then clip it off, flush. If this were a really nice wool yarn, I’d now wet my fingers with spit, rub the place where the yarn end is located, really well, between my thumb and forefinger, and never see this yarn end, ever again. Since this is a wool-acrylic blend, it would be a waste of effort. This end is going to worm its way back out, and give me fits, at some point in the future, but I like to think positive.

Leave the little hair clip in place, and knit across the row. That last loop, which is held open and captive by the clip is rather difficult to slip into place, but with patience and fortitude, anything is possible. I’ve learned to work at the very tips of the needles for this last stitch, in order to keep from stretching things out of whack. All done! Now, rotate clockwise, pick-up and knit!
I tell you, everyone says that log cabin knitting is addictive, and they are right! I’m having a ball! Take a look at some of my squares…
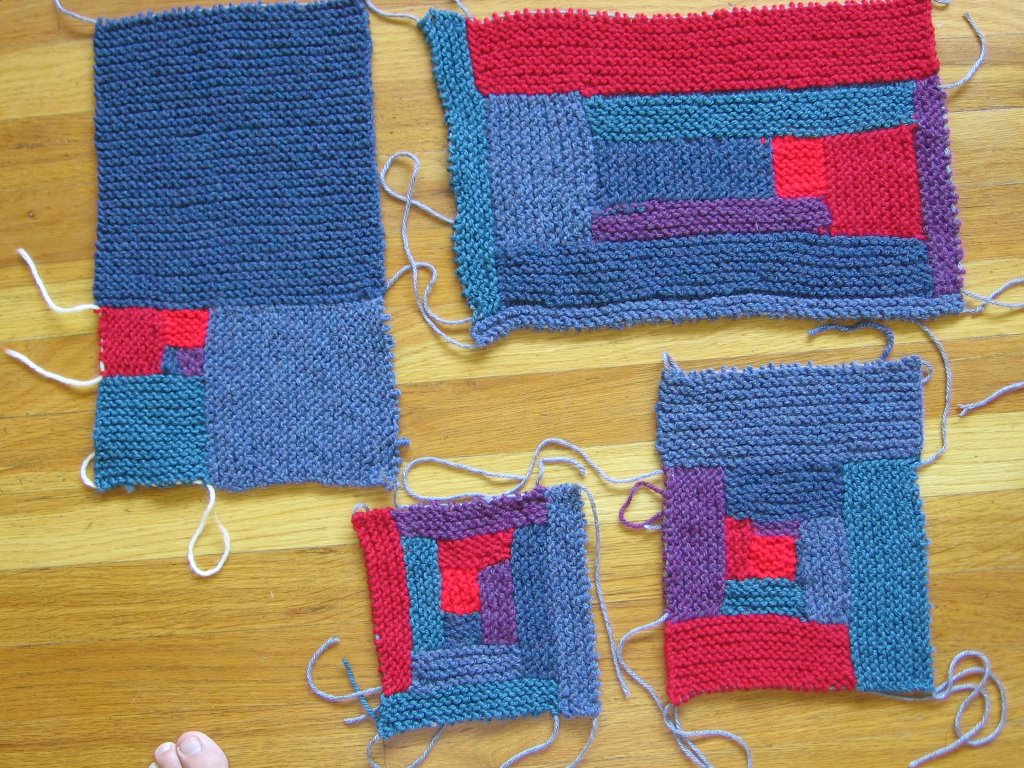
All of the squares (OK, rectangles) follow the same order of colors. They all have a bright red center, to represent the warm hearth fires in my little log cabin. The next color is a kind of a teal blue, then plum, then a deep red, followed by a sort of teal green, and a denim blue is the last color in the sequence. All of these squares follow this sequence, but they look very different! If one trip around the sequence created a smallish square, then I just went around again, skipping the hearth fires. The one on the upper right is my first attempt, back when I didn’t realize that I had to end on the wrong side, and you can see the tiny bit of non-garter stitch which resulted, before I figured it out. This horrifying mistake can be seen most clearly at the dark red-teal green interface. Oh, the horrors. This one was knitted as www.Januaryone.comsuggests, with the number of ridges being randomly assigned. The one below it has the red hearth fire, then one ridge of color number one, two ridges of color number two, and so on. The one on the lower left has the same number of ridges in all of the logs. My darling Grace got wind of what I was doing, ran to fetch her science book (click for larger photo), and presented me with the Fibonacci Sequence…

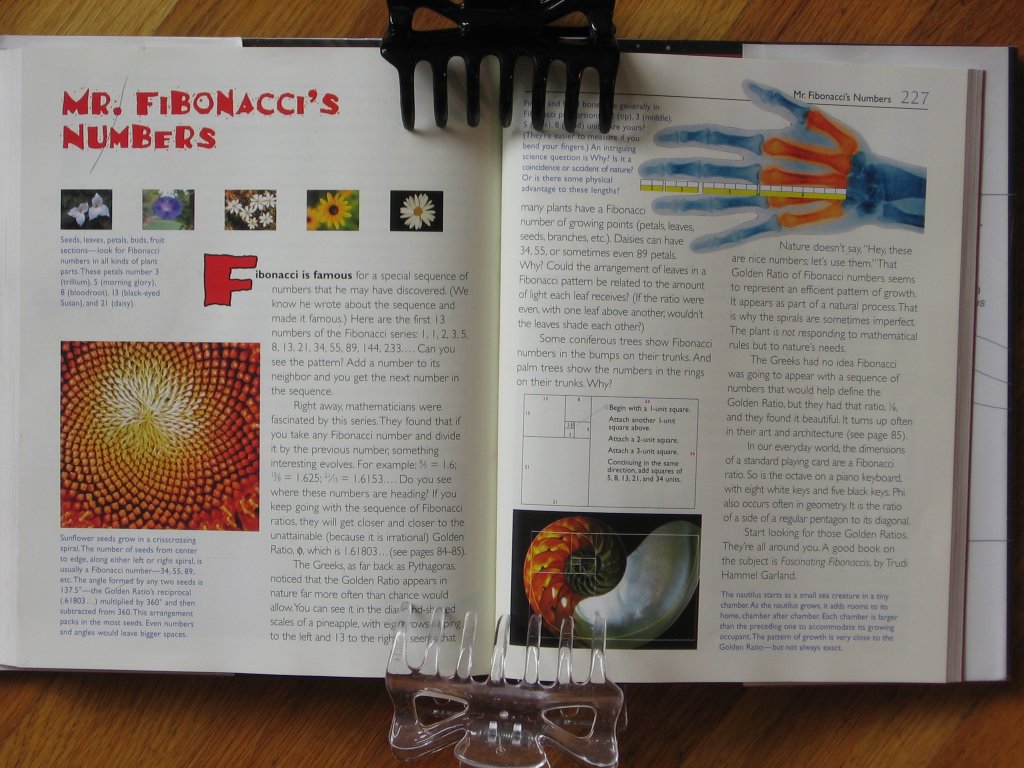
…so I had to knit up one of these, too. What fun! Maybe, in the future, I'll knit an afghan out of nothing but Fibonacci Sequence rectangles.
You’ll notice a distracting bit of … what would you call it…. A bit of “drawing in” right at the picked-up line. It is most noticeable on the left side of the largest square in the above photo. Of course, I’ve knitted *lots* of squares since this photo was taken, and I keep trying to wish this problem away… and it’s not working! The problem keeps occurring! Now that I’ve applied a bit of brainpower to the situation, I think that I’m going to try picking-up this first row with a larger-gauge needle then the rest of the knitting. Do you think that this will solve my problem? Hmmm…


2 comments:
Neat!!!
Hey! I'm working an a log cabin blanket right now too! And I ALSO don't bind off. I would needle myself in the eyeballs if I had to pcik up all those stitches. No way! It looks great...I'm going to have to study your tutorial a little more! :)
Post a Comment