.
A friend who knows me in person was wondering why it sounds like I'm lisping in my latest video, when in fact, I don't lisp. Her husband is an audio expert, and he explained it perfectly. So, to expand the general knowledge in the universe, or at least in the blogosphere, here's the problem and the cure.
Ben says that I was standing too far away from the microphone, which is built into the camera. He says that high frequency sounds, the "s" sound in my case, is being picked up better than the lower tones, so all you hear is the hissing "s" sound, and that the further you get from the mike, the worse the problem. He says that this problem is exacerbated when recording outdoors. Two strikes against me - too far from the mike and outdoor recording.
There you go. Problem identified and problem solved. I love it when this happens. Thanks Ben! Thanks Karen!
This is great news because I have plans on doing a couple more videos in the coming months. My kids have a nice recording device, so maybe I can put them on the job as my audio engineers, heh.
.
There IS a Spinning Fairy!
.
And she passed by my house! I'm the luckiest spinner on earth!!!
Take a look at the goodies which she left for me....

A nice big wad of cotton punis...

My girls have had so much fun with the newspaper that it's wrapped in!
A nice big wad of.... *swoon*..... cashmere.....

Two completely beautiful spindles, and three completely beautiful spindle dishes -

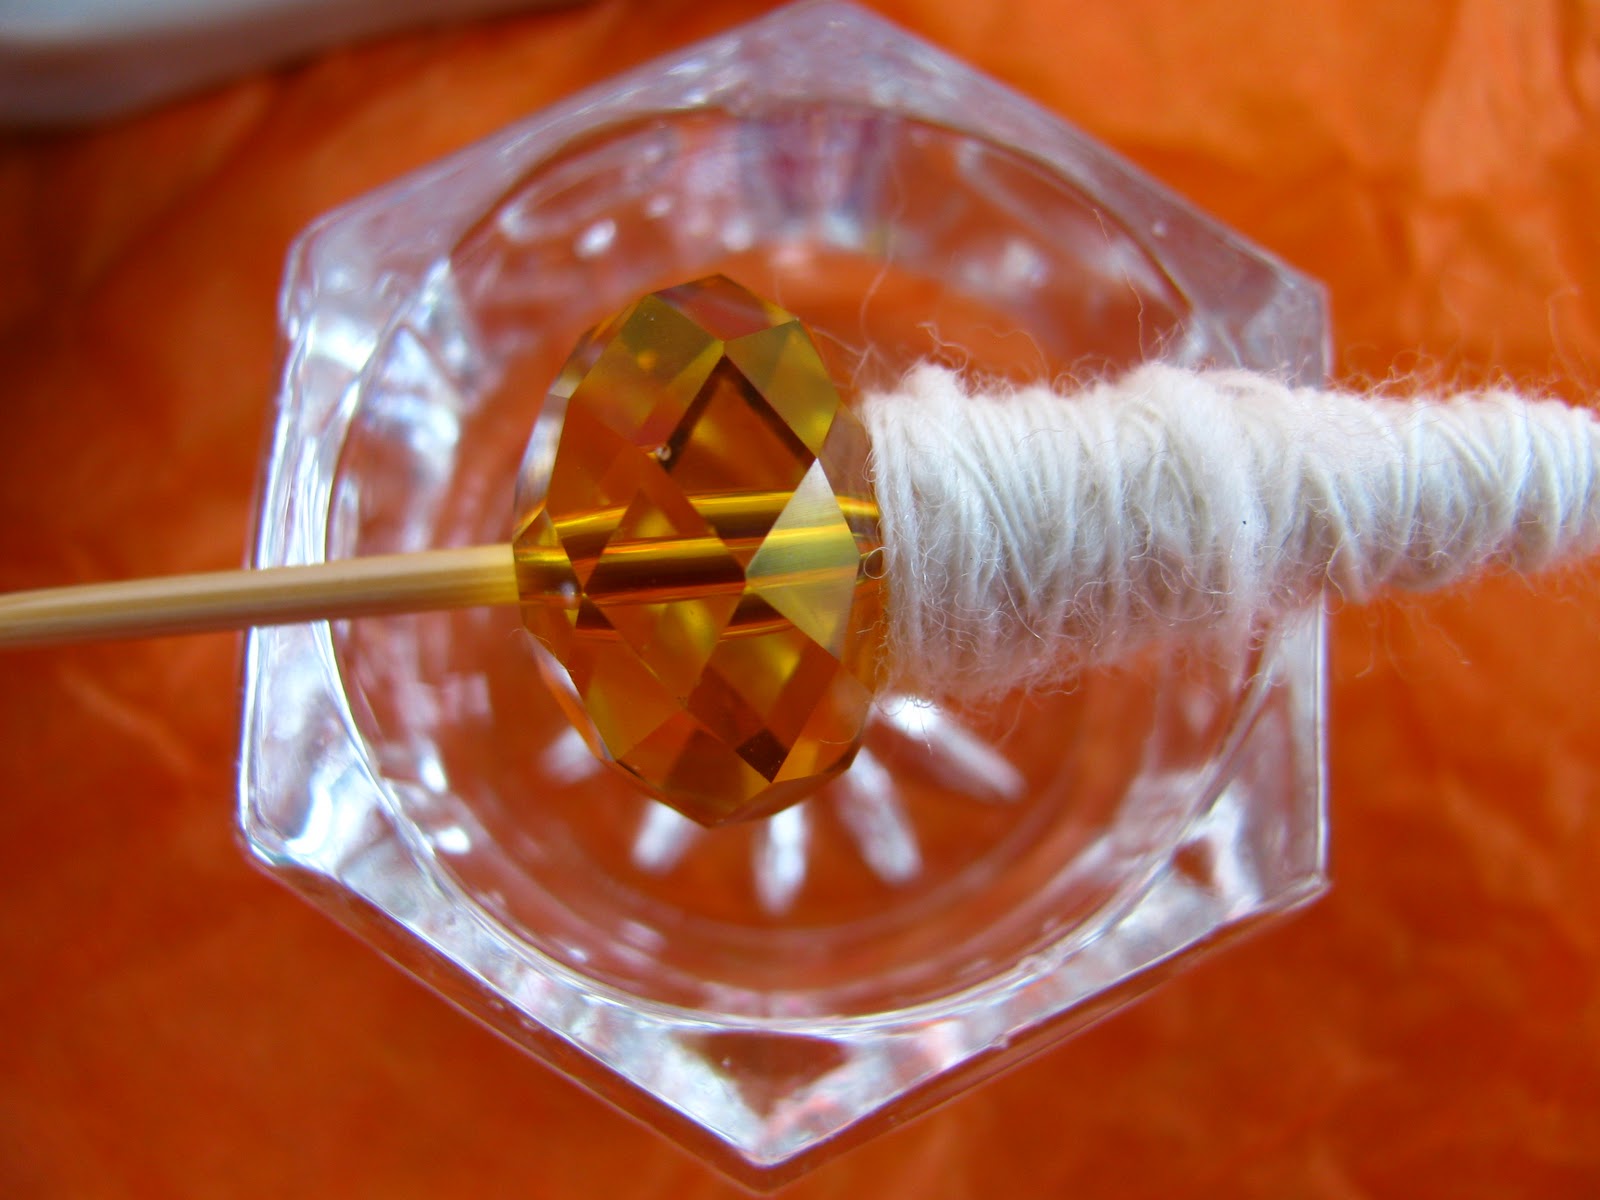
- one is a Swarovski cyrstal in a beautiful deep golden color, with a matching salt cellar dish,

and the other spindle has these three lovely greeny bluey browney beads, with a matching dish.

Both of them spin like dervishes - really REALLY fast, but the crystal one just zips like you wouldn't believe. I love them so much. The wooden dish was turned by my friend, and actually, I think that I like it the best.
Here is a quick little video to fuel your creative juices -
(That's a little bit of merino on the spindles - I want to get used to them before I spin the cashmere and the cotton.)
Wait, there's more!
Cute, colorful bookmarks to keep my place in my favorite spining books, and a darling little pair of knitting needles IN MY MOST FAVORITE SIZE HOW DID SHE KNOW?

A way too cute cup coaster -

check out these guys, look at their little googley eyes!

Look at the darling little thatched roofs and the stone fences!

She picked up this coaster on a recent trip to Scotland. I love it. I want to go there and see these sheep and these houses and these walls.
She also sent a magazine article which talks about a bridge project in my home town. I really appreciate this, too!
I'm such a very lucky woman to have such a good friend! Thanks, Susan!!!
And she passed by my house! I'm the luckiest spinner on earth!!!
Take a look at the goodies which she left for me....

A nice big wad of cotton punis...

A nice big wad of.... *swoon*..... cashmere.....

Two completely beautiful spindles, and three completely beautiful spindle dishes -

- one is a Swarovski cyrstal in a beautiful deep golden color, with a matching salt cellar dish,
and the other spindle has these three lovely greeny bluey browney beads, with a matching dish.

Both of them spin like dervishes - really REALLY fast, but the crystal one just zips like you wouldn't believe. I love them so much. The wooden dish was turned by my friend, and actually, I think that I like it the best.
Here is a quick little video to fuel your creative juices -
(That's a little bit of merino on the spindles - I want to get used to them before I spin the cashmere and the cotton.)
Wait, there's more!
Cute, colorful bookmarks to keep my place in my favorite spining books, and a darling little pair of knitting needles IN MY MOST FAVORITE SIZE HOW DID SHE KNOW?

A way too cute cup coaster -

check out these guys, look at their little googley eyes!

Look at the darling little thatched roofs and the stone fences!

She picked up this coaster on a recent trip to Scotland. I love it. I want to go there and see these sheep and these houses and these walls.
She also sent a magazine article which talks about a bridge project in my home town. I really appreciate this, too!
I'm such a very lucky woman to have such a good friend! Thanks, Susan!!!
Update to Tammy Rizzo's Navajo Ply on the Fly technique.
Finally!
I've finally found the time to make this video. Let me tell you, it takes so very long to make a 10 minute video!
I hope you enjoy, and I hope this video helps you to enjoy this technique. It's my favorite way to spin.
A friend pointed out that if you are viewing this on blogger, then you don't have the sidebar. Thanks, Karen! I hadn't thought of that... So, here's the "sidebar" links which I promised in the video. Enjoy!
(Karen also said that she's going to ask her husband, who knows about audio stuff, why I sound like I'm lisping.)
Links of interest -
my first video, showing you how to start the spindle,
EyeDazzler Alpacas
Dazzler's Best - where you can buy some of that yummy alpaca blend
Fiber Beat Podcast and Videos
Navajo Ply on the Fly, Navajo ply on fly, tammy rizzo, navajo spinning, hand spinning, spinning, spindle spinning
Simple Knitting Bag Solutions
Sometimes, it's the simple things which can make life so much... well... simpler.
I love backpacks, but I don't like how everything ends up in a jumble in the bottom of the pack - especially if the backpack contains my knitting, and all of the little doodads which seem to accompany any knitting project. I solved this problem by making my pack a two-storey pack.


I put two cut-down jugs in the bottom of the pack.


The sweater-in-progress sits on top, the notebooks slide between the jugs and the pack side, and the doodads stay in the bottom without getting all tangled up in the sweater. I have outfitted my knocking-around back pack in a similar way, too, with life's little doodads in the bottom (laptop cord, pencils, hair clips and etc, and larger items can sit on top (books, notebooks and etc.) If your zipper goes all the way to the bottom of the pack, then you don't have to unpack the upper storey in order to access the lower storey. It works great.
If you don't have jugs, then maybe you could use a cut-down box. You might like to devise a divider - it's the thing in the middle which keeps the knitting from falling down into the lower storey and getting all jumbled up with the doodads.
Another kind of bag that I like to use is the humble tote sack. What troubles me about tote sacks is that they don't stand up, and when the sack flops over, then all of my stuff tumbles out, too.

If you put a box into the bottom of the bag, then you eliminate the problem - voila! the bag stands on its own just fine, even when it's empty.

I can put my knitting or spinning project into the box, and any paper work or books can slide in between the box and the wall of the bag.
The bag with the purple handles has a shoe box in the bottom, and the other bag has a hair dryer box in it.

This particular tote sack is way too narrow for a shoebox. My daughters just bought a new hairdryer and it fits perfectly, ha! I just love it when my trash is useful. This bag will be just right for a couple of spindles and a whole bunch of fiber...
Industrial Percussion
My son, Sam, attends Rocky Mountain College of Art and Design, where he's studying to become a computer animator. This was his final for his Sound in Animation and Video class. I think that he did an excellent job. His friend, Zack, is shown in most of the video, but Sam is the handsome lad who is drinking coffee.
Enjoy!
Darling knitted creatures!

These animals are so much fun to knit! The patterns are very well written and easy to follow. They are written for knitting on double points, but with a little figuring, you could easily knit them with two circulars, or with the Magic Loop. They don’t use much yarn, so they are excellent for using up those bits and pieces in your stash.
Since they are small, they make excellent travel projects. Personally, I think that they make the perfect coffee shop knitting project - they are small, so you don't have to carry a big old bag, they are very oddly shaped, so you get interesting stares, and should someone gather up the gumption to come over and ask what you are knitting - well, nothing stops 'em dead like this response, "oh, I'm knitting a two headed alien..." heh.
Since they are small, they make excellent travel projects. Personally, I think that they make the perfect coffee shop knitting project - they are small, so you don't have to carry a big old bag, they are very oddly shaped, so you get interesting stares, and should someone gather up the gumption to come over and ask what you are knitting - well, nothing stops 'em dead like this response, "oh, I'm knitting a two headed alien..." heh.
I especially admire the shaping on these darling creatures. For instance, look at T Rex from the side

– see how she has a nice straight back, and a round, poochy belly? That’s not due to manipulation of the stuffing, that’s due to cleverly placed decreases. The patterns are written so that the animals really have personality, and from there, it’s easy to personalize.

I think that it would be lots of fun to needle felt designs onto the completed animal. Let your imagination soar! Flowers? Initials? Team-Jersey numbers?
These patterns would be suitable for many levels of knitting ability. While they would not be suitable as one’s very first knitting project, they would be a great way for a beginner to advance his or her knitting skills. Each pattern set features detailed instructions for the various abbreviations used in the pattern, and you can visit the designer’s web site for written AND video demonstration of any techniques that you might not know how to do. The online tutorials are very clear and well presented.
Another interesting point is that many of the techniques used in these patterns come straight out of sock knitting. For example, T Rex has a perfect sock-heel head. Triceratops has a short-row head. If you are interested in sock knitting, then these patterns would be a fun way for you to learn the various techniques.
Please note that I knitted these animals with very different gauges. If they were all knitted with the same yarn and the same needles, they’d all be just about the same size. In other words, if I had knitted the horse with the same yarn and the same needles as for T Rex,


they’d be the same size, believe it or not! Now, just imagine a menagerie of Tiny Dinosaurs, Safari Creatures and Aliens! How much fun!
T Rex – knitted with one strand of Lamb’s Pride (wool and mohair), and one strand of Broadway (acrylic, mohair, poly, metallic, nylon) held together, on size US 10 dpns, at a gauge of about 2 ½ stitches per inch. Her eyes are made of Cascade 220, tripled and french knotted, with a french knot of black Wildefoote sock yarn for the pupil. She’s a big ole gal who measures approximately 26 inches from her sharp teeth to the tip of her pointy tail. I assembled her according to the pattern with no modifications, other than her head ornament. Since she has no ears, being a dinosaur and all, her head seemed oddly bare. She needed a hat.


She stands (sits?) about 11 inches tall, and isn’t she beautiful?
Triceratops – knitted with two colors of Cascade Jewel (wool), a thick and thin yarn, and two colors of stashbusting sparkley yarn.


I call him "Lamont," because I worked on him on our drives back and forth to Denver, to watch Grace perform as part of her stint at the Lamont School of Music (see my post of July 2).
It was great fun to blend the colors, especially since I wasn’t sure how it would all come together until he was all sewn up. I knitted him on size US 7 dpns at a gauge of approximately ...ummm… let’s just call it a variable gauge, due to the thick and thin nature of the yarn. Knitted at this gauge, he stands about 5 inches tall, and is about 17 inches long.
I assembled him a little askew in order to give him something of an inquisitive air.


In order to sort of sculpt him into shape, I assembled him by using dpns to prop up his neck and head in order to hold him in position while I figured out the proper angle with which to attach his tail. It gives him personality, I think.
she is the darling of the bunch with her little diminutive self. She was knitted out of Fino, a laceweight Alpaca yarn, on US 00 dpns, at a gauge of approximately 10 stitches per inch. Her mane and hooves were made out of a little bit of Wildefoote sock yarn.

She’s approximately 3 inches tall, and she has a marble in her abdomen to help keep her from falling over. She is made from the Zebra pattern in the Safari Friends collection.

Just imagine how much fun it would be to knit an Appaloosa, or a Clydesdale? How about a paint or a Palomino? What fun it would be to needle-felt a little saddle or make a bridle out of ribbon? The mind boggles.


In order to sort of sculpt him into shape, I assembled him by using dpns to prop up his neck and head in order to hold him in position while I figured out the proper angle with which to attach his tail. It gives him personality, I think.

she is the darling of the bunch with her little diminutive self. She was knitted out of Fino, a laceweight Alpaca yarn, on US 00 dpns, at a gauge of approximately 10 stitches per inch. Her mane and hooves were made out of a little bit of Wildefoote sock yarn.

She’s approximately 3 inches tall, and she has a marble in her abdomen to help keep her from falling over. She is made from the Zebra pattern in the Safari Friends collection.

Just imagine how much fun it would be to knit an Appaloosa, or a Clydesdale? How about a paint or a Palomino? What fun it would be to needle-felt a little saddle or make a bridle out of ribbon? The mind boggles.
Gamma the Two Headed Alien – knitted with acrylic out of my stash, on size US 7 dpns, at a gauge of about 6 stitches per inch.


He and She measures about 9 inches tall. I loved knitting the eyeballs. After I attached the eyes to the heads, my daughter insisted that I leave the strings hanging, instead of hiding them. I agree with her – it gives a cute moustachey look.
Gamma is from the Take Me To Your Leader collection.
I think that most of these Alien models would be able to wear doll clothes. Imagine Gamma in a little vest? I know that my girls would have dressed Gamma, were he and she knitted about 10 years ago!

She is knitted with one strand of variegated mohair and one strand of Peruvian Tweed Alpaca held together, on size US 3 dpns, at a gauge of approximately 4 stitches per inch. She sits about 7 inches tall. This elephant, with no legs, would make an adorable baby toy, too. I moussed her ears to to encourage them to stay “outstretched – mousse works great with animal fibers.


Isn't this just the cutest thing you have ever seen?
These creatures are so much fun to make. Give them stripes – give them sparkles – sew on decorations – needle felt onto the completed animal - Let your imagination soar!
Screw Spinning

A few weeks ago, I had the good fortune to spend the day helping my friends Allie and Phil at their annual Alpaca Shearing Day.
As the alpacas are shorn, their fleeces are sorted into bags - the main fleece, the neck, and the trash. In slow times, I'd poke around in the trash barrel and oooohhhh and ahhhhhh at what was being thrown away! I wanted to spin that stuff so badly! Allie and Phil have such gorgeous alpacas that their refuse is stunning, lol. So, being the rude person that I am and all, I poked around in the storage room, hoping to find something that I could use as a spindle, because I just couldn't stand looking at that lovely fiber and not spinning it. I'm sure that you understand.
Voila! I found this long screw. Excellent! Actually, it spun very nicely. My friend, Peggy, snapped the photo, above, using a flash - the screw is actually spinning, and I am actually making yarn. WOOT. The only problem is this - I'd spin a length,

and then wind on, and I put a hitch, then spun another length. Then, I'd have to pick out the previous hitch, wind on, and put in another hitch. This was a royal PITA with the screw because of how the yarn would bury itself in the threads.
Back into the storage room.
Sorry Phil.... you were really busy.... I should have asked.....
Anyway, I found a bite block, which was a stick about an inch in diameter and about 6 inches long, and covered in Alpaca Puke (ICK), and I thought that I'd try this.
It worked very well. After a while, I gave up picking out the previous hitch, and would just wind on top of it, thinking that I'd deal with the problem later.
Truth be told, I never dealt with it. I never got to do enough spinning for it to be much of an issue. We were kind of busy.

I showed this photo to my son, and he exclaimed, "OH! Alpaca poi!"
Silly boy.
Anyway.....
So, take a look at this photo!

(The photo is of such high quality that if you click on the link above, you can enlarge your view numerous times and still have a clear idea of what's going on.)
Look at where his yarn meets his yarn ball - there's a little stick there. *facepalm. Of course. Why didn't I think of that. So simple. It would be such an easy thing to just pin that stick in there and no need for picking-out-of-hitches.
I wonder if his apindle-stick was coated in Alpaca puke? Take a look at the size of that ball of yarn, will ya? I wonder what he's spinning? His fiber looks sort of stringy/hairy. I wonder if this is the end of his supply - or, maybe he has a basket of fiber behind his right leg? I want to know more about this man and his spinning....
If I had poked around in that storage room, just one more time, I bet that I could have found a small nail.

Un Sospiro - Grace Thomas
Number 3 in D flat major - Un Sospiro by Franz Liszt
PianoKnitterGirl is at it again! My daughter, Grace, is currently studying at the Lamont School of Music, Summer Pre-College Academy. She was selected to perform in their Honors Recital, which was held last night, in the Hamilton Recital hall in the Newman Center of the Performing Arts. Oh My Gosh, what a facility! She will perform with her Chamber Ensemble tonight, July 2, in the same location, 7:30 pm, in case anyone is up for an evening of a variety of chamber groups. Join us! I'll be the one who is grinning like an idiot, possibly knitting.
Their final big blowout performance will be held on Saturday at 1:30 in the Gates Hall which is quite a stunning performance hall. Grace will be performing again, with a woodwinds ensemble, I think - not sure. This event will feature an all-school choir, a number of large ensemble groups, and an orchestra. It should be perfectly delightful.
All of these performances are free, and open to the public.
If you know of any high-school-age student, who is serious about music, please direct them to the Lamont Pre College program. Grace attended last year, and again this year. She just loves it, and she has never worked so hard in her entire life. Kids attend from all over the country. They study music from dawn to dusk, and they really grow as musicians. It's worth every penny.
Colonial Spindles?
I really enjoy reading about the history of fiber arts, particularly from a European/North American perspective. I just stumbled across this article, Request for Documentation!, and I found it very interesting. Maybe you'll like it, too.
Of course, I did my "stumbling" on Ravelry. Last week, I found this nugget on Ravelry - The Hearth Library. Oh My. Notice the search function - I typed "spinning" and I got 1127 books. What fun!
Of course, I did my "stumbling" on Ravelry. Last week, I found this nugget on Ravelry - The Hearth Library. Oh My. Notice the search function - I typed "spinning" and I got 1127 books. What fun!
Felted Rocks!

A couple of weeks ago, my daughter, Grace, and I decided to make little purses. We wet-felted some merino onto rocks! It was fun, relatively easy, and the purses came out really cute.
Here are my purses, next to the rocks that I used. Too bad that I didn't include a measuring device - the blue one is approximately 2.5 inches in diameter, and the green one is approximately 3 by 4 inches.

Here is the other side of the purses. The blue one is pretty much the same on both sides - the center bead is a little different, but that's all. The green purse...had a problem. See how the rock is white? Well, so was the wool, and I couldn't tell that the wool was REALLY thin in one little spot. So, I needle felted some colorful yarn over the thin spot. Where the yarns lie side by side, they are hiding the thin spot. Hey, it worked! It might not be terribly attactive, but it worked! The yarn provides strength to a really weak spot.
If I do this again, I'll either use non-white rocks, or I'll cut the neck out of a balloon, and then stretch the balloon over the rock. Then, I don't think I'll end up with thin spots.

So, here's how we did it. We wrapped the rock in saran wrap. Then, we layered thin whispy bits of merino top this way and that, wetting slightly to get it to all hold together - sort of. We dabbed a bar of Ivory bath soap here and there, and gently rubbed to get the wispy ends of the fiber to lie down and behave. The gentle rubbing causes foam to form, and this sort of holds everything together. We added more fiber, and gently rubbed some more. The rubbing was more of a turning and turning - like you would do with a bar of soap when you are washing your hands - that around-and-around motion.
When we were satisfied that we had added enough fiber, we dropped the rock into the toe of a knee high stocking, and sort of twisted the stocking so that the rock was held firmly in the toe of the stocking. Then, we jiggled it with an orbital sander. No sandpaper was attached - we just held the rock up to the rubber pad on the orbital sander. We'd sort of gently rotate the rock while jiggling it, around and around. It worked great!
After making sure that all parts of the rock had been jiggled, we rinsed the rock and took it out of the stocking to test for felting. We'd do this by poking (it should feel firm, and not spongy or cushy) and by pulling (no fibers should be able to pull free from the surface). When we were satisfied with the felting, we rinsed out all of the soap, and then we dunked the rock into a really hot pot of water, and then dunked the rock into a really cold pot of water, and we repeated this a few times. This finished up the felting process, nicely.
Grace and I did the dyeing parts differently. I dyed my rock purses by simply heating them up in a pot of koolaid - Lemon Lime for the green purse, and Berry Blue for the blue purse. I stuck the purse in there, rock and all - I was afraid that if I had cut the rock out, that the cut edges would stretch or something. Grace cut her rock out, and dyed her purse in Rit. Her way worked better, as it dyed the felt through and through. My purses dyed only on the outer surface, which isn't a huge problem, but I think it looks nicer to have the inside dyed, too. Oh, and her edges stayed nice.
After dyeing, we let the bags dry. Mine were still on their rocks, so I hung them in net bags so that all sides could dry.
We cut the rocks out by slicing the felt with an Xacto knife. This was much easier than I had anticipated. I adjusted the opening so as to receive a zipper - I sort of squared the edges of the slit.

We sewed in zippers. The little blue bag has a really old, really soft zipper, and it was very easy to install.

Sorta looks like a Muppet.

This purse is really small, so I had to cut the zipper. First, I made sure that the installation was just how I wanted it, then I whipped the zipper closed. Then, I cut the zipper, and whipped over the edge.

As a finishing touch, I whip stitched the outer edge of the zipper tape to the inside of the bag, just to sort of make it neater on the inside.
This green zipper was so soft, that it followed the curve of the opening without any further work.

However, this pink zipper is rather stiff, so I had to do a little extra work in order to make it lie nicely.

Can you see the whip stitch over the edge? Now, can you see the running stitch just inside of the whip stitch? Now, can you see the small vertical slits cut into the zipper tape? Each running stitch goes over one of the slits. Can you see them? This allowed the zipper to curve nicely.
First, I sewed the zipper into place - I used numerous rounds of whip stitch to hold it into place. Then, I cut and finished the end of the zipper.
Next, I cut the slits into the zipper tape, and then I ran the running stitch, gently pulling the thread to make the zipper curve. Then, I knotted the thread, holding the curve into place. Last, I whipped the edges of the tape into place. I think that it turned out nicely.
I stuffed the purse with net bags (onion bags) and zipped it closed, and then needle felted the yarn onto the outside of the bag.

Here is Grace's purse. She added a strap so that she can use it as a shoulder bag. It is so cute!!!

See how hers is dyed inside and out. This looks much nicer. Do you have any idea how hard it is to take a photo of a black hole?
In the photo below, and in the first photo of the black purse - I had to adjust the exposure so that it would show up nicely - in reality, the purse is jet black. These photos seem to show that the purse has a greyish tinge, but no, that's just the exposure. The entire purse is like in the photo above - BLACK!
In the photo below, and in the first photo of the black purse - I had to adjust the exposure so that it would show up nicely - in reality, the purse is jet black. These photos seem to show that the purse has a greyish tinge, but no, that's just the exposure. The entire purse is like in the photo above - BLACK!

Since she was planning to make a proper purse, she made her felt pretty thick so that it would be durable. My purses were to be small, "treasure" bags, and I wanted for mine to be pretty thin.
This was a very fun project - and, wow, your hands are never as clean as they are after a wet felting project!!!
(All photos click for big, and click again for even bigger.)
Enjoy!
Subscribe to:
Posts (Atom)

