Knitting in the Mountains, ahhhhhh.......

Look where we went last weekend! These are stunningly beautiful mountains, and it was a lovely drive.

We stopped at the turnoff to Bear and Blue lakes, right past Cuchara, Colorado. We were hesitant to drive very far down the road, due to all of the snow, so we just parked our car, pulled out our blankets and our picnic lunch and our sleds and our knitting and we had ourselves a real nice day.


Actually, Grace pulled out her crochet project. Take a look at this girl - does she know how to live, or what? She is wearing my mitts, she has her bag of chocolate at hand, and right beyond that, her coffee. She is wearing my nice, warm snow boots, and she's leaning up against my nice, warm husband. OK, so he's her nice, warm daddy, but still! There's room for only one fiber artist to lean against his back, and she snuck into my spot while I was busy taking pictures.


She's making this up as she goes along, and it's coming out real nice. She's crocheting a tiny purse, and she's doing a great job.


Emma built a snowman - isn't he handsome?

...and I worked on my green socks...


...while listening to the music of this babbling brook. Aaahhhhhhhh..... I doesn't get much better than this! (Notice, I'm wearing my Mod Socks and the boots that they were knitted for. Also notice the Very Warm Feet)


Sam threw snowballs - do boys ever out-grow this?


Oh, yeah, and he did the Marlboro Man thing... How fetching, with the potty shack in the background and all... oops.


Mack is busy being Grace's backrest. Tough job.

Then, we sledded a bit. Even this old lady participated - see, that's me at the top of the picture.


See the rainbows? Click for a larger picture. I just *love* it when this happens. Of course, in "real life" it was much more colorful and sparkley.

Brothers are good sled pushers...

WHEEE!

I know, you've already had enough of the photos of the snow, but bear with me, as I haven't.

Sisters can push sleds, too.

Yes - this is a photo opportunity. We've captured every single curl on film. This is a houseful of people with perfectly straight hair - any curl is a photo op, and cause for general rejoicing. Yippee! A curl! We should go sledding more often!

Then, between last Sunday and today, we've had a very busy week. I finished my green socks, and I finished and turned in the knitted doileys. (Wait until you see the picture of the second one - it came out so much better than the first one.) We had play practice every night of the week, which *really* cuts into my knitting time, and today was the children's piano recital. Whew! A fun week, but a busy one, too.

Next week - Opening Night yay, then FINALLY, I can get back to real life and REAL knitting. My kids and I have been involved in a string of plays - A Funny Thing Happened on the Way to the Forum in October, then right after that, Nunsense in Mid December. Then, Christmas shopping, knitting and general hubbub, then a short break. After the First of the Year, I volunteered to work on props for Come Back to the Five and Dime Jimmy Dean, Jimmy Dean, and then this latest one - A Broadway Review, in which Grace and Emma are performing, as well. So, except for a short break around Christmas, we've been involved in one play or another since late summer, when production for Forum started. Whew! Pant! Pant! We are done for a while, and I don't know whether to be happy or sad. Theater *really* gets under your skin... I can't say no!

I am anxious to complete my Log Cabin Blanket, which is languishing in a backpack, somewhere in the house, and I want to really sink my teeth into Heere Be Dragones, so I'll be really happy to have my evenings back. I'm also working on yet another Red Tent Blanket - this time, in a wonderful sock yarn, believe it or not! So, stay tuned for more knitting! I'm itching to get back to spinning, too. Ahhhh.... spring is upon us, and it's time to get my garden in order. If it's not one thing (to get in the way of knitting and spinning), it's another. Sigh.


"Someday" is today!

I've been saying, "Someday, I am going to knit a nice lacey little doiley," and also, "Someday, I'm going to get myself a set of blocking wires," and "Someday, I'm going to knit something out of my Lace books by Marianne Kinzel ," and don't forget, "Someday, I'm going to find a use for that big block of styrofoam in the office closet - you know the one that falls on my head every time I open the closet door? Yeah, that one,"

Well... "Someday" is today!

A friend of mine is the curator at the Bessemer Historical Society Museum, a brand new museum which is just setting up. She asked for a knitted doiley for one of the exhibits - so - why not! I started knitting!

I knitted the Azalea pattern out of Modern Lace Knitting, and it was much MUCH easier than I thought it would be. In fact, it was so enjoyable that I cast on for another doiley - a pattern from Yarnover.net.

Take a look at how many pins are necessary for blocking this doiley? EIGHT! Actually, I could have done it with only 6, but I pinned down the ends of the wire for a prettier photo, lol. Without the blocking wires? It would have taken a jillion pins. I *knew* that I wanted a set of blocking wires, and wow, they are really nice, and makes blocking such an easy thing I know that the pattern doesn't show up very well against a white tea towel, but use your imagination - it is a really nice little doiley, lol. A little light starch; a styrofoam block to pin to; life is good.

Which reminds me - have you read the book, Life is So Good, by George Dawson? If not, then run to your nearest library and read it. It's such a wonderful book. You should read it. Really, you should.

Want to know what I've learned, today? Cotton doiley yarn is completely unforgiving of tension irregularities! Aarrgghh! I just took my doiley off of the blocking wires, and put it on something black, and ... well ... maybe I ought to knit a few more, just to get it right, lol.


Mod Socks, lol


How about these "Mod" socks, eh? The colors don't show up correctly on my monitor - they should be Chocolate Brown, Peach, Avocado Green, and Pumpkin Orange. Hey! It wasn't until I typed this in that I realized that these are all foods, lol!

A while back my friend gave me a huge box of yarn that was from her Mother in Law's basement - in other words, straight out of the early 70's. Can you read the labels? Tangle Proof! Washable Colors! I didn't know that there was ever wool yarn with the Red Heart label - I thought that Red Heart was only icky acrylic stuff.
This yarn is *really* nice - it is firmly plied and a nice weight. The colors are way too cool too, lol. As you can see, the repeat in the variegation is almost exactly one round on the socks - a wonderful, stripey surprise!

I haven't knitted socks in soooooo long; it was fun to knit a pair again. First, I cast on at the toe with 8 stitches. Have you ever cast-on by wrapping the yarn around and around two needles? It’s like the figure-8 cast on, only a hundred times easier, and better, and nicer, and more wonderful, and just the best, lol. I think that there is an illustration in the Gathering of Lace book, so check it out.

I increased gradually until I had 36 stitches per sock – do you know the trick about increasing 4 stitches per increase round, except for the very last increase round? You spread these last 4 increase stitches over two or even more rounds, so that you don’t get those annoying “corners.” The corners only show when the socks are off of your feet, but it’s such an easy fix that there’s no reason not to do it this way all of the time.

OK, where was I, lol? I knit the foot-part of the sock for 6.75 inches and then I put in a waste yarn - do you know how? I knit two socks on one circ - magic loop - and this is how I put in the waste yarn. I knit across half of the first sock with the waste yarn, then turn it around and knit back with the waste yarn. Cut the waste yarn, and tie the two ends together. Then, knit across with the sock yarn. Repeat on the second sock, and now, I'm back in sock-knitting action.

As you can see, I started the ribbing way too early - chalk it up to sock knitting forgetfulness due to the fact that it's been too long since my last sock. I *should* have knitted in stockinette for about an inch, then commenced with the ribbing, but oops... I've cast on for my second pair with the green yarn, so I promise that I'll remember.

After the sock is finished, I go back and take out the waste yarn, and knit in a heel like this –

Put the stitches back onto the needles, and yes, I do both socks at the same time on my Magic Loops. Notice that at each side of the hole which results from removing the waste yarn, there is one "regular" stitch and one "sort of half way" stitch - knit these two together, putting the “regular” stitch on top. Put the socks onto your feet – possible with circs, but I don’t know how you’d do it on dpns - one side of the hole is under the arch of your foot, and the other side of the hole is at the back of your ankle - measure how much distance you have to knit in order to make it from one side of the gaping hole to the other. Find a nice, plain, even portion of the already-knitted sock, and see how many rows this works out to be. Since you are knitting from the edges of the gaping hole to the point of your heel, and then purse-stringing the final stitches together, you will need to knit only half of this many rows, get it? Now, you will have to do the math. You want to end the heel with 6 stitches, and you want the heel to have a certain shape - rounded, but rather flat at the very end.

This is how I figured it out – I want the last row to end with 6 stitches – second to last row, k2tog *every* stitch - third to last row - k2tog, *every other* stitch. I began the heel with 36 stitches, and I planned on doing a 6 point decrease, just like a hat, up until these last couple of rows.

Based on my measurements, I figured that I needed to knit 4.5 inches, which worked out to be 34 rows. Yes, I think that it works out better to take the entire measurement, and count the necessary rows for the entire measurement, then divide the number of rows by two, rather than dividing the measurement by two, and then counting the rows. Half of 34 = 17, so I wrote from 1 to 17 on a sheet of paper, and then worked backwards like this – Row 18 (yes, I added an extra row!) = 6 stitches. Row 17 = 12 stitches, which is the amount needed to k2tog, all around and end up with 6 stitches. Row 16 = 18 stitches, the number needed to k1, k2tog all around and end up with 12 stitches. Row 15 = 18 stitches, which is how many I end up with by decreasing at 6 points. Rows 14-12 = 24 stitches, Rows 11-8 = 30 stitches, and Rows 7-1 = 36 stitches.

In other words – pick up the stitches from the waste yarn, and knit plain for 7 rows. On row 8, decrease in 6 points, and knit plain for 3 more rows. On row 12, decrease at the same 6 points, and knit plain for 2 more rows. On row 15, decrease at 6 points, and knit plain for another row. On row 17, k1, k2tog all the way around. On row 18, knit 2 together all the way around. Cut the yarn, and run the tail through the last 6 stitches, and pull tightly. Work in the tail, very securely, over many stitches. Cut the yarn, but not too close – leave about an inch of a tail on the inside of the sock. When the heel felts a bit, with wearing, then you can cut the tail shorter without danger of it working its way out.

The heels came out perfect!

If I had used sock yarn, I would have had many more stitches on the needles to start with – something like 60-70 stitches - and I would have included more rounds of k2tog at the very end, and I would have included more rounds of k1, k2tog right before that, in order to produce a shape which barely reduced until the very end, where the reduction is abrupt, in order to knit a heel-shaped heel. No matter if the off-the-foot-shape is heel like or not, remember, knitting stretches and fits to the form. *smile* Anyway, if you work backwards, and concentrate your decreases near the finishing row, then you will knit a perfect peasant heel, too!

If you don’t like the shape of your finished heel, then rip it out and do it again, it goes fast. Keep notes, so that you know what works for you. When these heels wear out, you rip them out and knit a new heel. This *was* my original plan, but my LYS owner, Emily, suggests that maybe I would prefer to needle-felt a patch over the hole. What? Oh my gosh, what a wonderful idea! I’ll keep you posted on how this works. This yarn seems pretty durable, though, so it might not happen any time soon.

I've never knit or worn worsted weight socks before, and I was apprehensive, but now that they are finished, I just love them! I wanted worsted weight socks because my feet get so darned cold that for the last two years, I've gotten chilblains - what a complete and total bother! The way to prevent chilblains is to prevent your afflicted extremity from getting too cold, so - thick woolen socks! I have a nice pair of boots in which I clump around in all winter long, but I didn't have the appropriate socks until now. These socks work perfectly!

I wear them over a thin pair of cotton socks and my feet stay toasty warm, and the chilblains are kept at bay, yay! The cotton socks are an absolute necessity, otherwise it feels like I have uncooked grains of rice in my boots, lol. Yes, I tried to wear the socks inside out, and it still was quite bothersome, but with the inner socks, ahhhhhhh....... warm feet.

Dragon update and some discoveries

Yippee! I’m done with the first chart! On to charts 2a and 2b. Yay for me!

This is by far the most challenging knitting project that I’ve ever tackled. What a GREAT feeling that I’m actually able to knit this pattern. Yay for me!

Here is something that This Dragon has taught me about following complex charts - If you keep track of where you are by marking the row from *above* rather than from *below* then you are able to make sense of where you are sooooo much more easily! When you are knitting lace, you don’t need to know what’s going to come in future rows, but it sure is helpful to know what you did in the row below. You can look at your printed pattern, and look at your knitting, and find your bearings – something that’s not easy to do if your pattern is covered up by your marker.

Try it and you’ll see. Is this something known to everyone in the world except for me? If so, then y’all need to hang your heads in shame for not telling me sooner, because this has made all the difference in the world, and it means that I probably won’t have to rip out this project yet AGAIN!

Take a look at this handy set up. My son graciously allows me to use his music stand, and looky here
– the perfect knitting stand! There’s a place for my glasses, and for extra needles (I let them dangle in back, when I’m knitting), a nice little ledge for supporting the magnetic board, and place for a pencil and for my point protectors, which, by the way, are essential for this project. Oh the horrors – imagine if I set this down to get a cup of tea, and find that the cat has pulled the needles out of the knitting? I could cry just thinking about it.

Do they look a little odd for point protectors?
They are goofy little ear-plugs which are supposed to reduce the discomfort suffered by the child who is in an airplane. They don’t work for their intended purpose AT ALL, but they make dandy point protectors for size 2 needles, lol. (I pushed the little ceramic plug out first.)

I was bound and determined to make my own circs for this project, and while they are not the perfect solution, they work for me. I use a completely different technique for these tiny needles – maybe you’d like to learn how to make them in a size 4 or larger? Read my article in Knitter's Review for more information.

Here’s how to make them in a smaller size - -

First – find some bamboo skewers which are the size of the needle that you need. In my case, I needed a size 2 (US) and lo and behold, take a look at where I found them – in my kids’ pickup-stick box.
These silly kids never once touched these pick up sticks. What do they know? This was one of my favorite games as a child… anyway – the sticks are a perfect size 2, and the whole set, the box and all was only one dollar! Imagine that!

Select two sticks which are nice and smooth. Pare down each side of one end, as shown.
I drilled the tiny holes with a tiny screw driver, which you see on the left of the picture. My first attempts were drilled by twirling an Xacto knife blade to make the hole – as you see on the far right, and in the center, but it made a funnel-shaped hole, due to the shape of the blade, and it took away too much of the bamboo, which made the needle too weak in this spot. The tiny screwdriver works *perfectly*, so this is what I’ll use from now on. The screwdriver hole is the one on the left.

Thread the cording* as shown,
pull it tight, then wrap all in my old favorite Plumber’s tape, and you are ready for business. Oh – wait – you have to carve the points. For this project – my lace dragon and all of those knit 2 togethers and so on, I made the points really long and really sharp. Sand everything smooth with 2000 grit sandpaper and *then* thread the cording and wrap and so on. *NOTE – this is plain old sewing thread in the photo – I ran out of cording, read about it below…

The cording that I used for these needles is called “Tattu Magic,”
which my daughter bought at Hobby Lobby some time ago. I used the last of her batch (Oh my goodness would you look at that – another spindle whorl, lol) so I went back to Hobby Lobby for more. They don’t have it, and no one would admit that they ever sold it in the first place. They all, basically, called me a crazy person. I was not impressed. I was also desperate, so I bought this stuff called “C-thru” and it works in a desperate pinch, but it is not the best stuff. It is a braided nylon cord which is made for beading. It threads back and forth through the holes, and it sits quietly, waiting to be wrapped up in plumber’s tape much better than does the tattu magic, but it’s too wimpy to stand at attention when I am pushing the knitted stuff from the cord and onto the needle. But, it’s not terribly bad, and I’ll probably use this needle for something. Neither the C-thru or the Tattu Magic would work for larger needles, but they are mildly acceptable for these tiny needles. I need to find something else – something stiffer… any ideas? How thick is Fishing Line? I think that something about 0.5 mm-0.7mm would do the trick.

Notice that all of my needles feature a red end and a blue end. This is my high tech needle signaling method, lol. When I am holding the blue needle end in my left hand, then I’m ready to knit a right side row. When I’m holding the red needle in my left hand, then I’m ready to knit a wrong side row. Swift, eh? I know that some of you out there, who are way past me in the knitting arts are scratching your heads, trying to figure out how this can be of any importance at all, but let me tell you – us Kindergarten Knitters don’t always know, and it’s nice to have a little help, that’s all I’m saying. I’m really happy to have this little crutch. When I’m knitting on this dark plum lacy stuff in the late evening hours with my 47 year old eyes, well, I’m not always 100% sure which side is facing me. All of you youngsters – go ahead and laugh. Your day will come. Heh heh…

On this pair of circs, a little hole developed in the tape, revealing a hole in the needle
and as I’m knitting back and forth, looking at this little hole… looking at this little hole…. looking at this little hole… wondering why I’m wondering about this little hole… and wouldn’t you know – that little hole piped up and said to me, “Hey! What are you waiting for! Thread some dental floss through me and I’ll run a life line for you!” What a totally nice little hole! It works perfectly!

I used it with some dental “tape” which threaded through the hole very nicely, because the tape is rather stiff. But, it is soooooo curly, and not satisfactory for a life line. So, I made a little threader out of the tape, and used it to pull the dental floss through. The dental floss is too soft to poke through the hole. These pictures tell the story.


(The pointy end of the needle is to the left of the photo) See how the dental floss has been pulled through the whole of the knitting? See how simple? Yoohoo, all of you Knit Picks Options owners – your needles feature a built in little hole…

I nearly fainted from the joy of how terribly easy this is!!! Running a life line without a tapestry needle! Oh the Joy!

After about row 51, it became *seriously* apparent that a life line is necessary. After reaching row 51 for the THIRD TIME - - yes, I knitted to row 51, ripped out, knitted to row 51, ripped out, and then I figured that maybe I need to get into the habit of running a life line, lol. The thought of threading a tapestry needle and then picking up all of these stitches left me pale, so… you can imagine my glee when I figured out this little life line trick. ALL of my needles will soon feature little life-line holes! So easy to drill them – so easy to use them. Yay! Just knit across – push all of the knitting past the hole through which the dental floss is threaded, pull the dental floss out far enough to tie up the two ends, then push the knitting back to the end of the needle. Nice….. (You might be so sharp eyed that you noticed that I threaded it through backwards for this photo. This row was already knitted, so I ran the floss through afterwards, which meant that the knitting needed to be pushed towards the needle point. If I had threaded the floss through before the row was knitted, then the knitting would have been threaded onto the floss by pushing the knitting onto the cable, get it?)

Once again, is this one of those common knowledge things? If so, then why hasn’t anyone ever told ME?

All of this babbling, and I’ve not yet shown you my progress on my little dragon. Here she is –

…not too far just yet, but we have high hopes.

So, now that I have this all figured out, I am going to put it aside to knit a gift for a VERY special person. Hey – I have LOADS of Initiative, but very little Finishitive… sigh… but, this is a gift-giving opportunity that I can’t let pass me by, and I *always* finish knitting projects which are for others… Anyway, I have some fingering weight Cashmere in the color “Brighton Rock.” (Click here for a link to an ebay auction featuring this particular yarn. Lovely merchant is Richard at Colourmart, by the way. I highly recommend doing business with him.) I would like to knit a nice, lacy scarf for this very special someone, so, if you have any recommendations, please let me know ASAP! I want this to be really special. Really special. Off to study my Barbara Walker Treasuries… What is a good length for a neck scarf for a tall lady – she’s about 5’7” or 5’8” or so. Any suggestions for this project?

Look at my knitting-photo-session entertainment –


Ahhhhhh……

Emma has had only 3 cello lessons so far, and gosh, she’s playing REALLY well! (Anyone has a nice cello for sale? Seriously – if you are in Southern Colorado or Northern New Mexico, and you have a nice instrument for sale, then let’s talk.)

Charts, Classes, Alpacas, and a Dragon

As if the chart generator wasn't completely *perfect* before, Inna has made it even BETTER, hard as it might be to believe. Yes, it was perfect before, and it's now even more perfect. Such things are possible in my little world, lol.

She's added a "rounds" feature, so that all of the row numbers can appear on the same side of the chart if you like. This is a wonderful thing when one is knitting around and around, rather than turning the work and knitting across the wrong side. Check it out!

Click here for more information - - Inna's Wonderful and Spectacular chart generator

Here is the spiral shawl chart with the new chart numbering method - how great is this?
My only regret is that I'm not a knitting designer... but who knows - with such a lovely tool, maybe I'll suddenly get creative!

I taught the few sessions of my first knitting class - How to Knit the Baby Surprise Jacket. Oh my gosh, I didn't know that it was possible to have so much fun on a Saturday afternoon. Honestly, this was so much fun that even though the class was supposed to last only two sessions, I keep finding ways to schedule supplementary sessions... lol. Thanks to my extraordinary students, Karin and Allie, maybe we'll just meet weekly to knit baby surprise sweaters, yes?

Even more exciting than knitting baby surprise sweaters was the discovery that Allie raises alpaca, so... Field Trip! I can't wait. First, it's gotta stop all of this ridiculous snowing. I know, I know, I live in Colorado and all, but for the past ~8 years, it's hardly snowed *at all* in my part of the state, and yes, I'm kinda spoiled... When the alpaca field trip happens - maybe about mid July (lol), I'll take loads of pictures and post them here. Take a look at Eye Dazzler Alpacas, and tell Allie that I said, "Hi!"

Alpaca – ah… alpaca. As it turns out, there is actually a connection here. For the first time, I’m knitting with alpaca yarn, and for the first time, I’m knitting lace. Yes, I just finished that baby shawl which features actual yarn overs, lol, but it’s not “real” lace. Or maybe it’s just really simple lace. I thought that my black lace shrug was challenging – HA! My Print o’the Wave shrug was a walk in the park compared to this little dragon.

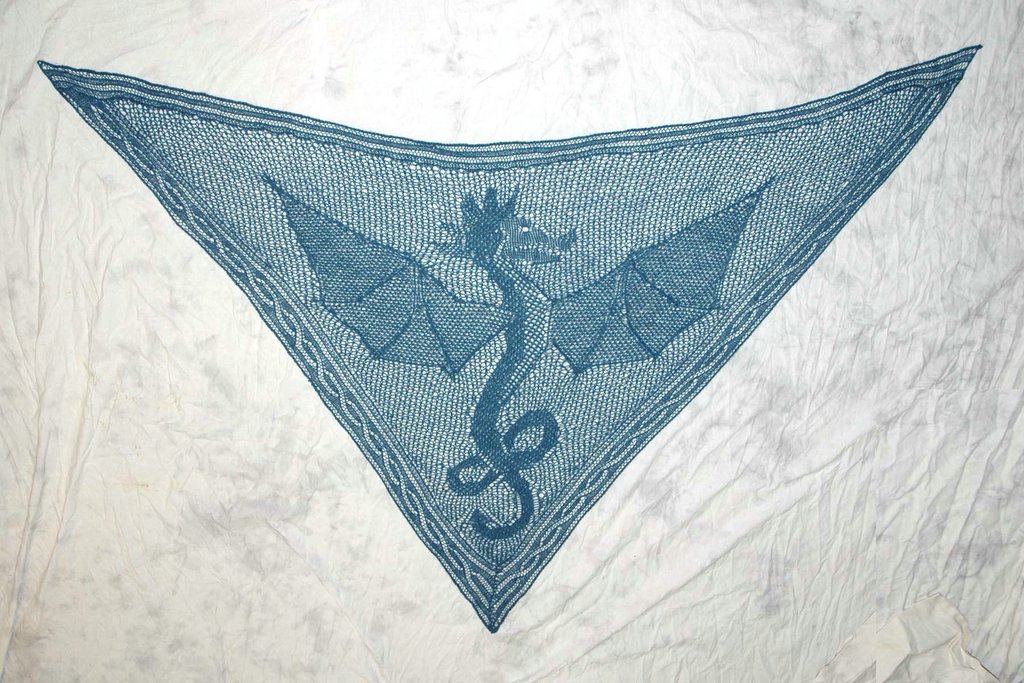
I bought the kit, Heere Be Dragone, from Sharon Winsauer, which includes the pattern and the yarn – a very fine alpaca/silk blend in a yummy plum color. It’s positively delightful. Unfortunately – another first – my bad boy Domino – my big black ex-Tom cat and knitting buddy – well, he thinks that it’s yummy yarn, too, so I have to keep it closed up in a gallon-sized plastic ice cream bucket to keep him from chewing on the yarn. If it’s not one thing, it’s ten, eh?

Here is the very tip of her lovely tail. Actually, in a few rows, the tip of her pointy little tail will be completed – what you see here is the tip of the shawl, lol. Here is a picture of the completed project - - Sharon supplied this picture. Isn’t it great?

Sharon wrote to me about the stretchy cast on that I posted on my tutorial site, Rosemary Knits Tutorial and attached this photo to the note. I had no idea that I wanted to knit a dragon shawl, but gosh, once I saw the picture, I had no choice – it was absolutely out of my control - I had to knit this pattern. Funny how that works out, yes?

What you see in my photo above is trial run #2. I’ve already knitted up this far once, sigh, and ripped it out, and I think that I’m going to rip it out again. Long Sigh. It makes me feel much better if I refer to this as my “dragon swatch,” lol. The first rip-out was because my knitting was sooooooooo loose, and this time around, it’s only sooooo loose, lol. How about those giant yarn overs, eh? This and the fact that my horizontal stitches are on the BACK – what’s with that? I was knitting in low-light conditions, and I didn’t see what I was doing…. SIGH… so I think that the third time will be the charm, don’t you agree?

There is a yahoo group dedicated to knitting this shawl – check it out! There are links to lots of photos of completed shawls, and shawls in progress -

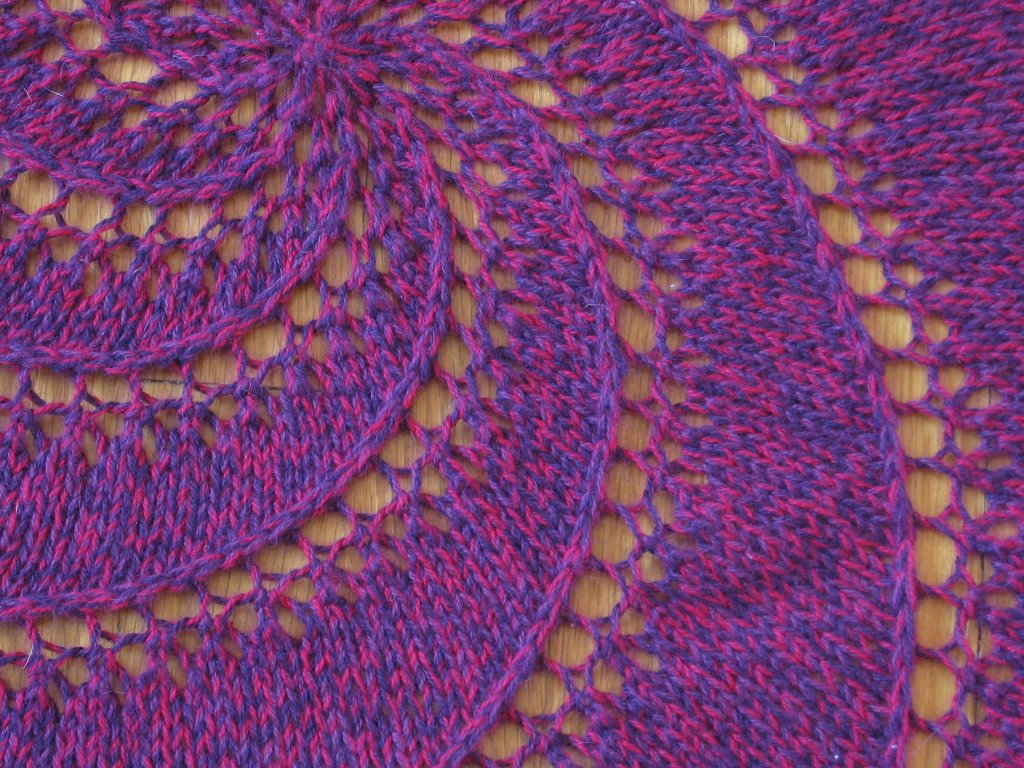
The spiral blankie is finished, yay!

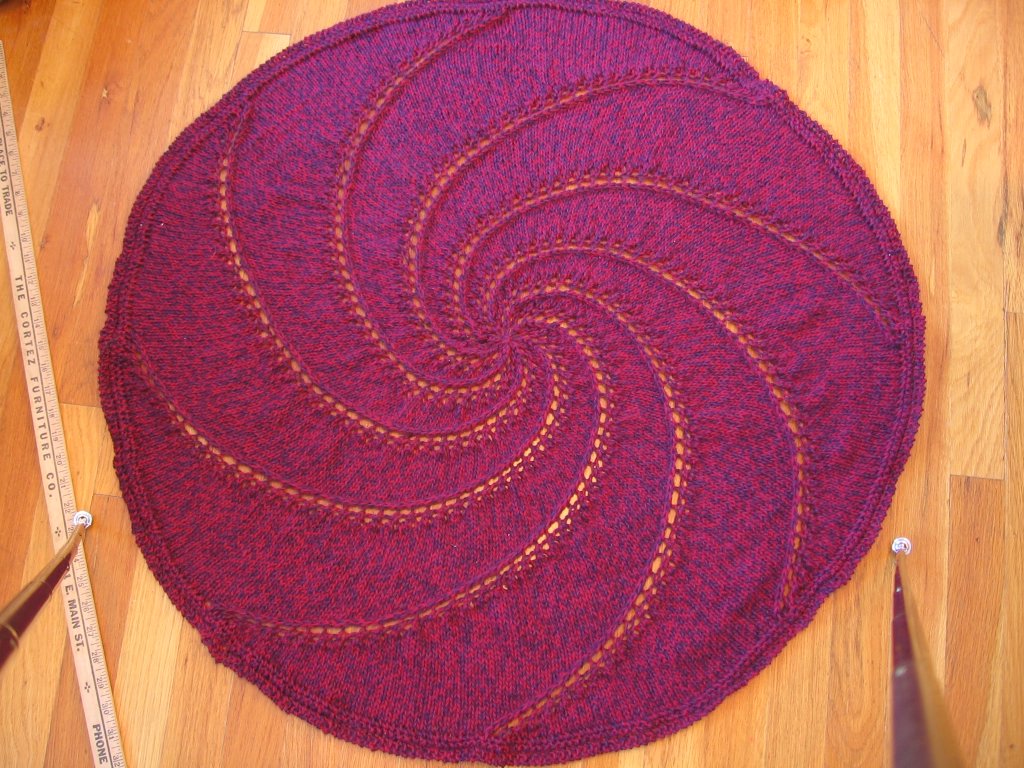
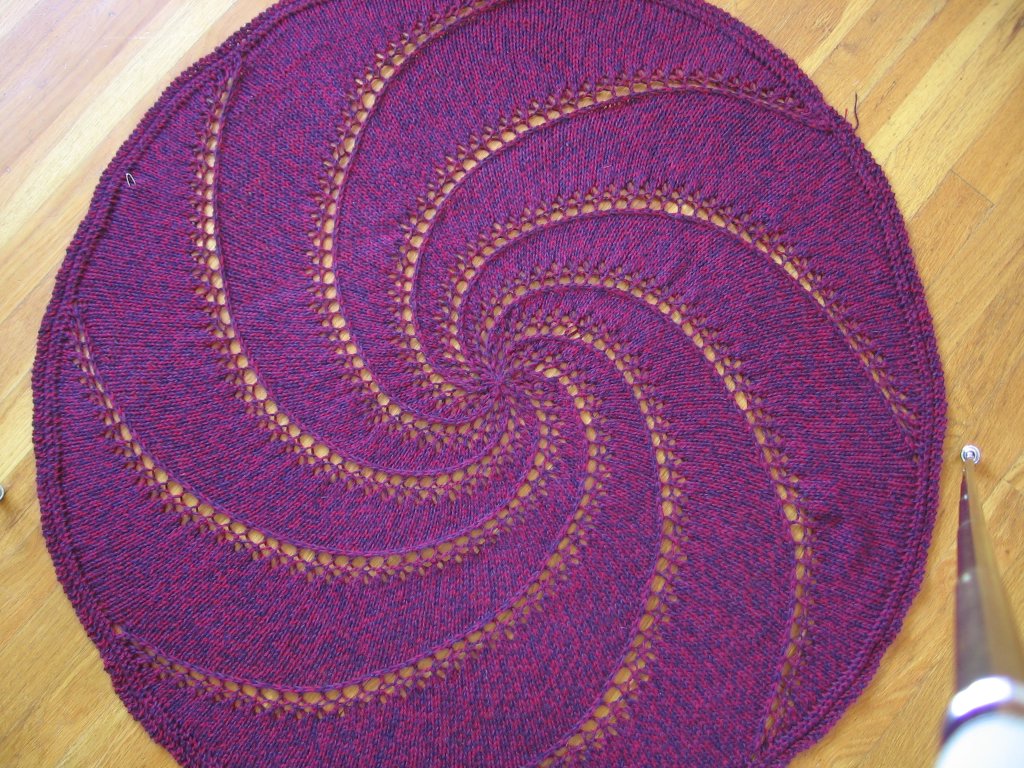
I finished the blanket for Emily’s shop! Check out how blocking improves things! Oh, it’s like a magic trick! When I was a new knitter, I thought that blocking was a useless step, but now that I’m more experienced, I know better. I look forward to blocking from the very first cast-on stitch.

Before –


After –
…no… blocking didn’t change the color of the yarn. The conditions and lighting were different on the different days in which I took the photos. The color stayed the same. This “after” photo seems to have a more realistic color, but all pix of this spiral blankie are a bit off, color-wise.

OK, so I took a better look at these photos, and aside from the color, you can't tell a bit of difference, can you? LOL. OK, here are the differences - the blocked one lies much flatter, the stitches look more even, and the edge lies flat and isn't threatening to fold over. It is also MUCH larger - it grew more than 5 inches in diameter. The drape is much improved, too.

All in all - blocking works wonders and your work will look SO much better blocked. So, if you are a new knitter, trust me - block it! Also, if you are a new knitter, know this - you should block your swatches. Keep in mind that this small blanket grew 5+ inches in diameter - imagine how your project will look if you are taking your gauge measurements from an unwashed/unblocked swatch? Oh, it makes me shudder to contemplate such horrors!

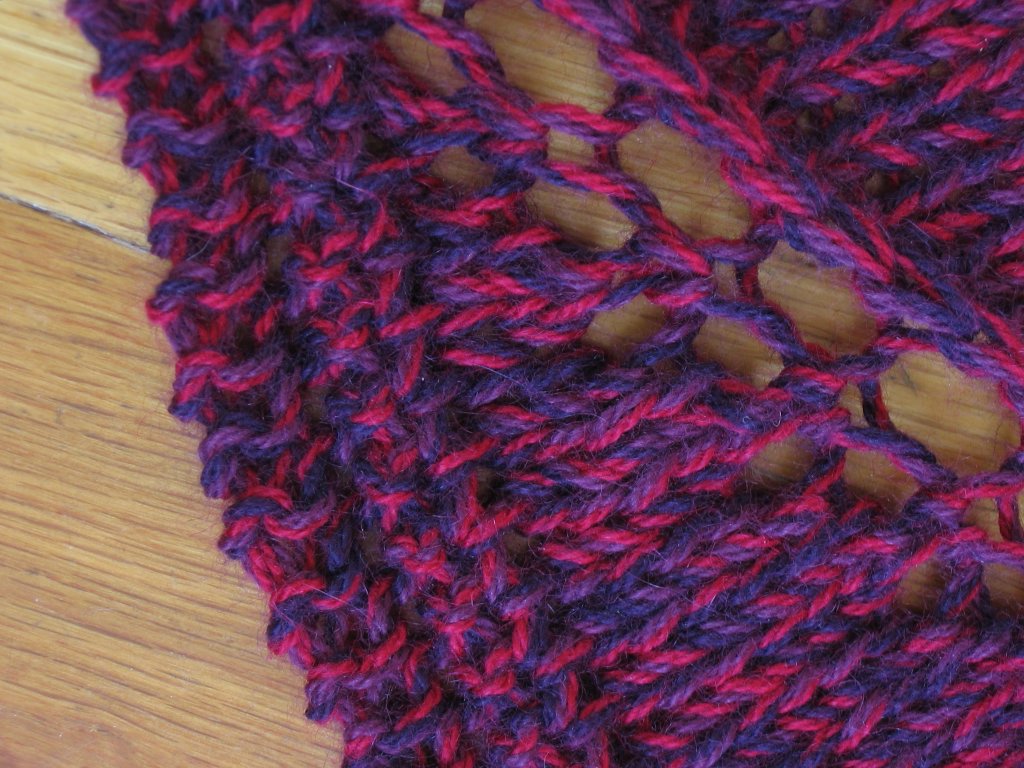
Edging –

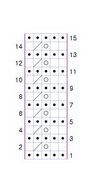
Chart for edging – (Yes, I’m still all charged up about this chart maker! It’s wonderful!)

This is a very simple garter stitch lace edging. So simple, yet so effective.

I finished this blankie with about 3 feet of yarn left over. This is how I performed such miracles – first of all, I didn’t ball up the yarn, but I left it in a skein. I don’t know why I did this, as I generally ball yarn, but these skeins are rather small, and why not. I have a floor lamp next to my Knitting Throne, and I just looped the yarn over one of the lamps and knitted away.

When I felt that it was time to put on the edging, I stopped and counted the number of loops left in the skein. I took this number, and divided it by 8 to calculate the number of loops per segment. Then, I divided the number of stitches per segment by this number to calculate the number of stitches per loop. Get it?

After all of my figuring, and allowing myself some room, I allowed myself 6 stitches per loop. So, I unlooped 2 loops, and practiced different bind-off edgings over 12 stitches, and experimented until I came up with an edging which took up this much yarn.. My calculations proved pretty accurate, but I was kinda worried, there towards the end. Gulp. But, it all worked out and I’m very happy.

It’s pretty easy to make up these edgings as you go along, and you can make the edging as wide or as narrow as you like. This blankie would look very nice with a plain garter stitch edging, but I decided to throw in a yarn over for fun.

Ahhhh – I just love this pattern! So simple and so… ahhhh…..

This is the perfect beginner project. It’s really easy, and just look at how wonderful it comes out! My teenaged son proclaims it, “Mesmerizing…” LOL.

In March, I’ll teach a class on how to knit this blanket. Sign up now! Contact me at thomases2000@yahoo.com for more information. In this class, we’ll discuss the math of the start-from-the-center-and-knit-outwards-flat-item, and we’ll learn different increases and decreases. We’ll also learn how to make a lace cast off, and we’ll take a look at different ways of casting on for the center. This is a very easy project, but there are so many different things to learn!

There’s still room in my Baby Surprise Class! Contact me for details.

Better Chart


It's amazing what reading the directions will do! Voila - a better chart. Enjoy!

This chart program is really fun! You'll find the link in the post below.

Simple minds....

Spiral (only) Shawl


Yes, what you see is the beginnings of a shawl, taped to the floor. Hey! It works!

I'm busily knitting away on this spiral shawl, aka Red Tent Blanket, for the class that I'm going to teach in March at Emily's shop. I decided that I really didn't like those star-shaped points in the original Red Tent Blanket, and I'm going to teach this class as a Spiral (only) Shawl. Right now, I'm scouring the 'net for a lace edging pattern. I'm just like Goldilocks, "That one is too big! This one is too small! This one is too narrow! That one is too wide!" I have to find one really fast, because I want to knit the edge tomorrow, and wash/block it in time to turn in to Emily on Saturday. Any suggestions?

Ooooohhhh, this yarn is soooo soft! Artful Yarn's Serenade- a cotton, angora blend. Ooooohhhh.... Aaaaaahhhhhh......

Oh My Goodness! Check this out! Go to this web page, Chart Creator, and you can make nice, professional charts of your knitting! Quick! Catch me! I'm going to swoon! I can hardly contain myself.

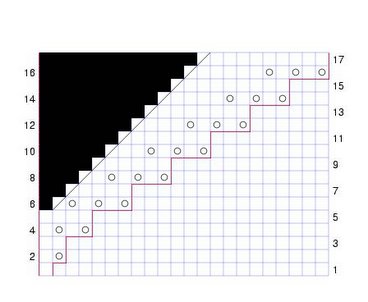
Here is an example of how knitting books always chart this particular swirl pattern,

... and here is the *right* way to chart it.
I mean, really... does the first chart look anything like the knitted item? No! But, take a look at the second chart, and compare it to the shawl. Now, what do YOU think?

My only complaint with this chart is that the row numbers are on either side. This would make sense, if I were knitting back and forth, but it’s a bit confusing for knitting ‘round and ‘round. Pretend that the numerals are all on the right side of the chart, OK? This might actually be a setting on the chart maker, but since it is 2am, and I’m considering falling face first into the keyboard for a long nap, maybe I’m just overlooking it. I’ll check again, tomorrow. lol.

This shawl is really easy, and a perfect beginner project. The circle cast on might be a stumbling block, but just get yourself a good knitting book, practice it a few times, and you’ll be just fine. You can always leave a long tail, and then use the tail to repair any problems later.

Preparation - Cast on 8 in a ring,
Round 1 - knit around. You might want to place a marker between each stitch.
2nd round, yo, k, pass marker (pm) all around.
3rd round, knit 2, pm, all around.
4th round, yo, k, yo, k, pm all around,
5th row, knit 4, pm all around
You are knitting 8 segments, and each segment is identical, and each segment is ended with the marker.

Now, you get to the repetitive - every row is just about the same - part.
There is a marker after each k2tog, to separate the 8 segments.
6th row, yo, k, yo, k, yo, k2tog, pm, repeat all around.
7th row, knit 4, k2tog…
8th row, (yo, k)3x, k2tog…
9th row, knit 5 k2tog…
10th row, (yo, k)3x, k1 k2tog…
11th row, knit 6, k2tog…
12th row, (yo, k)3x, k2 k2tog…
13th row, knit 7, k2tog…
14th row, (yo, k)3x, k3, k2tog…
15th row, knit 8, k2tog…
and etc and etc and etc, until the shawl is as large as you want.


As you knit around, you notice a pattern - once you pass the marker, notice what comes ahead. If it is a yo, then this is a knit round. If it is a knit stitch, then it's time to do the (yo, k) 3x business. There is a k2tog at the end of each segment, no matter what. As you are knitting, you can see this line of k2tog’s coming along, and you can remember to k2tog at the end of every segment. I think that you could even do without the markers, after you are used to what’s going on.

Next post - correcting common knitting errors with this pattern, without having to rip out!

Emma Dyes Snow and another Baby Surprise

My Emma isn’t the crafter that her sister, Grace, is, but… she can dye snow! This started out as a project so as to prolong her snow fort – but why douse it with just plain water when we have cake icing dye, just waiting to be flung onto a snow fort! (Simply mix a tiny bit of icing dye with a giant jug of water, shake and fling.) For some reason, the camera didn’t pick up all of the colors – it was really quite colorful! But, it’s just about gone now, in preparation for the next snowstorm, which I heard is due on Thursday? Oh my gosh! Again! More sitting and knitting! *Gasp!* Gotta run to the library for more books on tape!

Here is the completed picture of the Baby Surprise for Emily’s shop. Come! Take my class! This little darling thing is knitted out of Collinette's Cadenza “Dusk” and it was such a dream to knit with, that I sent my dh to Emily’s shop to buy more so that I can knit some socks for myself! Emily said that he did real well, too. lol.

This Cadenza is soooooo soft, and sooooo pretty and soooooo colorful. It was really nice to work with. I can’t wait to get started on my socks. But – other shop knitting, first. Right now, I’m knitting a Red Tent Blanket out of yet another yummy yarn, Artful Yarn's Serenade, a cotton angora blend, aaaaahhhhh sooooooo soft. This shawl will go on display in Emily’s shop to advertise the class I’m going to teach in March. Pix in a few days!

Happy Holidays!

I hope that all of you had a wonderful and peaceful Holiday Season! I sure did! I spent most of it knitting, and what could be more wonderful and peaceful than KNITTING?

Maybe you’ve heard that Colorado has had two blizzards, recently? Blizzards are *most* conducive to knitting, and they are most wonderful and peaceful, too, if you are a blizzard kinda gal, and I am. After our First Christmas Blizzard, we traveled to visit my friend, Annette, and Grace’s boyfriend, Howard. Take a look at Howard’s reaction, upon seeing Grace. I’m telling y’all, this boy has it bad.

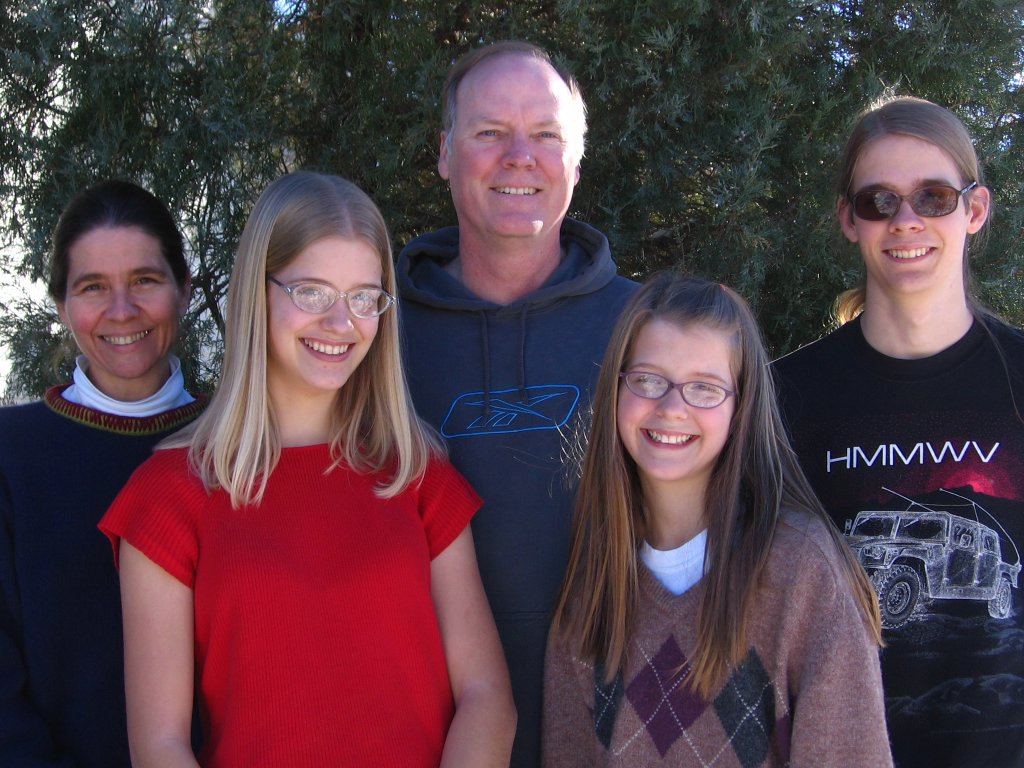
Here we all are, after our Second Christmas Blizzard. Yes, night-time temperatures are down to the single digits (F) and yes, we are standing there, in our snow boots, and yes, it is, indeed, warm enough for my darling Grace to be out-of-doors in her shirt sleeves. I so adore this wonderful Colorado Weather!!! By the way, I’m not a little, short, delicate person, I just happen to live in a house full of giants. I’ll soon be the shortest member of the family, and I’m 5’8” (172.7cm) tall!

Emma, and the neighbor kids, were busy, too. The first blizzard left only a trace amount of snow, but the second one left enough snow to actually *build* something! (The cardboard is the roof of the fort, which they kindly moved aside for the photo.)

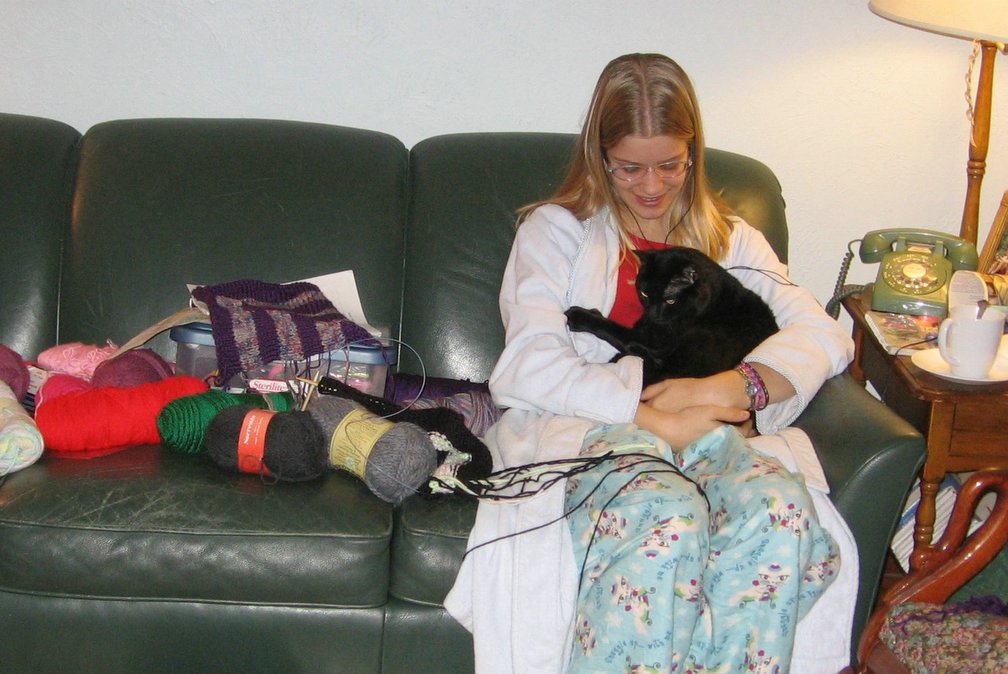
But – as I said, blizzards are quite conducive to knitting. Here is an action photo of Grace and Domino. Grace had to put her knitting aside in order to pin Domino to her lap – he takes one look at the camera and flees! He hates the flash? I don’t know, but the two of them were happily knitting away until I came along and ruined the whole thing. Notice the fine wires leading to Grace’s ears? She is listening to The Thirteenth Tale, a wonderful book! The Recorded Books Presentation was very well performed – a thoroughly enjoyable presentation, all around. She and I knitted and listened, in our jammies, with cats on laps, and cups of tea nearby, for three whole days. Ahhh….. bliss…..

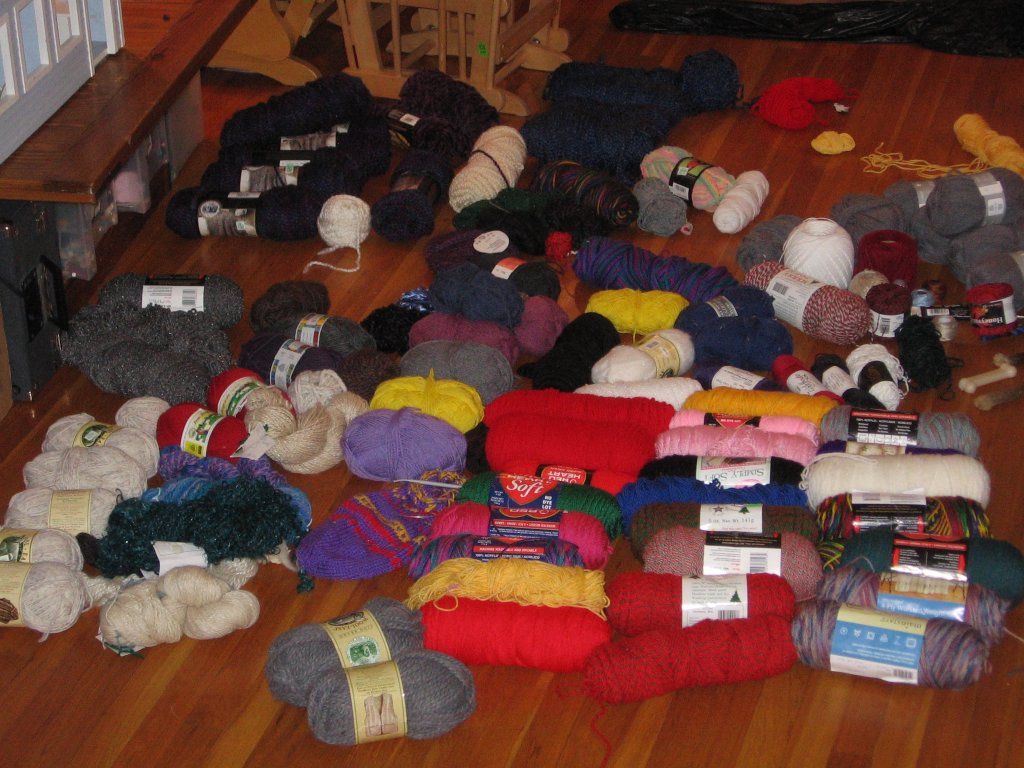
Grace is knitting a Mitered Square Blanket out of yarn which my friend, Katie, left on the front porch, after a major cleaning-out fit. Take a look at what she left for us! We’ll be knitting for a long time! Thanks, Katie!!!

Christmas Knitting finished – two pairs of slippers, photos below. 6 pairs of mitts, given away without remembering to take their pictures, but trust me, they all came out really nice! lol. Two scarves – photos below. Not bad, considering that I promised myself that there would be NO Christmas knitting. Yeah, right. Maybe I should start now on the Christmas Knitting that I’m not going to do for next year, eh? It would be much easier on my hands than knitting it all in two weeks… Oh, I also knitted – while listening to The Thirteenth Tale – another Baby Surprise for Emily’s shop. Photos soon. Oh my gosh, it came out so cute! Stay tuned!