.
My fiber laundromat is in full swing.
 I washed two batches of fantastic alpaca fleeces - all three from Allie and Phil at Eyedazzleralpacas.com

 from three different alpacas.
Nikko is a lovely butterscotch sort of color.
 Actually, his fleece ranges from ash blond to deep butterscotch. I just love it - lots of color variation - it'll be fun to play with this fleece.
Valley Girl is a wonderful cinnamon color. (This photo is NOT the correct color! She's more reddish.)
 Oh My Gosh, her fleece is super super fine. It's such a treat!
Calamity Jane is Black-Hole Black.
 Wait 'till you see it washed. Here it is, straight off of Calamity's back, and it's rather dusty. Once I wash the dust off, then you'll see how viciously BLACK this is. I can't wait to spin some.
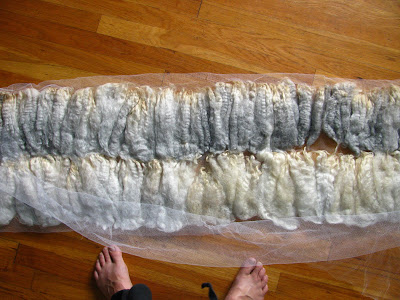
I like to sew the locks into a length of netting, so that everything stays in locks and stays nice and neat.

 It's a handy way to handle a batch of fiber like this. This sack contains about 3/4 of a pound - I could have gotten more in to the sack, but you know, alpaca is so dusty that I wanted the bits to be on the thin side for adequate water flow.
I personally vacuumed each and every alpaca on that ranch - I personally emptied the vacuum cleaner, numerous times throughout the day - so I know that our vacuuming job was actually removing dust and debris -
 - just how much dirt does an alpaca carry around every day? Look at this water! This is from an animal which had been cleaned!!! An added bonus to alpaca - hardly any smell, really. Nothing like sheep, nothing.
I fill the basin with warm water and a generous squirt of hair-shampoo. I let it soak a while, then lift the fiber out, and I just pour the water out into the yard - the grass loves it. I keep refilling the basin with warm water and letting the fiber soak until the water runs clear. In the last basin-full of warm water, I put in a generous squirt of hair-conditioner and let the fiber soak in it for a little bit, then I let it drain out. I don't rinse this conditioner out - it really helps control the static electricity that my desert climate can cause.
My high tech water heater - I let one basin-full soak until another hose-worth of water heated up. It worked really well. Let me tell you - on a sunny day in Colorado - this hose heats up pretty fast and amazingly HOT.
 - my high tech dryer -
Why do these spoiled brat animals
 assume that I'm washing fiber for their comfort and enjoyment?
Pure potential.

Dreaming of becoming a neck warmer? A scarf? A lace shawl?

 What do you want to be when you grow up? This black is blacker than black.
I spun a little bit of each one - fine and thick - here's Nikko's swatch.
 Oh yes, this is going to be fun. I have lots of ideas... which one to start first?
~~~~~~~~~~~~~~~~~~~~~~~~~~~~~~~~~~~~~~~~~~~~
I also washed a bit of Coopworth, which I purchased from Sandy in California. This Coopworth fleece is truly beautiful. It's from a young sheep named Sierra Silver. I hope to spin and knit the sweater named Moonlight by Kim Hargreaves - the pattern appeared in Rowan 34. So, my sweater already has a name - Sierra Silver Moonlight. Ahhh... I can hardly wait!
I laid out the locks -

Pinned them into place -
 -and then washed with my standard washing procedure - warm to hot water, shampoo, rinses, conditioner in the final soak. Hang to dry.
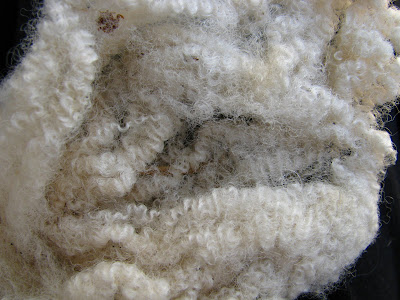
Washed and dried and take a look at how lovely.
 This sheep is many shades of grey from the lightest pearl to a very dark charcoal.
  If I'm a smart spinner, I'll be able to graduate the sweater from light grey at the shoulder to dark grey at the waist - won't that be nice?
I spun up a bit and got gauge (as noted on the pattern) on my first try, waahoo! Here is a test swatch - this wool fairly sparkles - it almost looks metallic -

 - there are some locks which are just about the exact same shade as pewter. If you make the photo large, you can see that there are some really dark fibers in there - this gives it a richness and depth to the color - I just love it.
I'm thinking of cutting off the yellowed tips to make the overall color more of a cool grey - the tips warm the color, and I'm not sure if I like it or not. Must experiment. (I've never cut tips off of locks before, and truth be told, I'm sort of chicken.)
A note on the pin job -
 - this was a minor fiasco. I don't think that it will matter in the long haul, but this is the last time I'll use pins. Take a look - rust - eek. Even the so-called "brass" pins -
 - yeah, right, brass, heh heh heh. It's such tiny spots of rust that I didn't have a full blown panic attack, only a minor case of the jitters. I need to find some rust-proof pins because this is just too quick and easy. I'll probably always sew alpaca into it's little sacks, but wool can get pinned.
Now, I washed enough fiber to get started spinning. I made a bunch of spindles, and improved my junky-garage-wheel. (I also bought a mountain of dyed rovings for other projects.) There's nothing stopping me - Let The Spinning Begin!
I can hardly wait!
Cheers!
Rosemary
how to wash a fleece - washing alpaca - washing wool - using conditioner on wool - how to wash wool - how to wash alpaca - wash fiber


