From Sweater to Clogs (almost)

What a productive 24 hours! I went from here to there in this short amount of time...

Quite a long time ago, my local thrift store ran a special sale on sweaters - 12 for a dollar, if you can believe it. Of course, I stocked up! Last night, I decided to rip one of these sweaters, and make a pair of felted clogs-slippers for my dear, darling husband.
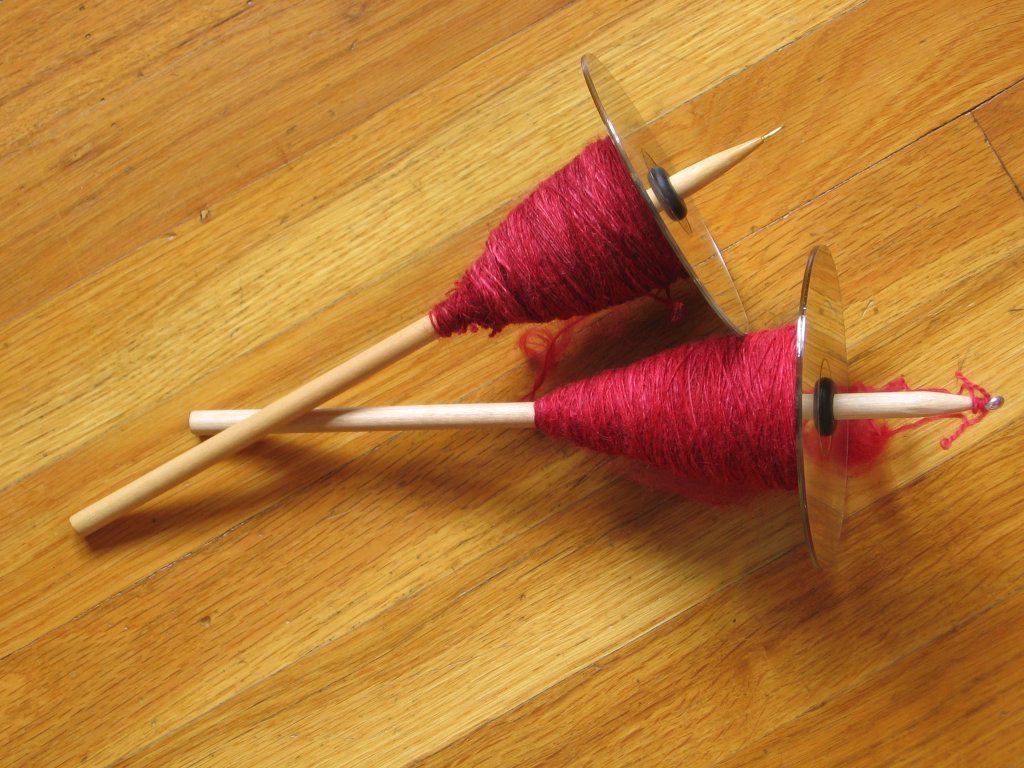
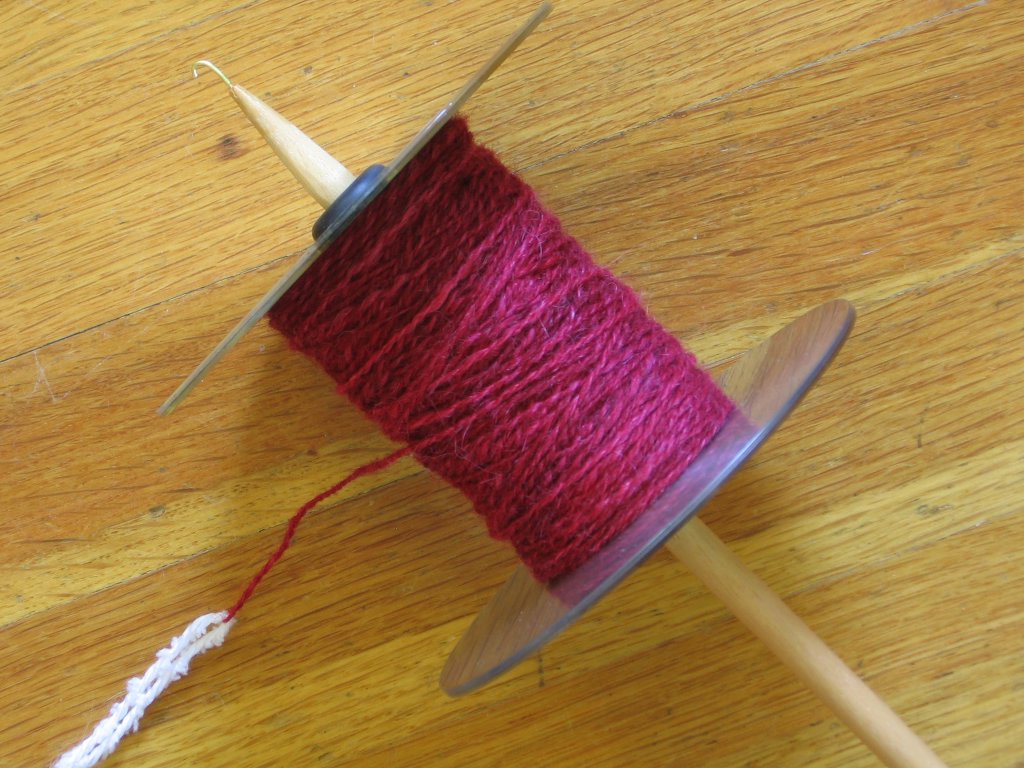
This is a really thick, really bulky sweater. I hope that it felts OK. It's odd - even though it is a wonderfully thick sweater, it is made from really fine yarn. I mean really REALLY fine. The trick is that there are 5 of them held together. Each strand of yarn is two ply - one ply is brown and the other ply is cream, so the result is this wonderful heathery brown (not grey as it looks in the photo). Doesn't that sound like a ridiculous amount of spinning for one strand of knitting yarn? Each ply is just a little bit thicker than sewing thread. Gosh, I hope it felts!
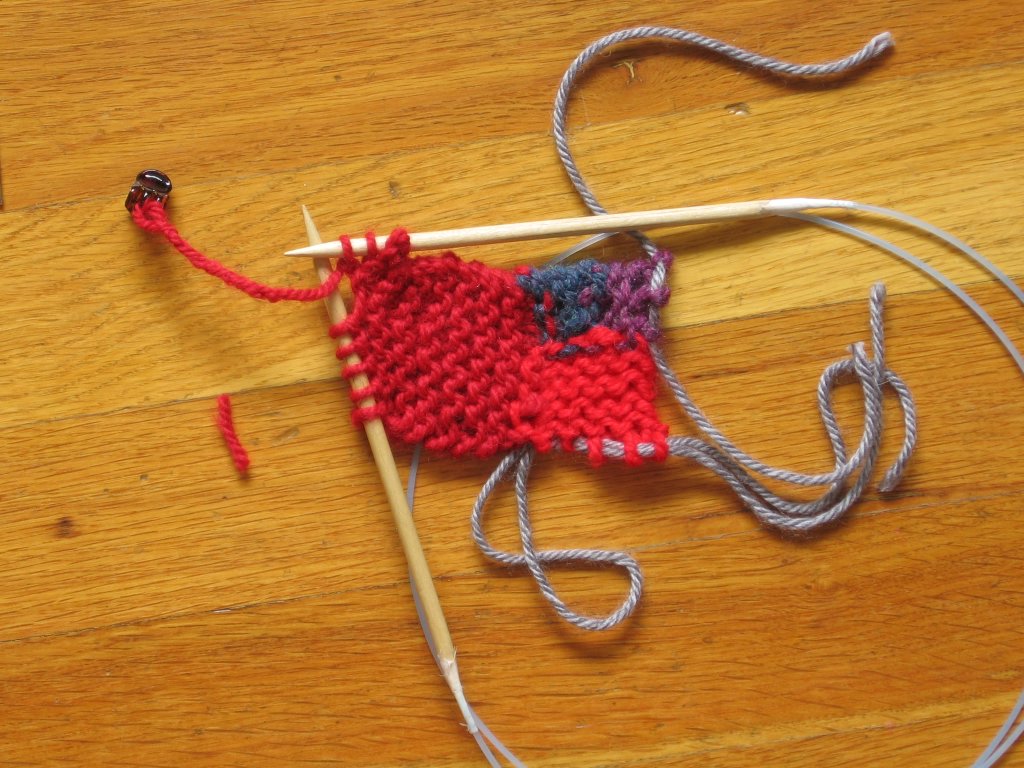
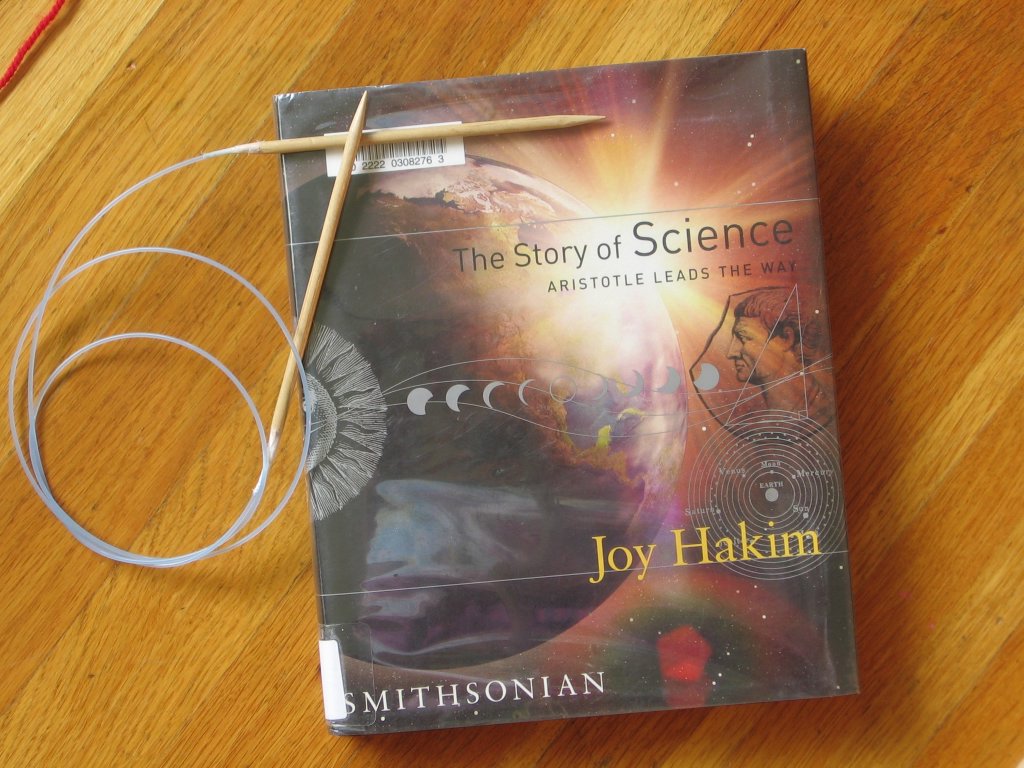
Well, last night, I began knitting on my old, home-made circs, which are made of wood. Oooch! Even though the needles are perfectly smooth, from miles and miles of knitting, the yarn really dragged on these wooden needles. I was seeing a headache in my future. While running errands this morning, I came across this set of plastic needles, on the *clearance rack!* Yippee, life is good. I came home, and I didn't even put the perishables in the fridge - I raced out to my garage, and whipped up a pair of circs. Here is a photo at the half way mark. Nifty, eh? They made up really easily - much more easily than I had imagined. These needles are so very smooth, and very lightweight. Yes, this is a good day

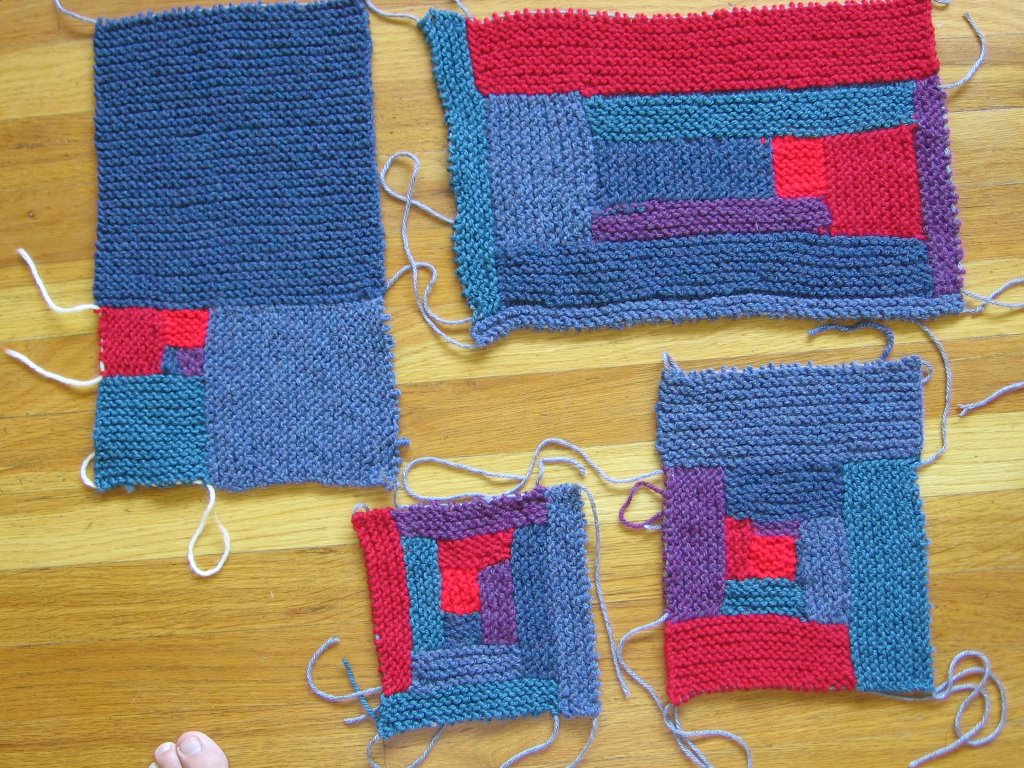
I'm almost done with the first part of the first slipper - as I sit to write this, I'm much farther along on the slipper than the photo indicates. I'm now to the point where I have to knit another sole. I'm really going to run out of yarn!!! Oh well... hubby and I discussed it and we came to the conclusion that slippers *really* don't need to match each other, do they? I'll just make the mate out of another sweater, and hope for a match weight-wise. I think that it would be unpleasant to wear slippers of different weights, don't you?

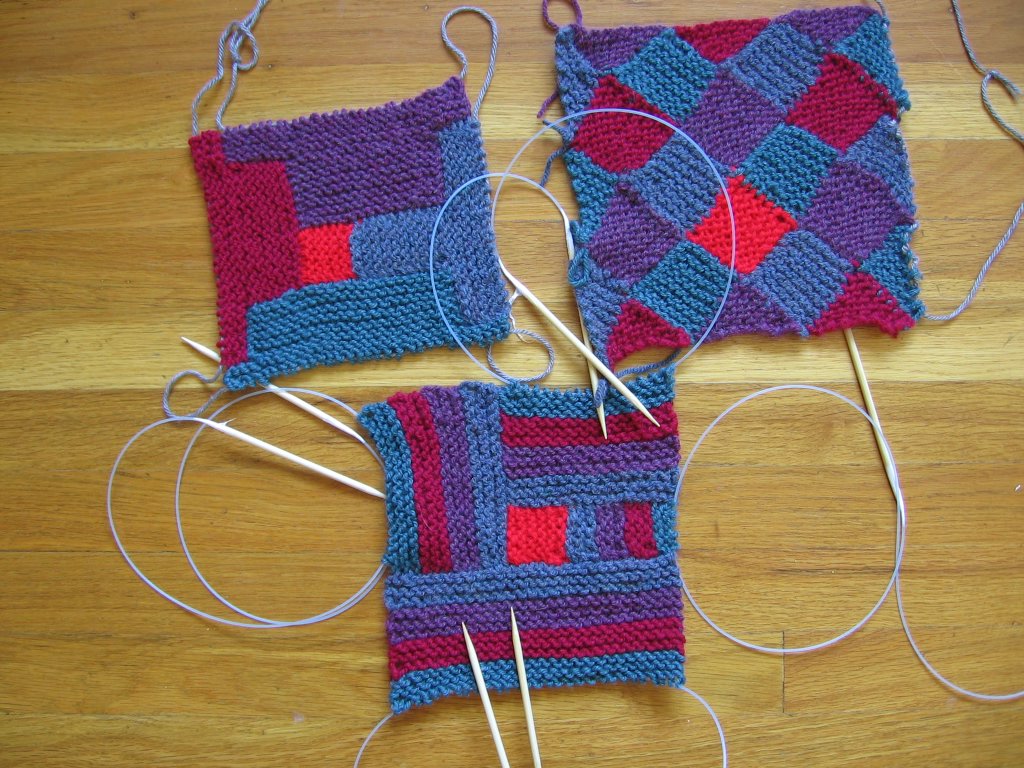
If you haven't tried the felted clogs pattern from Fiber Trends - well, what are you waiting for? It's relatively easy, once you understand the rhythm of the pattern. What came as a Eureka! moment is when I realized that I don't need to count every row. Simply read ahead, and see what the author tells you what to do *after* the counting - maybe it's to m1k2 2 times, at which point you'll be at the middle stitch. Well, I put a piece of contrasting yarn across the knitting (on top of the knitting, between the stitches, but under the needle - it'll stay there for a little while) at 4 stitches from the middle stitch, which I also have marked, and when I get to the yarn, then I do as I'm told. No counting. Mind you - the knitter doesn't have to count to say... 10. The knitter is asked to count to 79, or 68 or whatever. It's much easier to place the temporary marker.

I’ve knitted this pattern over and over again. It’s great fun. http://www.fibertrends.com/viewer/patterns/AC33x.html

Felted, Fibery, Fun.


Look what I found while cleaning out my junk-basket! My cell phone case! I made this in about July of 2005, during a fun afternoon of felting with my children, a close friend, and her children. Have you ever wet-felted? Your hands have never been this clean before! It’s great fun, and I just wanted to share these photos. The pink one is my first try. Who knew that felted wool shrinks so very much!

Both projects were made with merino roving, and dyed with Koolaid. I used the method outlined in this book, Feltmaking: Fabulous Wearables, Jewelry & Home Accents , which is a great book, by the way, with very easy to follow directions.

No, I don't ever use it, as my little cell phone is quite sturdy and doesn't need any protection, so this case turned out to be not-as-handy-as-I-had-hoped, and it's relegated to my junk basket. Still, it was a great project!

By the way - I am the proud owner of the World's Most Spoiled Dog, and yes, I have proof. See below. Spoiled dog.


The little brat has his Nylabone in there - what a brat.


It was blowing rain and snow most of the day, and this spoiled dog spent the whole time on the sofa, under a down comforter. See? What did I tell you? The World's Most Spoiled Dog.

Three more blocks


Three down, 9 million more to go. Not really, but it sure seems this way.

Take a look at the one in the upper left - what was I thinking? I'll use it, but... umm... yuck.

The one on the upper right is a garter stitch entrelac. What's the point of this? Entrelac is supremely annoying to do, whether you knit backwards or not, but the payoff is that you get that wonderful woven appearance, right? In this garter stich variation, there is no woven appearance possible as it is completely flat, so this means that you get all of the annoyance of knitting entrelac with none of the payoff. Plus, as you can see, I lost count of my rows quite often - yes, counting to "6" really throws me at times - and my tension is not regular at all, so basically, the whole block stinks.

I like the one on the bottom, though. I left my chopstick circulars in place so that you can see how handy is is to have then ready to pick up that side and resume knitting. I'll continue in this pattern for another round, and see how it turns out. Then, I'll thread it onto a length of yarn for washing and blocking while I continue to try to figure out some clever way of hitching these blocks together.

Stay Tuned!

The Red Roving is spun! All of it!

You know, when you get it all lined out like this, spinning is really an extraordinarily work intensive hobby! I started out with the dyed roving. There are many steps between the shearing of the sheep and the dyeing of the roving, too. It kind of makes me dizzy to think of it all.

I’m completely finished spinning the red roving that my friend Peggy D. gave to me – take a look -

Two spindles full.


Andean Plying Paperbacks. Y’all, this method is the best! You really need to give it a try. For the record, these paperbacks are the same size, 11.25 inches around, and this is the perfect size for an Andean Plying Bracelet. I couldn't find any popsicle sticks, but pencils work perfectly well. A Double point knitting needle would be even better, and it wouldn't make marks in your book, either. Can't make this claim with the pencils. Oops.


I thought that I’d try a heavier plying spindle, so I dug out two old baby stroller wheels to use as whorls. I cut the rubberband and the toothpick off in order to use this contraption – I leave then in place to give you some ideas on how to wedge whorls onto spindles.


As you can see, it worked, but it was no fun. This arrangement was just too heavy. It hurt my wrist to wind up the plied yarn. I’m a CD spindle kind of gal, I suppose. This is the first time that I tried the 2-whorl idea, and let me tell you, the second whorl really makes the spindle spin very well. I’m certainly going to continue to experiment with this idea.


The CD Spindle, in all of its symmetrical, balanced, not-too-heavy glory. The second whorl makes a world of difference! It spins so very smoothly with no wobbling at all. It’s cumbersome to wind the yarn onto the shaft, however. It’s hard to get my hand around the bottom whorl, but I'm going to work on this. Maybe I can use those odd, small, CDs for the bottom whorl? Hmmmm…. Gotta ask hubby if he has any lying around his office.


I pulled off the top whorl, in order to wind the yarn off of the spindle, and the beauty of it made me catch my breath! Check it out! You can see where the grommet was – I don’t know why this amuses me so, but it does. I also unscrewed the hook, and then the yarn spooled off and onto my niddy noddy quite easily.


Next step – Niddy Noddy.


Then, wash, hang to dry…


…and then, admire!


Thank you so much, Peggy! Look! I have 4 lovely skeins of wonderful, faintly variegated, red yarn. What am I going to make? I am amused by the fact that they are all so close in yardage. Two skeins measure 129 yards, and one measures 119, and the last one 114 yards. (The last little tiny skein is the one that I made with my Brio Mec Turkish Spindle.)

What to knit? What to knit? Decisions... decisions...

Log Cabin afghan, continued

I’ll get to the Log Cabins in a minute. First, let’s consider the completion of my mitered square –


Finished! I like it! If I ever say that I want to do an entire mitered square blanket, with no cast ons and no cast offs - - would one of you please run to my house and put a cold wet rag on my forehead and hold my hand until the fever passes? I’m sure that I would lose what’s left of my mind, but here’s proof that it can be done!

You know…

On second thought…

Imagine if the stripes were asymmetric with respect to each other – you know, that they didn’t line up with each other - and maybe some wide stripes, set off by single-ridge stripes… hmmm… maybe so... What do you think? Oh no – wait – wait – Imagine if the stripes were of different widths, and some were stockinette and some garter and maybe even some in different seed stitch patterns. Oh, yes, it’s all coming together now.

I should have taken a picture of all of those yarn strands all in a big huge scrambled tangle and then I would have NO second thoughts, eh? Let me tell you – this square was a pain in the neck! But…


Another Log Cabin Square, in a similar design to my favorite square, which is seen in the photo below.


Now… an entire blanket in this style is a definite possibility! Just imagine the possibilities! I have a few other squares waiting to be washed, blocked, photoed and blogged, but I think that all subsequent blocks will be on this square-bullseye design. I love the crisp corners most of all! Yes, more of these to come!

Once again, I interrupt the knitting to bring you... the last blooms of summer.

As I sat here last night, surfing the Internet, my little weather bug alerted me to the notion that summer is actually completely over, and that a frost was on the way. The first frost always makes me sad, as it means "No more flowers!"

I was granted a reprieve! We didn’t have a frost! I had a few moments today to snap some pictures of the very last of my summer flowers. I don’t know whether to laugh or cry! I love winter and the cold and most especially, the SNOW, but I’ll miss my flowers. Enjoy my last blooms of summer –

Morning Glories! Here are some of the “standard” variety –


And, here is Emma’s “Blue Heaven” Morning Glories. The blooms of this beautiful variety of Morning Glory are much larger than the standard variety – they are about 5 inches across! Yes, they are this blue in the early part of the day, and they fade to lavendar as the day progresses. This is one of my most favorite flowers!


Another favorite is the simple Hollyhock. Ahhh… I have hollyhocks in every imaginable hue, and I have them by the HUNDREDS. They are sooo pretty!


Calendulas are such happy little flowers!


Even though I’ve grown these every year for about 10 years, I still don’t know the name of this plant. It makes these huge beans, so my kids call it – “Jack and the Beanstalk Bean.” The blossoms were a bright, cardinal red, but they are long gone. Time to harvest the beans!


Every part of this plant is purple – notice the stems. There are lovely pods developing and I hope that the seeds develop before they freeze. It’s a beautiful plant, and the blooms are very long-lasting, too. Look at them! Blooming like crazy in October!


I forgot all about this plant! I call it, “Grow your own good luck,” for obvious reasons. It is a very pretty little plant, but since it was lost in the Calendula Jungle, I sort of forgot about it until today. My girls will enjoy pressing these leaves.


I’m cheating – I snapped this photo about a week and a half ago, not today, but it was still October, lol. This bloom was the diameter of a dinner plate, and I was *really* looking forward to hanging it outside of my kitchen window, to watch the birds eat the seeds. However, a squirrel chewed it off, and dragged it away. Grrrr….


Jack Frost – you can come now. I’m emotionally prepared.

Yes! It can be done!


A year or so ago, I knitted a mitered square baby blanket for my little nephew, Carson. I am so very lazy, that I simply refused to sew together all of those squares, and promptly figured out how to provisionally cast on so that I'd be able to knit 4 squares together. If you take a look at Carson's blanket, you'll note that the central 4 squares are knitted in one piece, and the outer squares are knitted together in pairs, then the whole shebang sewed together. This method saved me lots of sewing, but didn't eliminate it. Well, I've been thinking about this problem ever since. I just knew, deep in my knitter’s heart, that there was a way of knitting the ENTIRE blanket without any stitching up, and without any piecing at all. I just *knew* that there was a way to knit the whole blanket, in one piece. Here’s proof! As you can see, I’ve provisionally cast on the “backbones” of the squares, then I’m knitting back and forth on all 4 squares at once. This is the only one that I’m going to knit for this particular project – my Log Cabin Gone Awry afghan - but should I ever want to knit a mitered square blanket in the future, this is the way that I’m going to knit it. Knit a bunch of “super squares,” then connect them to one another by another batch of “super squares,” and then end up with one huge, glorious hunk of garter stitch. Of course, this can be done in stockinette, too, but my current afghan is primarily a garter stitch project.

You might also notice something that I noticed only just now, when posting this photo. I can’t believe myself!!! How many times have I picked up and put down this particular square? I never noticed! My knitting buddies didn’t notice (or they were too polite to comment on my foibles?) In fact, I couldn’t believe it, and had to tiptoe upstairs, through a sleeping house, to check for myself. Yep, there it is…one of my blue sections is not the same color blue as the other sections. It’s not nearly so noticeable in person as it is in the photo, but there it is. Oh well. Something that I noticed when I was taking the picture is that my latest red knitting – the red closest to the center – is a different color red. I knit, mostly, in the evenings, during family-read-aloud-time, and my little knitting corner is not terribly bright, and I simply didn’t notice the different red. Ah, what the heck. Maybe I’ll just leave it, to keep the odd-ball blue stripe company?


Want details on how to do this? First, study the instructions here, Psychedelic Squares, on how to make the basic mitered stockinette square. Notice that there are instructions for garter stitch here. Instead of casting on in the regular way, provisionally cast on for one square, then provisionally cast on for the second, third and fourth squares, twisting the different color yarns together when ending one color and beginning the next. When you get to the end of #4, arrange your needles and your yarn as if you are going to join in a circle. (I’m using long circulars. Want to make your own? See my tutorial at http://rosemaryknits2.blogspot.com.) Twist the first loop of square #1 and the last loop of square #4 around each other, replace the loops on their original needles (one on the left hand needle, and one on the right) then turn your work around, and knit back in the direction from which you just came. When it’s time to change colors, twist the yarns around each other. If you look very closely, you can see that I’m experimenting with the perfect yarn-twist. I had it in the second round of colors – reading from the outside in, the second round of colors seem to be perfectly joined, and darnit it all, I can’t figure out how I did it! OK, so knit all the way around, and when you get to the beginning… well… what can I say – invent your own way of joining the yarns, lol. I’ve tried everything, and they all are working, but not all perfectly. What seems to work very well is to knit into the row below of the neighboring color – which is a way to “make one” and then pass the previous knitted loop over the newly made loop. This maintains the correct stitch number, and accomplishes the join in an area where you can’t twist the neighboring yarns together, but… well… let’s just say that I hope that blocking will soothe my anxieties. Do you notice the little white stitch markers? This marks the place to do the decreases which accomplishes the whole miter thing. The “end of row – beginning of row” is to be seen on the right hand side of the top photo. See how it’s a bit rumply? I’m working on it.

To sum it up – Provisionally cast on for 4 different mitered squares, making sure that the yarns at the color switch are twisted with each other, so that the square will hold together. Join in a circle by twisting the first and last loops together. Knit across until you’ve knitted across all 4 squares. Twist the loops together – or figure out another way and immediately write to Rosemary at thomases2000@yahoo.com to tell her your invention – and then knit back across to the beginning. Repeat until done.

Provisionally cast on half of one square, then pick up provisional cast on along one side of this super square. Provisionally cast on the remaining stitches to the square that you just picked up, and then provisionally cast on for two more squares. Miter your way to the center of this square, then repeat until your afghan is the size that you want.

Revel in the lack of sewing and revel in the extreme drapeyness of your lovely, large afghan, which has no cast on and no cast off edges. Life is good.

From Chopsticks to needles in no time flat!

Below, you can see how I started with Chopsticks, saved from a recent trip to my favorite Chinese Restaurant, and ended up with 4 sets of circulars, in less than an hour. This is about 10 minutes per needle. How cool is that?

Chopsticks before...
Chopsticks after....


And... ooooohhhhh.... these are soooooo nice! They were very easy to work - very easy to carve and to shape. They are SO lightweight. I love them!!! Now, I'm knitting my Log Cabin Squares in style! lol

I am using one circular per side of the square. This is the sort of luxury one can indulge in when one has the gumption to make her own circular needles out of her eating utensils. It makes for a regular octupus of needles, but I got tired of threading stitches onto needles, then onto pieces of yarn, then onto needles and etc. I put them onto the needles and there they stay! I sharpened the tips really long and sharp and pointy, which makes it easy to pick up stitches, so I don't need to use my little, skinny, sock needle anymore.

I eyed the skewers at the grocery store tonight with new interest. My grocer has two different sets of skewers - one looks to be about a size 3 and the other looks to be a size 5 or there'bouts. These chopsticks are about a size 7 or 8. (All sizes are estimated, based on my familiarity with the US sizes.) The grocery store skewers seem to be made out of the same sort of bamboo as these chopsticks - a nice, solid, smooth bamboo - not the splintery stuff that skewers are usually made out of. The added bonus - the grocery store skewers come with really nice points! No carving necessary, if you want to make straights. $2.50 for 5o pairs of needles? What a deal!

More Log Cabin Knitting

I’m still chugging along.


Here, you see a shot of all of my squares, to date. Gosh, I sure thought that there were more of them.


This is my current favorite. It’s also the largest, by far! As you can see, I have my 6-ridge “hearth fire” in the middle, but instead of changing colors every log, I changed colors every 4 logs, to get a bull’s-eye effect. Gosh, I really like this square! I love the geometrics; I love the nice, square corners.


Here is the reverse side of My Fave, to demonstrate the fact that there are no loose ends. Yes, I’m very proud of myself, lol.


Still, the 6-ridge hearth fires, but instead of doing one log at a time, I picked up all around the central “fire,” and I knitted out from the center, increasing one stitch after the first stitch and before the last stitch of each side, on the purl rows. In other words, I increased 8 stitches, every other row. I like this square well enough, but it just doesn’t have the “pop” that the other one does. I’m certain that it is the lack of nice, sharp corners which makes the difference.


Now, these squares are great fun! Not exactly log-cabin, but close enough. Notice that even though these squares look very different, they are made exactly the same – it’s the color placement which makes the difference. First, I had the 6 live stitches remaining from knitting the central square. I switched to another color, making 2 additional stitches along this side, and then I decreased on each side when knitting the right side row. (Next time, I’m going to decrease at the beginning of each row – same mathematics – easier knitting.) So, since I started with 8 stitches, I ended up with 8 ridges on this initial triangle. Just remember – pick up a stitch for each ridge, just as in log-cabin knitting, but make 2 more stitches. However, when picking up after the central square, you are picking up along 2 different triangles, so you have to add 2 stitches for *both* sets of triangles. Get it?


The idea for this square has been percolating around in the back of my mind for a long time. Joe knitted a blanket like this, and he named it “Rosemary’s Baby Blanket,” the reference being made to the movie of that name, but I always took it as a sign, lol. In fact, I made a really long circular needle for him, so that he could photograph his knitting in progress. See his blanket here – Joe's blanket

My square looks like it has swirly edges, but actually, the waviness is due to the bias of the pattern, and I’m completely optimistic that these edges will become straight when they are bound to another square. Sort of like buddy-taping a broken toe, kwim? This is my hope – we’ll see.

How am I going to put this all together? Your guess is as good as mine. I plan to pick up all along the edge of each square, and knit out a few ridges, in black yarn. Then, I plan to either kitchener it all together, or think of something else. Hmmm… I’ll work on it.

In the meantime, if you have any spare scraps of Plymouth Encore in Black, send ‘em my way, OK? Thanks.

Log Cabin Fever

Earlier this summer, I bought a huge bag of yarn at the Salvation Army Store, and in it were many balls of Plymouth Encore yarn, in nice-enough colors. At some point, I visited www.Januaryone.com, and she was making a Log Cabin blanket… The light bulb flashed in my head and I said, “That’s it!” This is turning out to be loads of fun, and quite the learning project, too.

The whole fun of Log Cabin is to use many different colors, which means many loose ends to weave in later. Well, I decided that this was just foolish – OK, really, I’m just lazy - so I start out each color, and I also end up each color, already woven in, so to speak. Are you familiar with the Russian Join, or Russian Splice? Google it. It’s the best way to end one piece of yarn and begin the next, without leaving any tails or knots to worry with later. It’s also fairly easy to change color predictably, as I’ll show you in a minute.

First, notice that in the Garter Stitch construction, you need to *start* your new color on the *right side.* If you start on the wrong side, then you’ll get those odd, but sometimes desirable, little middle-of-the-road stripes. So, this means that you need to *end* your colors at the end of the *wrong side* row. Keep this in mind, as you knit.

Now, all of the directions call for binding off each log, only to turn around and pick up along this edge. This seems silly. Just keep those stitches live, and come back and knit them later. Easy, plus you don’t get a bound-off edge in the middle of your knitting. What’s the point of suffering through miles and miles of garter stitch, the slinkiest and drapiest of stitches, only to make stiff ridges all over the place?

Now, back to the Russian Splice. I won’t attempt to teach it to you here, as there are a million wonderful tutorials already online. My fave is at www.boiknit.blogspot.com. I started each new color with one half of the Russian Splice. Here you see me preparing to pick up along one edge.


I picked-up the stitches with a small-gauge metal needle, simply because it was handy. It is much easier to use a skinny needle for picking up along the garter stitch edge.


Here, I’m beginning with my “official needle,” one of my beloved wooden circulars. Notice that the first row is a right side row.


All the way across…


I’m five stitches short of finishing the row. Notice that I’m on the wrong side of my work. Also notice the lack of yarn ends. *smile* I’ve wrapped the yarn five times around the needle, and marked the end of the fifth wrap with a teeny-tiny hair clip. Maybe you have something handy? Paper clip? The corner of a binder clip? Thread this point of the yarn onto a tapestry needle? You’ll think of something.


Leaving the tiny hair clip in place, I’ve cut the yarn, and am weaving it back and forth, with tiny stitches, back through the yarn, to accomplish the Half Russian Join.


Pull the yarn end through, and then clip it off, flush. If this were a really nice wool yarn, I’d now wet my fingers with spit, rub the place where the yarn end is located, really well, between my thumb and forefinger, and never see this yarn end, ever again. Since this is a wool-acrylic blend, it would be a waste of effort. This end is going to worm its way back out, and give me fits, at some point in the future, but I like to think positive.


Leave the little hair clip in place, and knit across the row. That last loop, which is held open and captive by the clip is rather difficult to slip into place, but with patience and fortitude, anything is possible. I’ve learned to work at the very tips of the needles for this last stitch, in order to keep from stretching things out of whack. All done! Now, rotate clockwise, pick-up and knit!

I tell you, everyone says that log cabin knitting is addictive, and they are right! I’m having a ball! Take a look at some of my squares…


All of the squares (OK, rectangles) follow the same order of colors. They all have a bright red center, to represent the warm hearth fires in my little log cabin. The next color is a kind of a teal blue, then plum, then a deep red, followed by a sort of teal green, and a denim blue is the last color in the sequence. All of these squares follow this sequence, but they look very different! If one trip around the sequence created a smallish square, then I just went around again, skipping the hearth fires. The one on the upper right is my first attempt, back when I didn’t realize that I had to end on the wrong side, and you can see the tiny bit of non-garter stitch which resulted, before I figured it out. This horrifying mistake can be seen most clearly at the dark red-teal green interface. Oh, the horrors. This one was knitted as www.Januaryone.comsuggests, with the number of ridges being randomly assigned. The one below it has the red hearth fire, then one ridge of color number one, two ridges of color number two, and so on. The one on the lower left has the same number of ridges in all of the logs. My darling Grace got wind of what I was doing, ran to fetch her science book (click for larger photo), and presented me with the Fibonacci Sequence…


…so I had to knit up one of these, too. What fun! Maybe, in the future, I'll knit an afghan out of nothing but Fibonacci Sequence rectangles.

You’ll notice a distracting bit of … what would you call it…. A bit of “drawing in” right at the picked-up line. It is most noticeable on the left side of the largest square in the above photo. Of course, I’ve knitted *lots* of squares since this photo was taken, and I keep trying to wish this problem away… and it’s not working! The problem keeps occurring! Now that I’ve applied a bit of brainpower to the situation, I think that I’m going to try picking-up this first row with a larger-gauge needle then the rest of the knitting. Do you think that this will solve my problem? Hmmm…