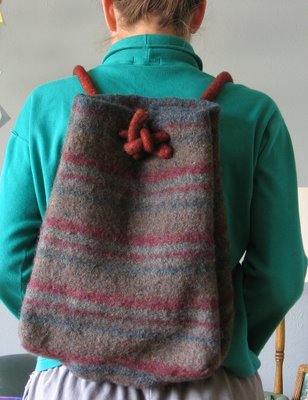
I made this backpack from a felted man’s sweater. I purchased the sweater at the thrift store, foolishly thinking that my husband would like it…. I was so wrong! No way! He wouldn’t even try it on. Sigh. So… I took off the sleeves, which was surprisingly easy – just pull the right string and Zip! off it comes! The sweater-body was just a cylinder, so with the sleeve holes sewed up, I now had a giant flat rectangle. I then used the unraveled-seam’s yarn to kitchener the sleeves together, so that the stitches wouldn’t un-knit themselves, and then I threw the whole business into the washing machine and felted the daylights out of it.
It was such a loosely knitted sweater, that it felted tightly and shrunk an amazing amount! Then, I squeezed it over a plastic-bag-covered Amazon.com box and set it aside to dry. While it was still wet, I sewed up the neck hole, and patted and shaped it into what I thought a proper backpack ought to look like.
When the project was in the washer, I was mentally planning how I was going to use the sleeves as outer pockets on the backpack – maybe a large front pocket with a cool button, and maybe a water-bottle pocket on the side…. Well… the sleeves, which went into the washer measuring something like 4 feet long by 2 feet wide came out of the washer really teeny teeny teeny tiny! So, instead of my grand plans for outside pockets, I used the sleeves as inside pockets. It works quite well, actually. I knitted the drawstring/backpack straps out of Lion’s Fisherman Wool and dyed them with Koolaid. All in all, it’s a pretty neat backpack. Too bad I never use it….

In the photos, you can see….
Look way at the bottom – you can see the neckhole and the tag – it was an Austin Reed Sweater. One of my friends assures me that the original owner paid much more than the dollar that I paid for this lovely wool sweater. What do I know? More to the point, what do I care?

Anyway, in the photo above, I’ve put tissues into the inner pockets so that you can see that there are actually three of them! One large one, one medium one and a tiny one (cell phone?) piggy-backing on the medium sized pocket.
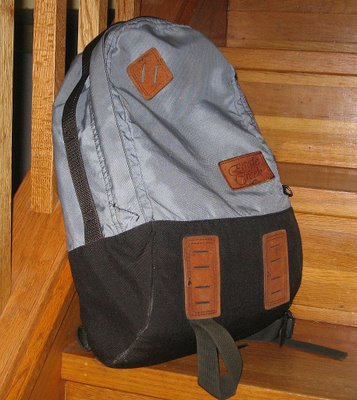
I’d use this bag, except that I can’t wean myself away from my ancient blue backpack that I’ve slapped on my back nearly every day since I was 20 years old. Let’s see… yes, that was 26 years ago… I’m not sure that I’m going to be able to break the blue-backpack habit any time soon. Isn’t she a beauty? How on earth does the Eagle Creek company stay in business if a customer needs to buy only one of their backpacks, ever, during that customer’s entire life? I’m telling ya, it’s the best backpack ever manufactured!!!

I’ll try to use my new backpack, but I’m not making any promises. It was a fun and easy project, and quite amazing to watch this HUGE sweater shrink down to nothingness. What’s even more amazing is that the fabric is perfectly smooth. It wasn’t smooth, back when it was a sweater. There were these knit-purl diamond rows, there were blackberry-stitch rows, there were eccentric-gauge rows (you know, where one row is knitted with huge needles, so that the loops are huge in some rows, but “normal sized” in the rest of the rows?) and other textural things, but once fulled, it’s perfectly smooth. Imaginese!
Now that's talent!
ReplyDeleteThat's an awesome backpack. I would actually like to ask any fellow knitters a questions. I am starting my first felting project and would like to know if the holes at the top of the backpack are buttonholes that were knit in prior to felting or what? How do you make the holes at the top of the backpack to thread the drawstring through? Thanks so much
ReplyDeleteHi Ginger,
ReplyDeleteThanks for the compliment!
The holes - well, this is a purchased sweater which I ran through the washer to make it felt.
The very last step was to make the holes. I simply stuck a large knitting needle into the knitting in order to make the hole. I worked it in slowly so as not to rip the fabric. I worked it back and forth until the hole was big enough for the cord to go through. It took no time at all - really easy.