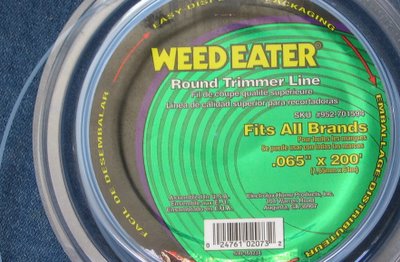
Weed Eater Round Trimmer Line

This is the stuff that I use to make my needles. Check it out - it's made by Electrolux!

I did a little looking around, and wonders of wonders, it's available at Amazon.com! I love the Internet. Here's a link -Weed Eater Round Trimmer Line

At $5 per package of 61 meters, and assuming that you use about one meter per needle, that's something like 8¢ per needle. Add to this the cost of the dowel - 19¢ per dowel, divided by 3, which is the number of pairs of needles per dowel, or about 6¢ per pair of needles - and your extravagant, homemade needles will run about 14¢ per pair. OK, so maybe you can't get the dowels this inexpensively- maybe in your community, the dowels are $1 each - now your cost is all the way up to about 40¢ per needle. Make some for yourself and for all of your friends! Have a blast!

Not very impressive....No Wait... Very Impressive!

Some of us want to make an impression, and some of us just want to make yarn, lol.

Meet my new favorite spindle - a stick with an empty spool of Beading Elastic, and a hook. I wound a little bit of wire onto the spool, for a little added weight, but I don't know if it's necessary or not. This little doozey spins like crazy! I spun a little bit, then Navajo plied back onto this same spindle. It passed both tests. Yey! A new spindle!!! (click the pic for a larger view)

I've also just discovered that my cutie-pie little camera has a manual setting, so that I can tone down that overwhelming flash! I can set whatever f-stop I want (very, very limited selection) and I can set whatever shutter speed I want (lots of selections), and I can choose between a bright and a REALLY bright flash. For months I've just been complaining about it, never once questioning the little "M" on the control dial. Duh... Maybe I shouldn't admit to that...In the next few days, I'll probably update the pix in the home-made circular post - those washed out pix really bug me. This is what prompted me to try to solve this problem. Necessity is the mother of learning something new! *smile*

Home Made Circulars

It is extremely easy to make your own circular needles. You need a dowel, and something to cut it with – a razor blade will do, or you can use a fine saw. You will need some weed whacker filament, and you need to make sure that it is smooth, and circular in cross section, rather than angular in cross section. The weed whacker stuff comes in different thicknesses – I don’t think that the thickness is important, but the flexibility is of the utmost importance – you want it to be as flexible as possible. Generally, this means that it is the finest gauge that the store carries. You need a drill, and a drill bit which is either the same diameter of the filament, or a teensy bit larger. You need different grades of sandpaper, and a roll of Plumber’s tape, aka Teflon tape. You also need some glue – I use “Household Adhesive” made by Locktite.

First, obtain the dowels. They are readily available at hardware stores, Wal-Mart, Hobby Lobby, and similar stores. Check around – in my community, they are much cheaper at Hobby Lobby than any other store, and they are also of better quality. Make sure that you are getting something like birch or maple – oak will not work at all. (I want to try some really exotic wood, such as ebony.) You want a fine grain. It really doesn’t matter if the dowel is straight or bowed, but it must be smooth. Run your hand down its length in both directions to determine if the grain is poking out the sides or not.

Next – remove the label, and sand the dowel. I start with 150 grit, then 200, 300, 400, 600, and I finish with 2000 grit. You can find this fine sandpaper at auto-body shops. One pack of multi-grit will last for the rest of your life, if all you use it for is knitting needles, so don’t be put off by the cost.

Now, you are ready to start.

1 - Cut the dowels to length. This is another reason why I make my own – I find that the store bought ones are too short. I make my needles about 6 inches long. If you are cutting with a razor blade, roll the dowel under the razor’s edge, making a groove all the way around the needle, then snap it to break it.

2 – Make a point at one end. I use a chisel, but you can sand it to a pointy shape, or you can use an Xacto knife. A pencil sharpener will give a really bad shape, but you can use the pencil sharpener to remove the bulk of the wood, and then come back with a knife or sandpaper to elongate the point.

3 – Drill a hole in the other end. Drill it as deeply as you can manage. It’s perfectly OK if you can't go straight, and the hole pokes out of the side of the needle. No problem.

4 – Shape the end that you just drilled into a point. Don't get too close to the hole - you can shape this later.

5 – Sand both points through the different sandpapers, starting with the 300 or so.

6 – Cut the filament to the proper length.

7 – Dip the end of the filament into the adhesive, and shove it into the hole. Try to get some adhesive down in there, too.

8 – Allow to dry. If you use Household Adhesive, you are ready to proceed in about 10 minutes.

9 – Pare off the excess adhesive with a razor blade or Xacto knife.

10 – Wrap the join in Plumber’s Tape. This tape has no stickiness - it sticks by static cling. You will need to pull it and stretch it and smooth it out. It works like a charm.

11 – You're done, so knit.

These wooden needles are a joy to use. They get soooooooo smooth with use. I made a pair the other day out of chopsticks, instead of wooden dowels. These chopsticks are of some sort of bamboo, or other grass. Usually, chopsticks are square for most of their length, but these are more-or-less oval, and they worked great. In no time at all, they were as smooth as they could be. I’m going to really like knitting with these. Here’s a pic – not that these look any different, in the flash of the camera.
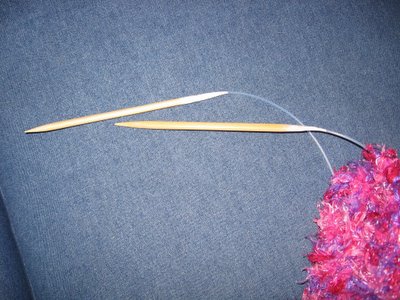


Here (below) you can see a REALLY long needle – I made this while I was knitting the Red Tent Blanket, and I was anxious to see how the spiral was coming along.
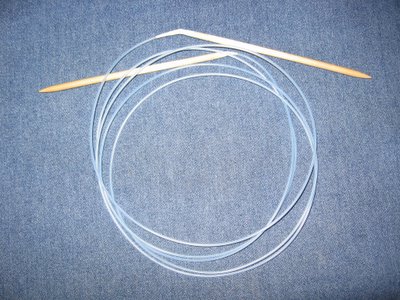
I made this super-long needle so that periodically, I would knit off of my regular needle and knit onto this long one, and spread the blanket out flat, and check my progress. This needle is about 90 inches long!!! No, I don’t use it very often. In fact, I don’t think I’ve ever used it since.
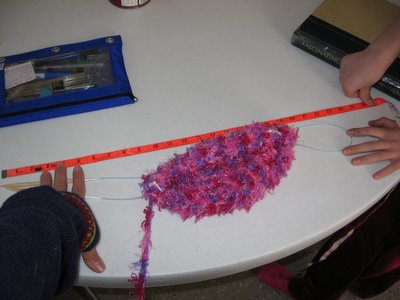
This is the length I use most often – between 50 and 60 inches long. It’s the perfect length for knitting two items at once, via the magic loop. Here you can see a fuzzy hat – destined for the chemo department of the hospital – on a 50 inch long needle. I'm knitting in the round with the Magic Loop method, which is why there is a loop sticking out of the right side of the hat. You can also catch a glimpse of homeschooling in progress, lol, as I interrupted one of my children for help with the photo. Bad mama. lol.
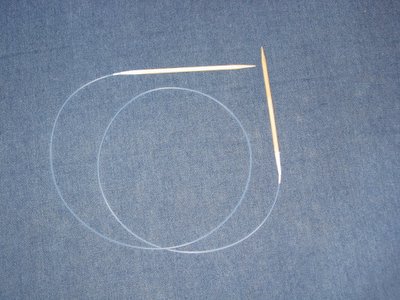


Another of my fave length needles, in the nude.
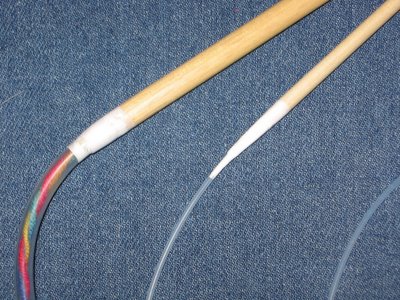


This pic shows the two different cords I’ve used – Weed Whacker Filament, and aquarium tubing. The tubing is on a needle which is about a size 13. The difference in diameter between the large needle and the filament is a bother, so I thought it was a brilliant idea to use aquarium tubing! Well, with the yarn run through the tube, it’s pretty and all, but not a good idea. The tubing is so “grabby” that the grabbiness is much more bothersome than is the difference in diameter between the cord and the needle. The tubing is very flexible, however.
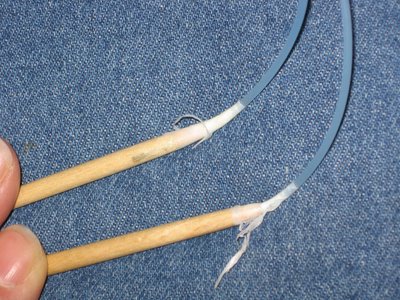
With use, the plumber’s tape gets all ratty, as you can see here, but it makes no difference at all. You would think that the rags and tags would be a problem, but they really aren’t. Notice the upper needle – if you look carefully, you can see that the drilled hole came poking out of the side. I “packed” this hole with the adhesive, and when it dried, I shaped it with an Xacto knife, and all is well. I’ve knitted a million miles with this particular needle.

My home-made dpns are very lonesome these days. I rarely use any of them. Notice that the colorful ones were pick-up-sticks, in a former life. I bought them in a nifty little wooden box at the dollar store. They are bamboo, and a perfect size 1. How I hate dpns!!! I feel like they are all going to poke me in the eye. I clearly have a deep-seated fear of being poked in the eye by my crafting equipment! I think it stems from the various experiences I’ve had of actually getting poked in the eye – not fun.
My Portable Supplies


This is what lives in my knitting backpack - a carabiner which has all of my handy supplies. I'm ready for any knitting situation with my handy supply pack, lol. You can see a tiny Swiss Army knife - I use the scissors all of the time, and I've been known to use the tweezers to loop through a dropped stitch, until I can work my way back to it. You see the Plumber's Tape - ready to patch up the join on a circular needle - and you can see the 7 jillion yarn-loop-stitch-markers. My tapestry needles are ready, and so are my most favorite tools - coilless safety pins. Add a couple of knitting abacuses and I'm ready for anything!
Knitting Abacus


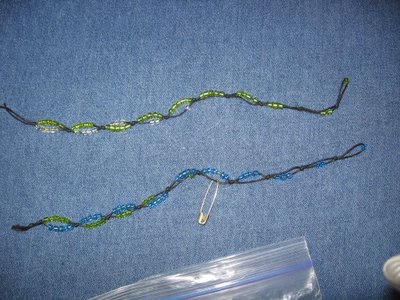
You can whip up a knitting abacus in about 20 minutes or so. Take a close look - click on the picture for a larger view – it’s a long piece of fine, strong twine – waxed linen in this pic – folded in half. Thread one bead – tie an overhand knot, leaving a goodly sized hole for any needle you might want to use. Thread on two beads, tie a knot, three beads – and so on, until you tie the knot after 5 beads. Now, thread 5 beads of one color onto one side, and one bead of another color onto the other side, tie a knot, 5 beads of one color, two of the other color, and so on, until you have 5 of each color. The different colors make it easy to tell, at a glance, which hole you are on. Trim the ends.

Now, you are ready to knit. Knit two or three stitches, and thread your right needle through the first hole. The “one” bead means “row 1.” When you get to the marker again, slip it from the left to the right needle, but pick up the hole with two beads. I mostly knit in the round – if you are knitting back and forth, you might find it more sensible to put the marker more to the middle of your piece. Continue until you get to row 10. Now, if your knitting has more rows than 10, when it comes time to mark row 11, you might want to leave the 10 hole on the needle, and pick up the 1 hole. For row 12, leave the 10 on the needle, and pick up the 2, and so on. I prefer to move a safety pin, to mark the 10’s place. If the number is, say, 15, then there’s a safety pin in the 1 hole to mark the 10's place, and the needle is in the 5 hole, to mark the one's place. If you do it this way, you will have to move the safety pin every 10 rows, but this certainly isn’t difficult.

I like this stitch marker much better than any I’ve tried before. I never can remember to twist the little barrel marker, and I never can remember to make a tick mark on a piece of paper, but I can’t ignore this marker when it comes around again. Just slip it from one needle to the other, moving through the holes. Simple!

Mitts!


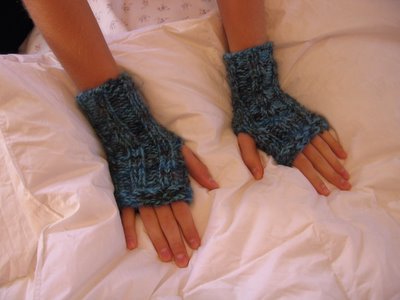
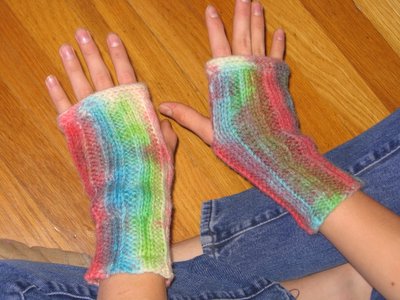
I had a blast, knitting these mitts! I went through about 5 different designs, before I finally decided on this one -

Cast on 29, join in circle, knit together the first and the last stitches, for a total of 28 stitches on the needles. K2P2 for 10 rounds. Increase in the middle of a K2 rib, knit around. Increase in the next rib, and continue in this way, until the pattern is K3P2 all the way around the mitt. Knit straight for 10 rounds. Put in a one-row buttonhole over a stretch of P2K3P2. Knit 10 rounds. Knit to the P2K3P2 stretch that would go over the pinky finger, turn and knit back all the way around to the other side of this P2K3P2 stretch*, turn and knit a couple of ribs and then begin the I-cord bindoff. Kitchener the ends, weave in ends and you're done! * This short row part is not absolutely necessary, but it makes the mitts fit much better. What it does is to put two more rows in the area of the index finger. Without these added rows, the mitts are either too short over the index finger and just right over the pinky, or just right over the index finger, and too long over the pinky. This short-row business might seem picky, but it makes the mitts just right.

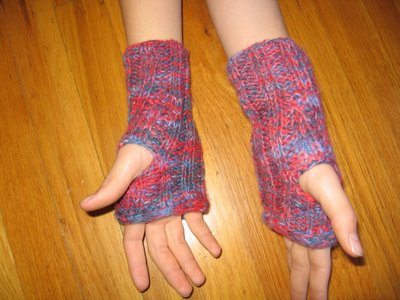
Thes red and blue mitts are knitted with a different pattern - notice the increased ribs to make the thumb. You can really see this increase if you click on the pic to enlarge it. Too fiddly - I much prefer my latest pattern. But, what wonderful alpaca-wool yarn in such a wonderful colorway!


We had fun dying these mitts with Koolaid. They are knitted out of Lion Brand Fisherman's yarn.


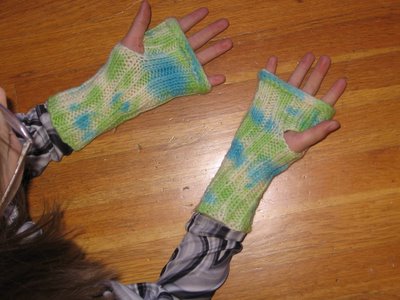
These blue and green ones are mine, and are much too large for my little model, lol.

Everyone got a pair of Mitts, whether they wanted a pair or not!

Arrow Spindles

Since I am now obsessed with spinning as well as with knitting, everything either looks like a knitting needle, or a spindle, lol. My son proudly presented me with these arrows, which had been abandoned at the local archery range, so that I could make knitting needles. Silly boy - couldn't he plainly see that these were actually spindles?

The one on the top is made from an arrow and a CD, and the one on the bottom is made from an arrow and a baby-stroller wheel. These are used in the Navajo method of spinning. The one on the bottom spins for an especially long time, as its shaft is perfectly straight, and the stroller wheel is rather heavy. On this one, I sharpened the end, but on the CD spindle, I left the nock in place, and it works just fine. On both, the metal arrow point is still present. I put the point into a bowl, and they spin and spin and spin..... I roll them up my leg, as demonstrated on this web page, Grafton Fibers.

These are fun, but I'm fairly certain that I'm going to end up poking my eye out. While it was great fun to experiment, I think I'll stick with my smaller spindles, as there is much less chance of ocular damage. I think that these big spindles will be great for plying, however.


Emma's door prize

Emma won a large skein of yarn at my friend's Fiberlicious party - the party where I was infected with the spinning bug. This is wonderful stuff. My friend core-spun the roving with a very fine strand of something sparkly. I knitted this cute hat from the yarn. Emma might dye it with Koolaid later - she hasn't decided what to do with it yet. It made a thick, warm hat.


Roving, Fit for a Party!

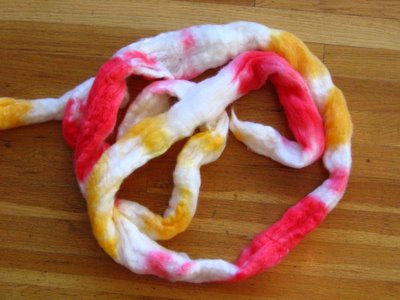
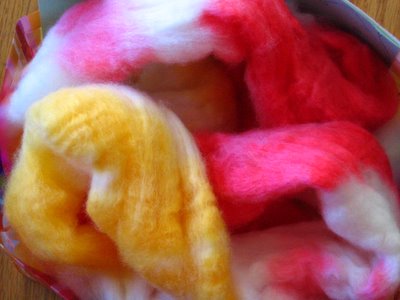
My daughters were invited to a 13th Birthday party, and this is what they made for the Birthday girl. How many 13 year olds do you know who are *thrilled beyond belief!* at receiving a pound of Merino roving? Grace and Emma had a blast, dyeing this roving with Koolaid - Strawberry, Mango and Pink Lemonade. I want to make some for myself! Isn't it so pretty?

In the dyepot, fresh out of the Microwave oven.


Dry, and ready to gift-wrap.


Ahhhh....

Meet Knit and Purl

I made these knitting needles for a friend who is... well... a little bit goofy. She loved them!


Spinning!

Look at this! I've learned to spin! This is my first skein, and I'm sooooo hooked! This is spun from Brown Sheep roving - wool and mohair blend. I Navajo plied it. Jingles, your fur is next! (Yes, I do pluck it off of her hairbrush, and yes, I am saving it in a papersack, until I get enough to spin. Crazy? Only to those who don't understand.)


Click on the photo for a larger picture of her lovely tail... I mean... face!


I interrupt all the knitting to bring you.... Morning Glories!


These are from Emma's Sunflower Garden. Oh my gosh, they are the prettiest Morning Glories ever! Emma planted a large circle of Sunflowers, and let the Morning Glories climb up the sunflowers. The flowers were about 4 inches in diameter, and the prettiest blue. I hope we can grow them again, next year. Enjoy!

Sweater to Shawl

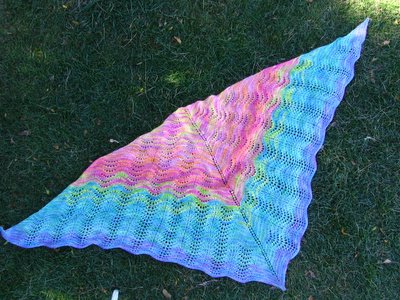
I bought a sweater for a dollar at the Goodwill - ivory, shetland wool. It unraveled quite nicely! I dyed the wool in easter egg dye, and tried to achieve a gradual transition from the yellow dye to the purple dye, but as you can see, there's quite a jolt from the reds to the greens. Each skein was dyed half in one color, and half in the other color, and the skeins were graduated as follows - #1 was yellow and light pink. #2 was light pink, and dark pink. #3 was dark pink and red... and so forth to the last skein, which was blue and purple. I had a great time knitting this shawl, but honestly, I'm not a shawl kinda gal, so I doubt if I'll ever wear it. It was a fun project anyway! If you click on the photo, you'll see a larger photo, and you'll be able to see the color better.

Here's a link to the pattern Feather and Fan Comfort Shawl.


Alexander's Baby Blanket

Look at what Grace knitted for Baby Alexander! Great job, Grace!


Grace knitted this one in much the same way as I knitted Carson's blanket. She used the left over yarn from her poncho. It might not look it, from the picture, but this blanket is much larger than the one that I knitted for Carson. This one is about 4 feet by 4 feet, and Carson's was more like 3x3. What a nice blanket! What a lucky baby!

Carson's Blanket

I knitted this blanket in the summer of 2005 for little baby Carson, the newest edition on my husband's side of the family. I modified a pattern which I found at this site, Psychedelic Squares Afghan: Stocking St Version. This was a very fun project! Do you recognize the edging? It's what I used for the Red Tent Baby Blanket. Instead of knitting separate squares, as the pattern indicates, I provisionally cast on the edges of the squares, and held the cast on loops on a piece of yarn. Then, when that square was finished, I put one side of the square's cast on edge back onto a needle, to start on the neighboring square. I knitted along the side of the old square, in the new square's color, then provisionally cast on the other side of the new square. In this way, I only had to sew up two long seams, and 4 really short seams, rather than a jillion little tiny seams. The middle four squares were knitted in one piece, the four corners were all separate squares. Do you see the sort of tic-tac-toe-board lines on the blanket? These are the seams. When it came time to knit on the border, I only had to put the provisional cast on back onto the needles, and away I went!

I knitted this blanket out of 4 colors - the yarn that was left over from Emma's poncho. If I knit this blanket again, I'll use 5 colors. Each bullseye will have one color that is repeated across all of the 4 squares which make up the bullseye, with 4 other colors - one color per square. See how the upper, left hand bullseye has orange in three of its squares, and one square has pink and green? They should all have orange - but I couldn't do it this way with only 4 colors from which to choose. All of the squares in the whole blanket will have one color - which will be the same color as the border. I think that this will make it much more op-art-ish. Yup. Now, I just need to find the time, and someone has to have another baby. *smile*

Grace's Broomstick Lace Poncho

Wait a minute here... whose blog is this, anyway?


Our buddy, Ann, taught Grace how to make Broomstick lace. Ann made a blanket with these colors - black, white, grey and red - and Grace really liked that blanket, so here you go - her latest creation! Completed in the spring of 2005. She didn't get to wear it last year, but is making good use of it this year, especially since it is rarely cold enough for a coat. Ponchos are perfect for our climate.

Felted Backpack


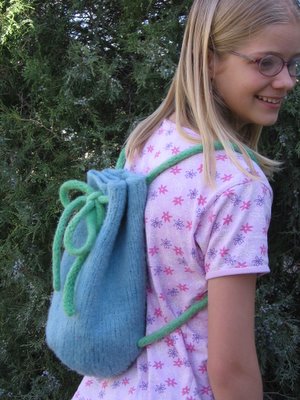
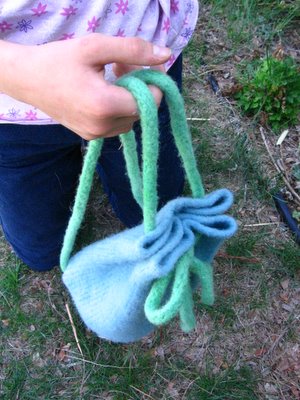
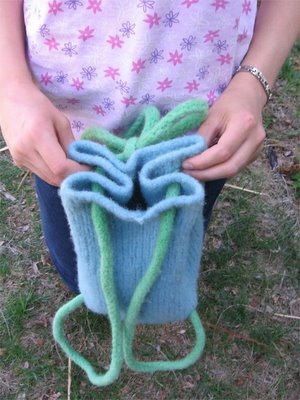
Grace is at it again. Here is her little felted backpack. Felting is so much fun, but it is rather discouraging to knit and knit and knit, only to throw it into the washer and make the item much much much smaller. But, look how cute this is! Grace dyed it with easter egg colors after it was completely felted. The shoulderstrap is one continuous piece of knitting, and it goes through the bag at the bottom. Knots on the inside of the bag keep it all in place. Grace is NO fan of I-cord, so she knitted a very long strip - I think she cast on 250 stitches? - and knitted 7 rows in stockinette, then let it curl, and cast off by catching the cast on row in the cast off row - which is how the cuff edge of Dana's Clogs were made. I've taken her lead and my I-Cord days are OVER! Grace bound off in the I-cord bindoff - and it's the perfect bindoff for felted projects. The edge shrinks right along with the rest of the knitting; it doesn't splay at all.


You can get an idea of how she closes the bag from these two photographs. Cute, yes?


Felting is part science, and a whole lot of voodoo. Grace first knitted a long, skinny bag, and it felted down to a ... bowl... it was very sad. So, she knitted this backpack, and it was an even longer skinny tube, and it turned out perfect. So, I next tried to knit a waterbottle holder, which is, of course, much skinnier than this pack. I used Grace's measurements, taken before and after knitting, to figure out how to make my waterbottle holder. Well, since it was such a skinny tube, it didn't get any shorter at all. I now have a lovely thermos bottle holder. If something is rather wide, then it will shorten a whole lot in the felting process - it will shorten proportionately more than it will decrease in width. If it is not too wide to start with, then it will shorten and decrease in width in more-or-less equal proportions. Or, something like that. Sigh.

Poncho Fever!


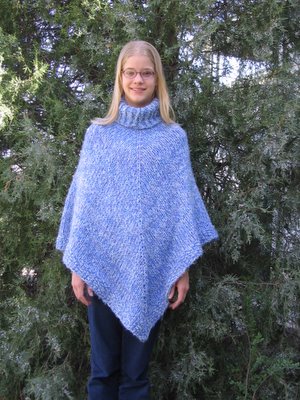
Grace designed and knitted this poncho herself. It is knitted with one strand of white Simply Soft, and one strand of Lion's Homespun in Delft Blue. It has a turtle neck collar, and a seed stitch edge. (It doesn't actually hang crooked, it just looks this way in this photo.) Grace has worn and worn this poncho for a whole year, and it still looks great! Good work, girlie!


So... I copycatted my darling daughter, and made a poncho for Emma. This one is made from two strands of Simply Soft, held together. I used a few bands of textured knitting, to add interest. Emma wears this poncho very often.

Black Baby Blanket (a.k.a. Red Tent Blanket)

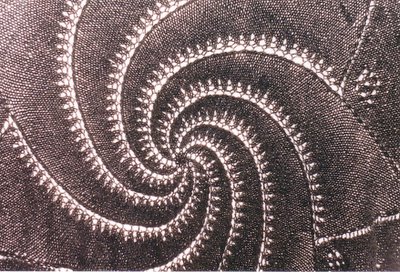
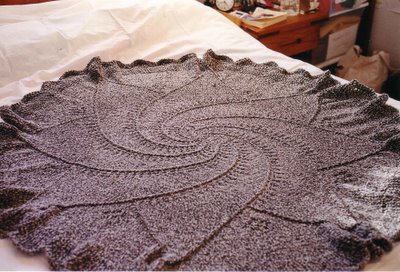
I know it sounds odd to hear of a black baby blanket, but when I had my babies, I was perfectly sick of pink or blue or *shudder* yellow baby blankets. When I heard that a new grand-niece was on the way, I quickly got to work knitting a black-and-white baby blanket. It's knitted out of a black and white yarn, sort of heathery, cotton-acrylic blend, and I'm really happy with how it turned out. It's from a doiley pattern, and here's the link Spiral Doily pattern


I didn't like the edge in the original pattern, as it was WAY too frou frou for me. I found this edge in a Mary Thomas book, and it's perfect for a blanket. It adds a nice edge, and binds off at the same time. Since the "bound off" edge is simply the selvege of the knitting, its not tight at all, but nice and stretchy. I especially like the ruffly edge - it makes me think of a pie crust.


I pinned the blanket to a sheet, then hung it in the front window to get a photo of the spiral -


Cool or what?


It was hard to send this on its way, because it looked like the perfect cuddle-up-to-read blanket. I keep saying that I'm going to make one for myself, but since I've been saying this for a year, I think that my chances are rather slim. While I knitted this blanket, I listened to The Red Tent, so I'll always think of this as my Red Tent Blanket.

Dana's Clogs

So... I'm starting to feel like a real-live knitter by this time. I've knitted a couple of baby hats, a baby sweater, some socks.... what else? Then, I learned about...felting. This sounds like fun! So, I bought the FiberTrends Clog pattern, the appropriate yarn, and off I go.

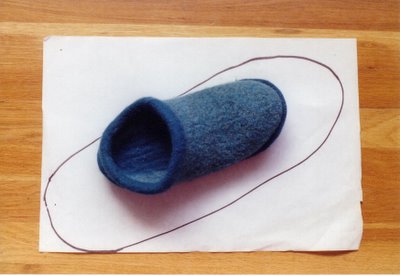
These clogs are for my friend, Dana, and I knitted them about a year ago. She watched me knit these clogs, always knowing that they were for her, and I have to admit that she was openly skeptical. Well, who wouldn't be. I mean, Dana has perfectly lady-like feet, after all. When I finished, I invited her over for a shrinking-the-slippers-party, so - down we go to the laundry room. Let me just say right now that my laundry room is not exactly equipped for any sort of party, but we persevered. We shrunk and felted until the slippers were just right. This project took place in my pre-digital-camera days, so I don't have the cool before and after photos, but you can see the final slipper on an outline of the pre-felted one. It always amazes me...

Lately, I hear that Dana has worn a hole in her slippers. Maybe the faintest of hints has been dropped... So, do I knit her another pair, or do I teach her to fish? lol


Hats for Rhys

I spent a wonderful day with a couple of friends, bumming around in Colorado Springs at yarn stores! WHAT could be more fun than that, I ask you? I found the nicest yarn in a sale bin; it's a cotton yarn, spun with an elastic thread, so that it's really stretchy. I knitted these two little hats for my pal, Rhys. The Yellow was knitted from the top down, and the other from the cuff up. I had fun knitting these little hats - it was such nice yarn, super stretchy, light, soft, and great colors! I really like yellow and orange.


Sweater for Baby Rhys

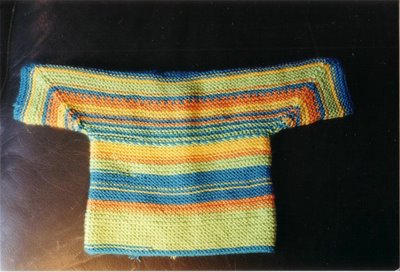
I knitted this little sweater out of an acrylic yarn - wonderful, tropical colors - perfectly horrid texture. It is Elizabeth Zimmerman's Baby Surprise. It was fun, but rather annoying to knit, because it was so hard to figure out where I was in the pattern. Only after I was completely finished with the whole project, did I discover that there exists a nice cheat sheet, made especially for this project! If you want to knit it, I suggest that you print out this cheat sheet - - Baby Surprise Notes , on Dawn Adcock's site. By the way, you really should cruise around in Dawn's site - it's a great site with all sorts of wonderful information, and great ideas. Check out her knitted Baseball Pitching/Batting net on her General Knitting page. Check out those home-made circs!!! Those home-made circs got me thinking.... anyway, that's the matter of another post!


Susie has a New Sweater

When Grace was 10, she kept herself busy sewing and knitting clothing for Susie. Grace designed this sweater - knitted in one piece from the neck to the hem, raglan sleeves, k1p1-rib-tubular bindoff - - some pretty snazzy knitting for a little girl, eh? As you can see, the sweater is not exactly symmetrical but you know something - Susie loves her sweater, and couldn't care less.